Bài 19:
How to Draw a Bookshelf Illustration Using 3D Modeling Techniques
NHẤP VÀO ĐÂY để xem các bước trước đó ......
Step 12
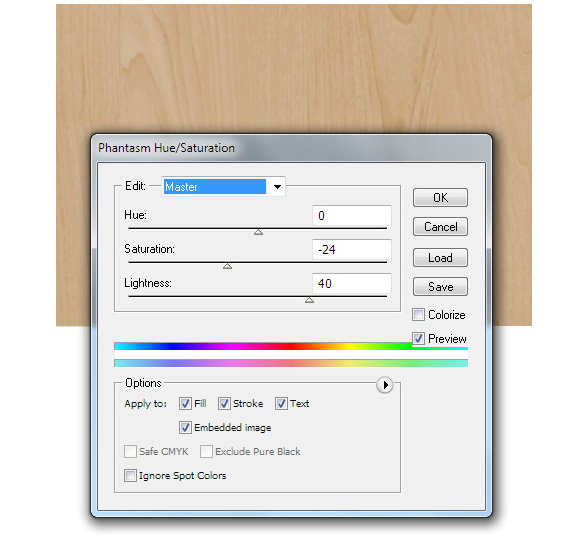
If the color of the vector texture doesn’t quite suit you, then before turning it into a vector, you need to edit the colors in Photoshop or in any other raster editor. If you use the Phantasm plug-in, which is probably one of the most popular plug-ins for working with colors in Adobe Illustrator, then you can perform the color correction of the vector texture. This is the plug-in I used to change the Lightness and Saturation of the texture.
Step 13
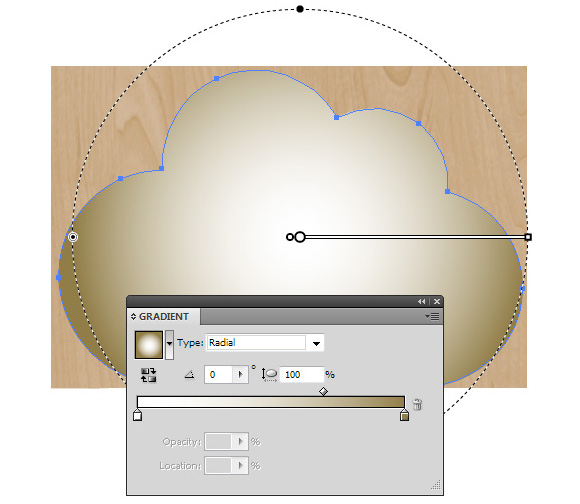
Place the wooden texture underneath all the created objects. Fill the back wall of the shelf with the radiant gradient from white to brown.
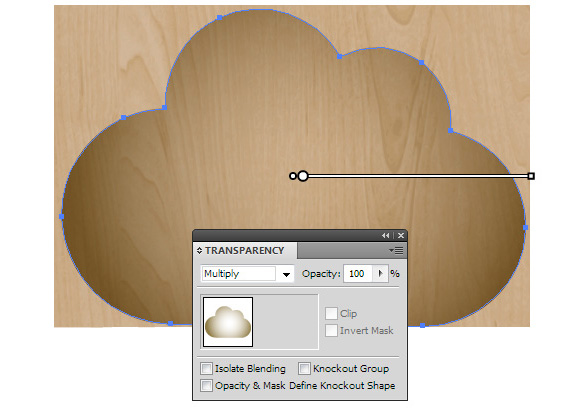
Apply the Multiply blending mode to this object using the Transparency panel.
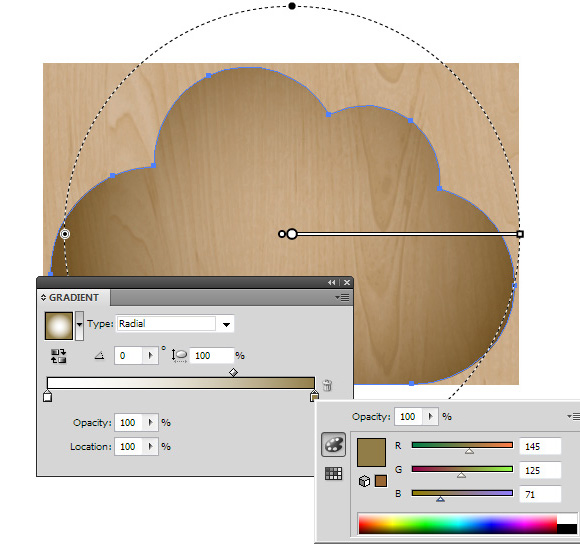
Only after the blending mode has been applied, you can edit brown if obtained shadow does not satisfy you.
Step 14
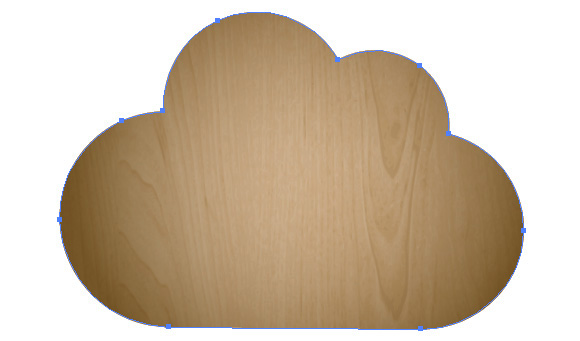
Copy the back wall and paste it to the front (Cmd/Ctrl + C; Cmd/Ctrl + F). Select both forms of the back wall and wooden texture, then use the Cmd/Ctrl + 7 shortcuts to create the Clipping Mask. As a result, we’ve hidden the parts of the texture which go beyond the borders of our shelf.
Step 15
Duplicate the front part of the shelf (Cmd/Ctrl + C; Cmd/Ctrl + F). Keep the new object selected, go to the Object > Compound Path > Release.
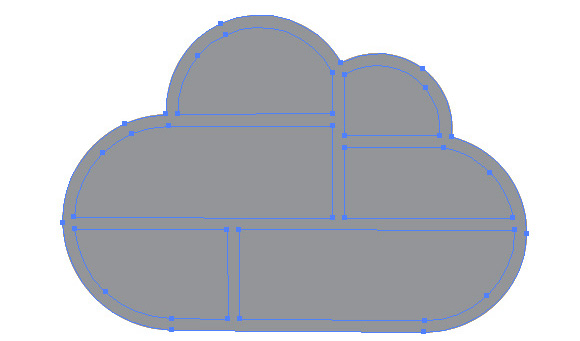
Remove the outer shape of grey cloud.
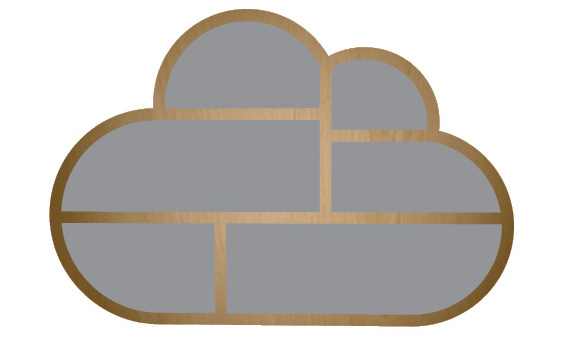
We will need the remaining parts to create some local shades inside the shelf.
Step 16
Fill one of these forms with brown.
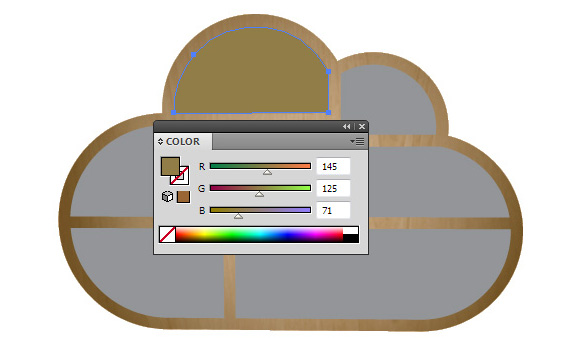
Duplicate the brown shape (Cmd/Ctrl + C; Cmd/Ctrl + F) then fill it with white.
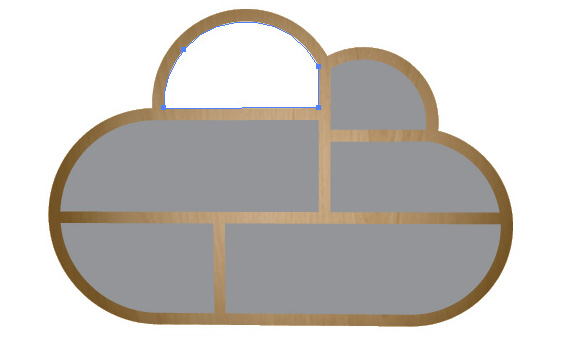
Select the brown and the white shape (it can be easily done in the Layers panel), then go to the Object > Blend > Make.
Step 17
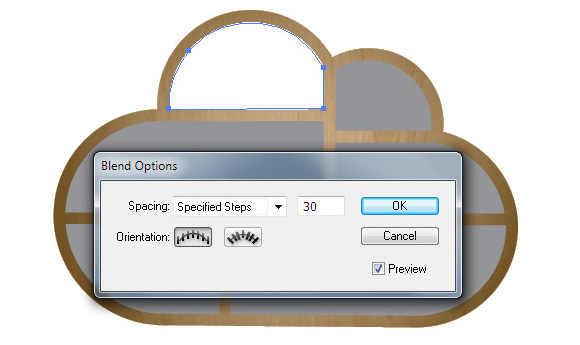
Click twice on the Blend Tool (W) icon to open the Blend Options of the dialog box. Set the number of specified steps. I seldom use more than 30 steps because it increases the size of the file.
Step 18
Move the points of the white object inside as it is indicated on the figure below.
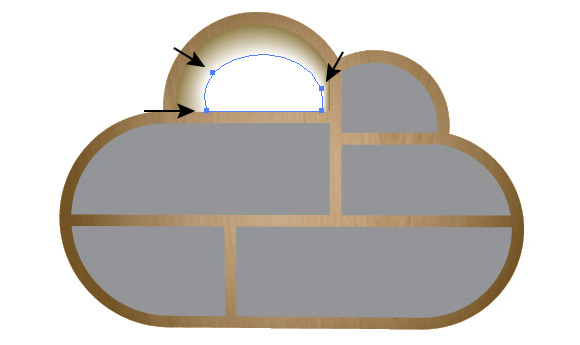
Select the entire blend object and set the Multiply blending mode in the Transparency panel.
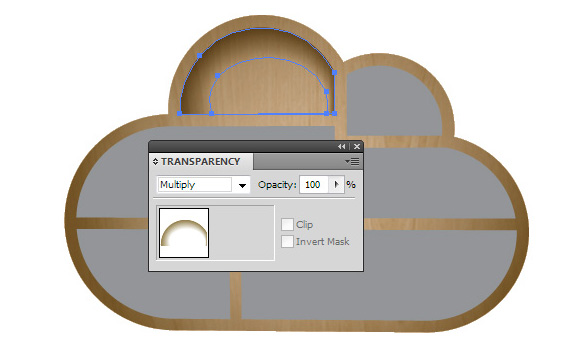
If you don’t like the form of the shade, you can always change the points’ location in the white object. Using the described technique create some shades in the remaining sections of the shelf.
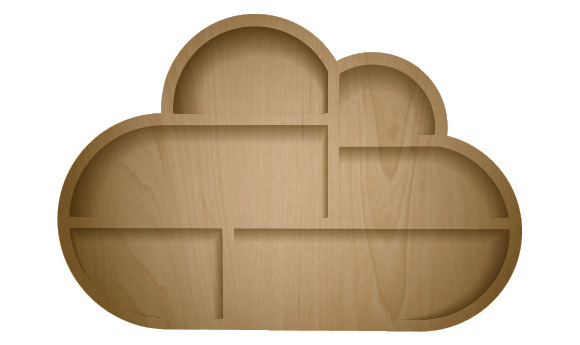
Step 19
Fill the side walls of the shelf with linear gradients in accordance with the light direction (downward).
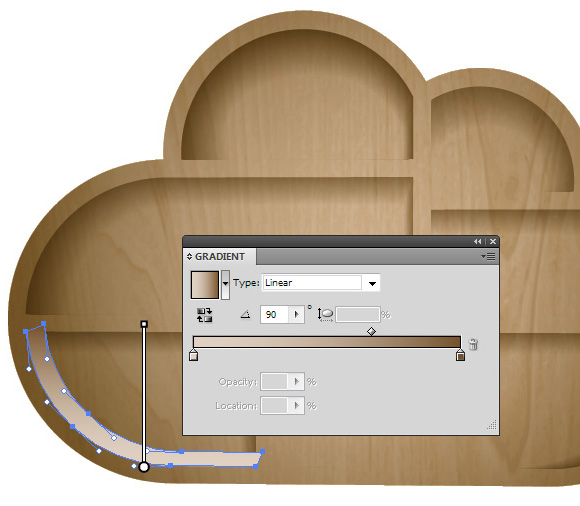
Step 20
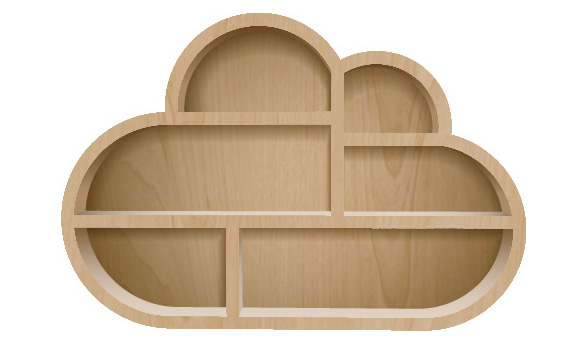
For the front part of the shelf, I used the same vector texture. However, I turned it to 180 degrees to make the front and back textures look different.
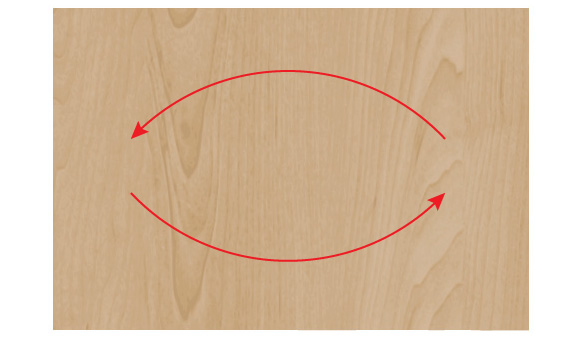
Place this texture underneath the front part of the shelf.
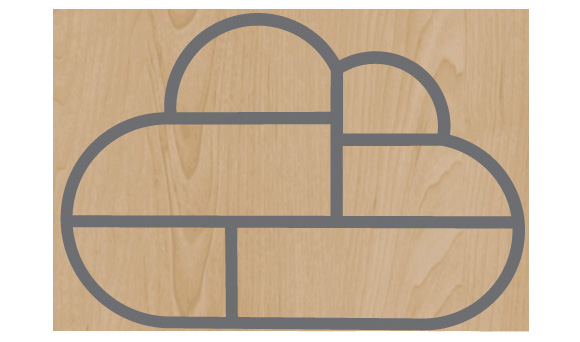
Select the texture and the front part of the shelf. Then use the Cmd/Ctrl + 7 shortcuts for the Clipping Mask creation.
Step 21
Duplicate the Compound Clipping Path (Cmd/Ctrl + C; Cmd/Ctrl + F).
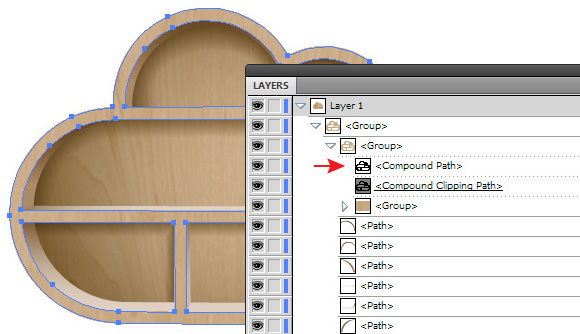
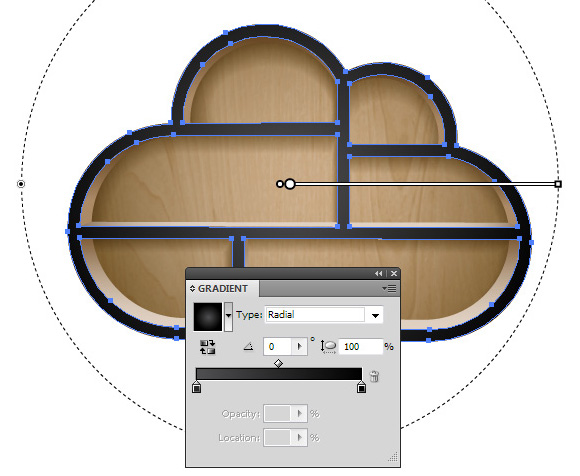
Fill the new object with radial gradient from dark-grey to black.
Apply the Screen blending mode to this form using the Transparency palette.
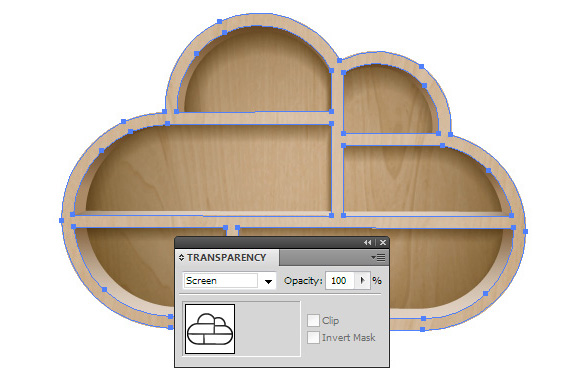
This should result in the lightening of the front part of the shelf.
Step 22
Duplicate the front part of the shelf, then fill the new object with white.
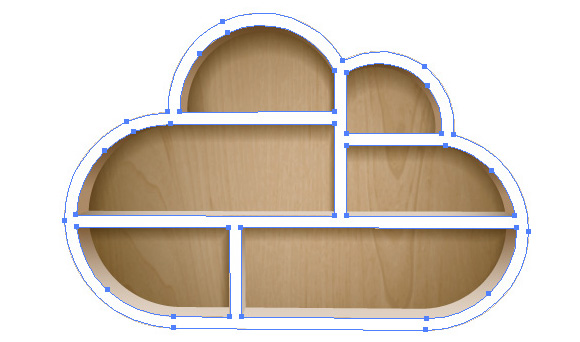
Duplicate the white object and shift the copy a couple of pixels down using your keyboard arrows.
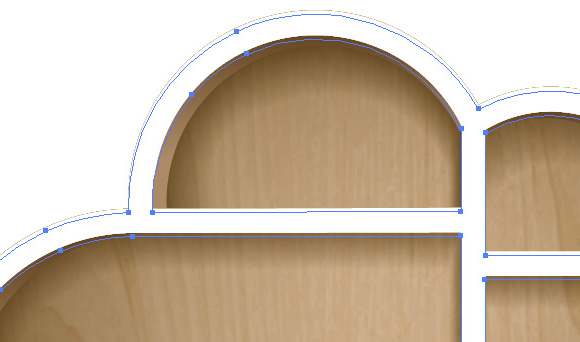
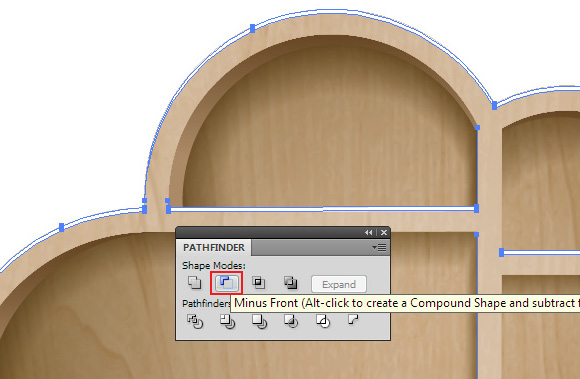
Select both white forms, then click the Minus Front option in the Pathfinder panel.
Reduce the opacity of the received form in the Transparency panel.
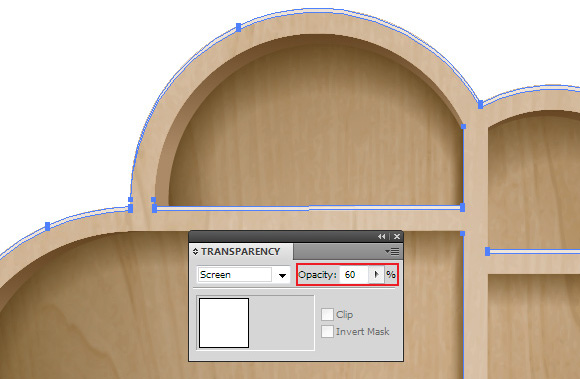
We’ve now have some highlights on the faces of our shelf.
Step 23
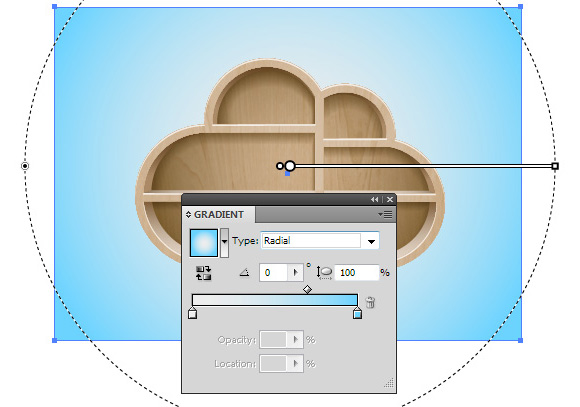
Next, we’ll create the background. Create a rectangle with the help of the Rectangle Tool (M); the size of the rectangle should correspond to the size of our artboard. Fill the rectangle with the radiant gradient from light-grey to blue.
Step 24
I created the shadow from the cloud with the help of the blend object. Copy the back wall of the shelf and paste it to the back (Cmd/Ctrl + C; Cmd/Ctrl + B). This object should be located underneath all objects of the shelf and above our background. Fill the cloud form with blue ( for clarity, I turned off the visibility of all clouds above).
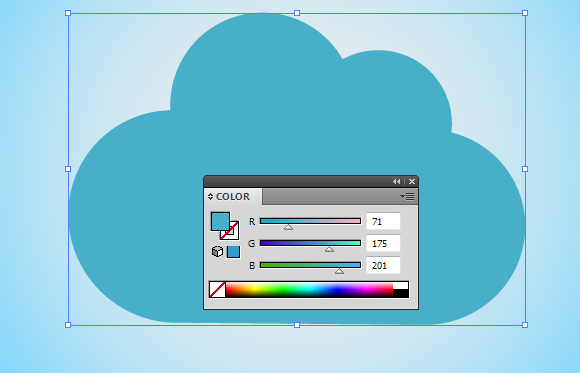
Copy the form of the cloud and paste it to the back. Color the new object with white then shift it down and a little to the right.

In the Transparency panel set 0% opacity for the white object.
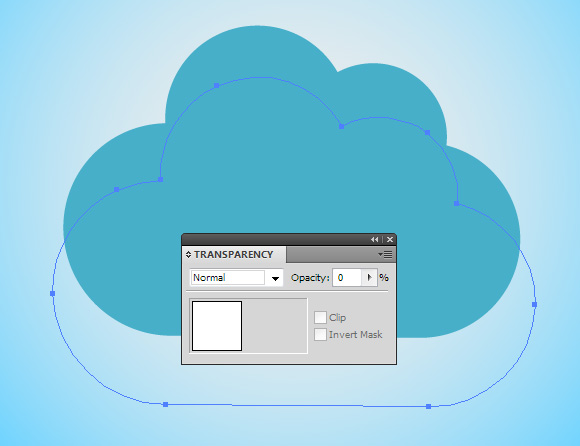
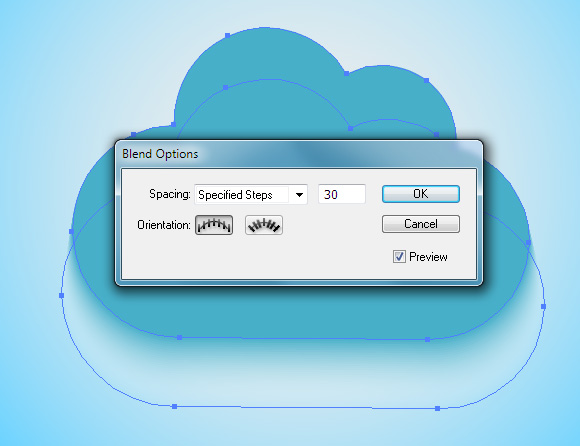
Select blue and transparent form of the cloud then go to the Object > Blend > Make.
Click twice on the Blend Tool (W) icon to open the Blend Options of the dialog box. Set the number of specified steps.

Nếu bạn có nhu cầu học khóa học Adobe illustrator (Ai) vui lòng NHẤP VÀO ĐÂY để xem chi tiết về khóa học hoặc NHẤP VÀO ĐÂY để gửi thắc mắc về khóa học của bạn cho chúng tôi.
Những bài viết có nội dung liên quan khác:
Phím tắt trong phần mềm Illustrator (AI)
Giáo trình illustrator cs6 tiếng việt
Hệ thống bài học Adobe illustrator (Ai) (tiếng Việt) có hướng dẫn chi tiết - Bài 1
Hệ thống bài học Adobe illustrator (Ai) có hướng dẫn chi tiết - Bài 1 (Phiên bản gốc)
Hệ thống bài học Adobe illustrator (Ai) có hướng dẫn chi tiết - Bài 2 (Phiên bản gốc)
Hệ thống bài học Adobe illustrator (Ai) có hướng dẫn chi tiết - Bài 3 (Phiên bản gốc)
Hệ thống bài học Adobe illustrator (Ai) có hướng dẫn chi tiết - Bài 4 (Phiên bản gốc)
Hệ thống bài học Adobe illustrator (Ai) có hướng dẫn chi tiết - Bài 5 (Phiên bản gốc)
Hệ thống bài học Adobe illustrator (Ai) có hướng dẫn chi tiết - Bài 6 (Phiên bản gốc) Phần 1
Hệ thống bài học Adobe illustrator (Ai) có hướng dẫn chi tiết - Bài 6 (Phiên bản gốc) Phần 2
Hệ thống bài học Adobe illustrator (Ai) có hướng dẫn chi tiết - Bài 7 (Phiên bản gốc)
Hệ thống bài học Adobe illustrator (Ai) có hướng dẫn chi tiết - Bài 8 (Phiên bản gốc)
Hệ thống bài học Adobe illustrator (Ai) có hướng dẫn chi tiết - Bài 9 (Phiên bản gốc)
Hệ thống bài học Adobe illustrator (Ai) có hướng dẫn chi tiết - Bài 10 (Phiên bản gốc) Phần 1
Hệ thống bài học Adobe illustrator (Ai) có hướng dẫn chi tiết - Bài 10 (Phiên bản gốc) Phần 2
Hệ thống bài học Adobe illustrator (Ai) có hướng dẫn chi tiết - Bài 11 (Phiên bản gốc)
Hệ thống bài học Adobe illustrator (Ai) có hướng dẫn chi tiết - Bài 12 (Phiên bản gốc) Phần 1
Hệ thống bài học Adobe illustrator (Ai) có hướng dẫn chi tiết - Bài 12 (Phiên bản gốc) Phần 2
Hệ thống bài học Adobe illustrator (Ai) có hướng dẫn chi tiết - Bài 13 (Phiên bản gốc) Phần 1
Hệ thống bài học Adobe illustrator (Ai) có hướng dẫn chi tiết - Bài 13 (Phiên bản gốc) Phần 2
Hệ thống bài học Adobe illustrator (Ai) có hướng dẫn chi tiết - Bài 14 (Phiên bản gốc) Phần 1
Hệ thống bài học Adobe illustrator (Ai) có hướng dẫn chi tiết - Bài 14 (Phiên bản gốc) Phần 2
Hệ thống bài học Adobe illustrator (Ai) có hướng dẫn chi tiết - Bài 15 (Phiên bản gốc)
Hệ thống bài học Adobe illustrator (Ai) có hướng dẫn chi tiết - Bài 16 (Phiên bản gốc)
Hệ thống bài học Adobe illustrator (Ai) có hướng dẫn chi tiết - Bài 17 (Phiên bản gốc)
Hệ thống bài học Adobe illustrator (Ai) có hướng dẫn chi tiết - Bài 18 (Phiên bản gốc) Phần 1
Hệ thống bài học Adobe illustrator (Ai) có hướng dẫn chi tiết - Bài 18 (Phiên bản gốc) Phần 2
Hệ thống bài học Adobe illustrator (Ai) có hướng dẫn chi tiết - Bài 19 (Phiên bản gốc) Phần 1
Trung Tâm TIN HỌC KEY
ĐC : 203-205 Lê Trọng Tấn – Sơn Kỳ - Tân Phú – TPHCM
ĐT : (028) 22 152 521
