NHẤP VÀO ĐÂY để xem các bước trước đó ....
Step 8
In this step, we’ll create a glossy sheen on the screen of the calculator icon. Press “ M “ to create 2 rounded rectangles. On the first one, set the settings to Width = 340px, Height = 100px, Corner radius = 50px, and the second one with Width = 350px, Height = 100px, Corner radius = 50px . Using the Layers Palette, place the second one in front of the first one like the image below.
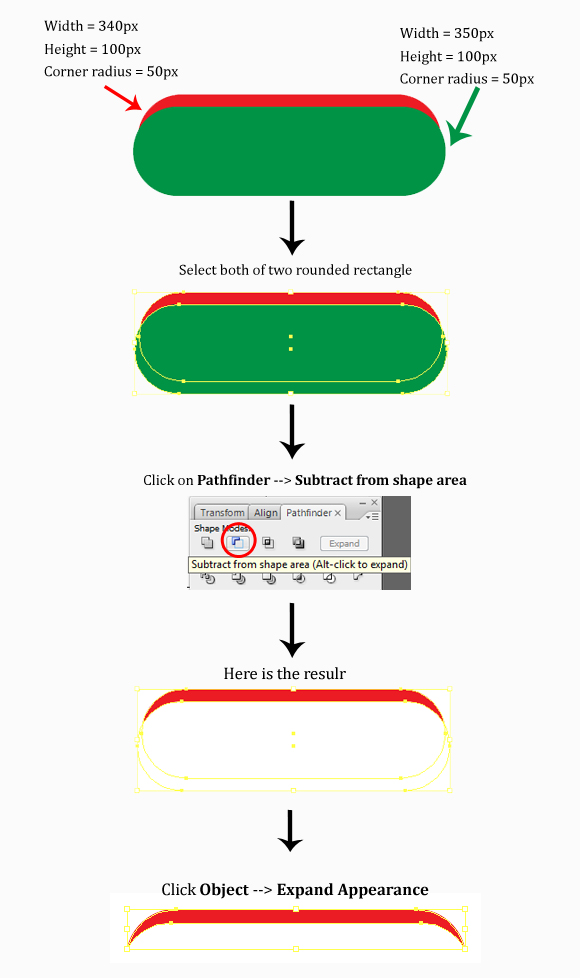
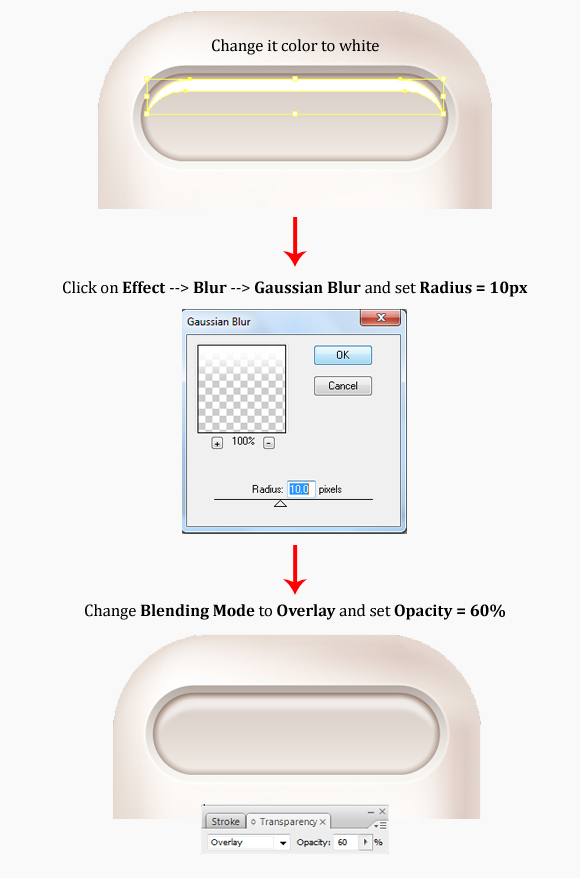
Change top color of the top rectangle to #FFFFFF. Apply a Blur effect to it by clicking Effect > Blur > Gaussian Blur, and set the Radius = 10 px. Then using the Appearance Palette, change the Blending Mode to Overlay and lower its Opacity to 60%.
Step 9
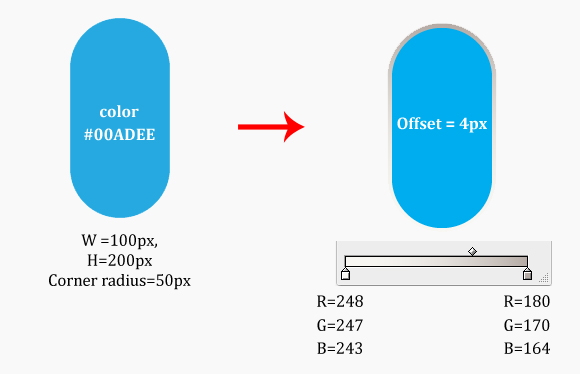
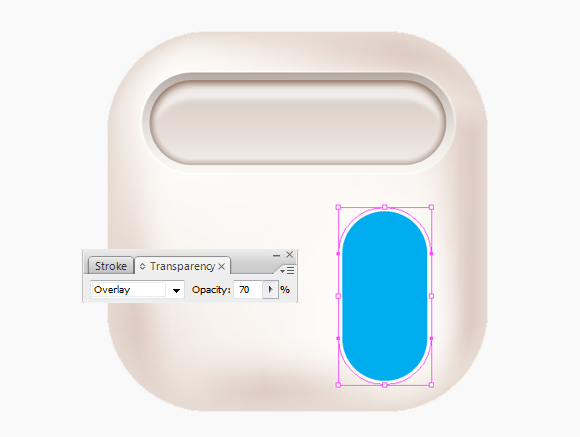
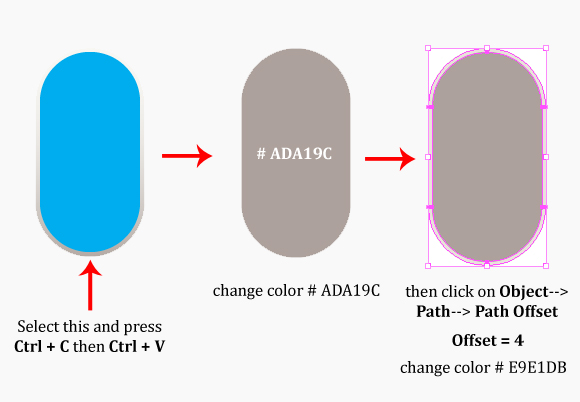
Now we’ll create the buttons for this calculator. First press “ M “ and set the size of the shape to Width = 100px, Height = 200px, Corner Radius = 50px. Fill this shape with color #00ADEE, then with it still selected, click Object > Path > Offset Path. Set the Offset = 4px and fill it with the same gradient as step 4; change the Blending Mode to Overlay and lower its Opacity to 70% from the Appearance Palette.
Next, we’ll create the shadow for the button. Duplicate the rounded rectangle by pressing Ctrl + C (copy) then Ctrl + V (Paste), change the color # ADA19C. With this shape still selected, click on Object > Path > Offset Path, set the Offset = 4px, and the fill color to #E9E1DB.
Select both shapes and click on Object > Blend > Blend Options.

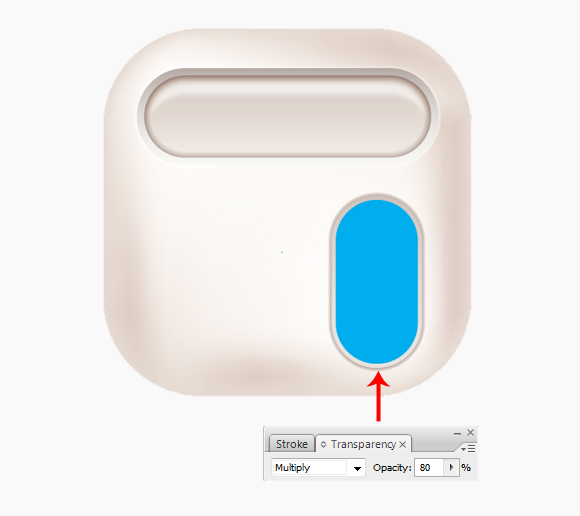
Next, move the gray rounded shape below the blue shape using the Layers palette. Then with the gray shape still selected, change the Blending Mode to Multiply and lower the Opacity to 80% in the Appearance Palette.
Step 10
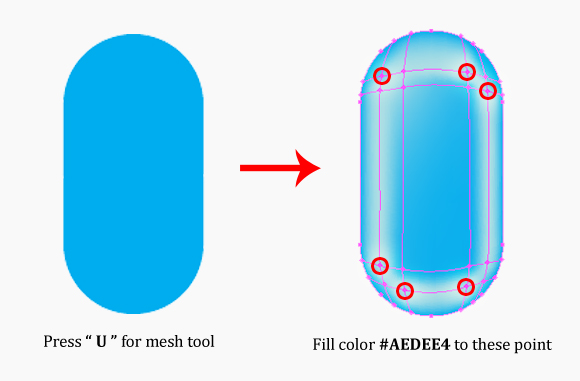
Press “ U “ for the Mesh tool to create a mesh for the blue button, then click on the blue button to add the mesh. See the example image below.
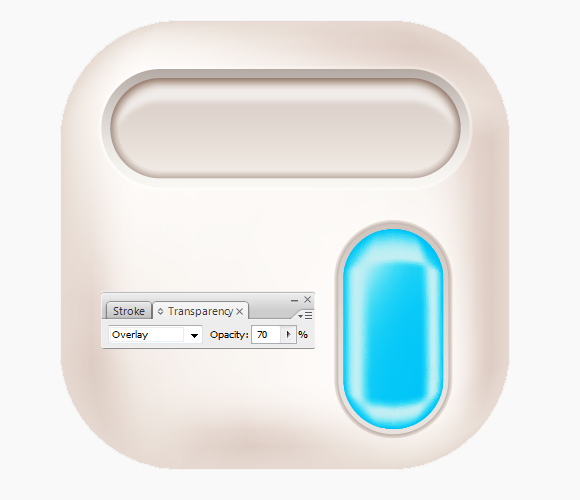
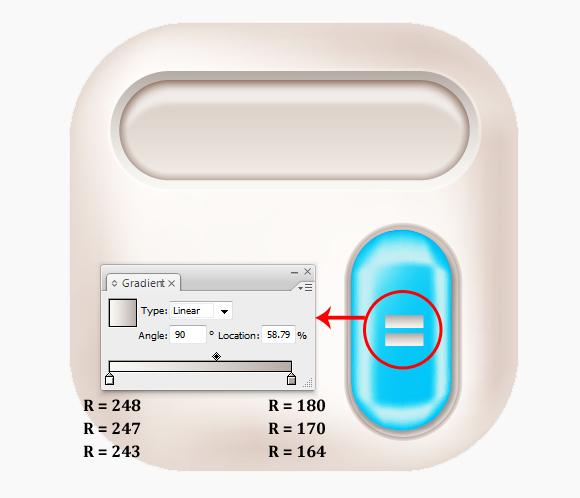
Create a copy of the blue shape by pressing Ctrl + C (copy) then Ctrl + F (Paste in front). Then using the Appearance palette, change the Blending mode to Overlay, and lower its Opacity to 70%.
Now we’ll create another shadow for the button to make it look more realistic. Create a rounded rectangle with Width = 100px, Height = 200px, Corner Radius = 50px. Fill with the color #ADA19C and apply a Gaussian Blur by going to Effect > Blur > Gaussian Blur and set the Radius to 10px. Then change the Blending Mode to Multiply using the Transparency palette.

Next we’ll draw the equals symbol. Press “M” and draw a small rectangle with a fill (any color will do) with no stroke. Then using the Gradient Palette, apply a white to gray gradient on our rectangle. Next hit CTRL + C and CTRL + V to create a duplicate and space the 2 rectangles we’ve just created like the below image.
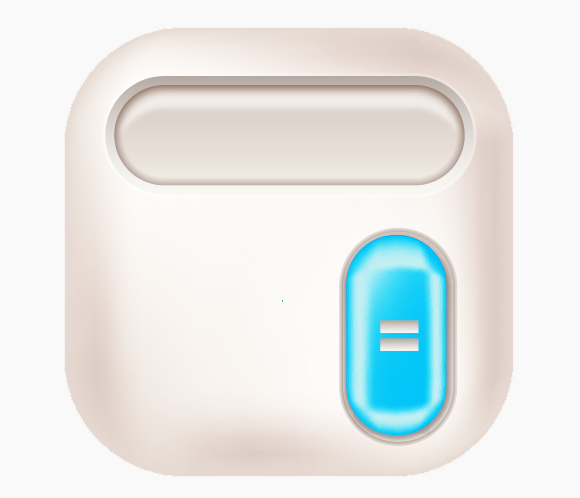
And we’re done with this button. Here is the result.
Step 11
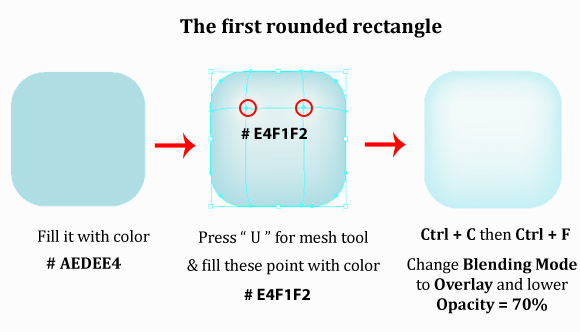
In this step, we are going to create a square button for the calculator icon. Press “ M “ for rounded rectangle with Width = 80px, Height = 80px,Corner radius = 20px. Then duplicate the rectangle by hitting Ctrl + C (copy) and Ctrl + V ( Paste).
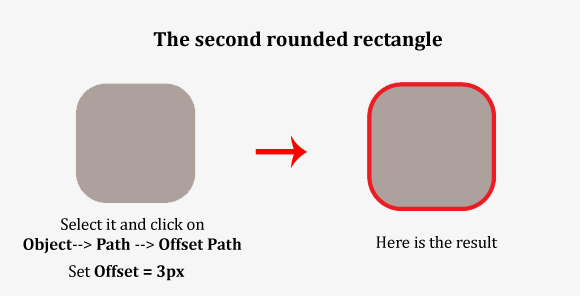
And with the second rounded rectangle selected, click Object > Path > Offset path and set the Offset = 3px.
Now separate the rectangles and follow the below instructions.
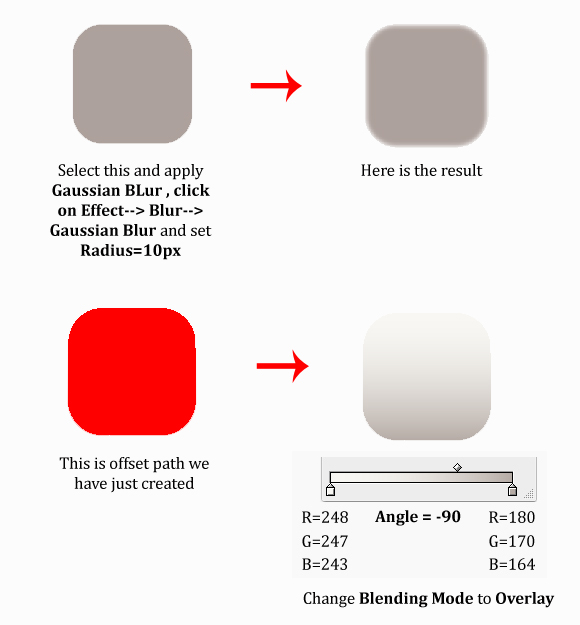
Now we need one more shadow for this button. Press Ctrl + C (Copy) the offset path we have just created then Ctrl + V ( Paste ). Select it and create one more offset path with Offset = 3px.
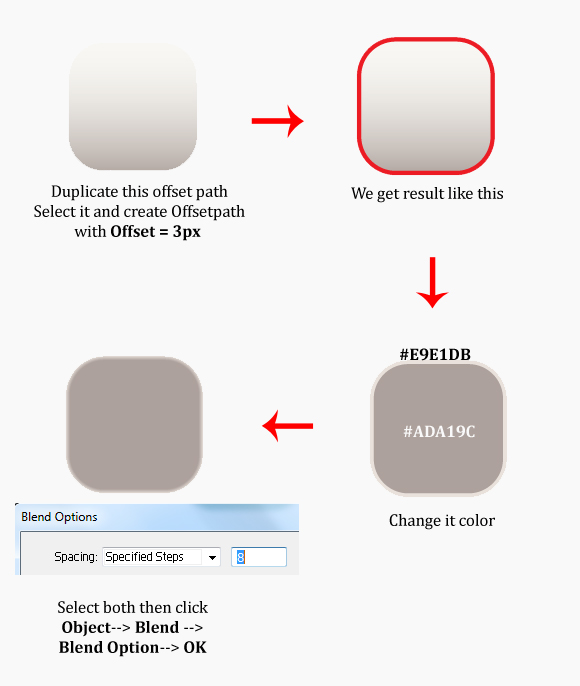
Now place all of the rectangles on top of each other, and using the Layers palette, layer them in the following order:
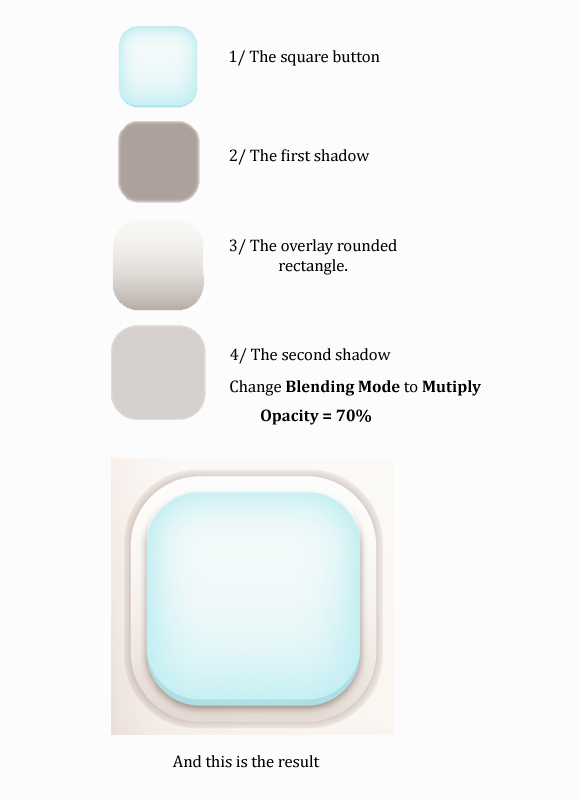
Group the 4 rectangles by hitting CTRL + G. Then create 3 duplicates of the square button by hitting CTRL + C (Copy) and CTRL + V (Paste) 3 times. Then arrange them like the image below.
Step 12
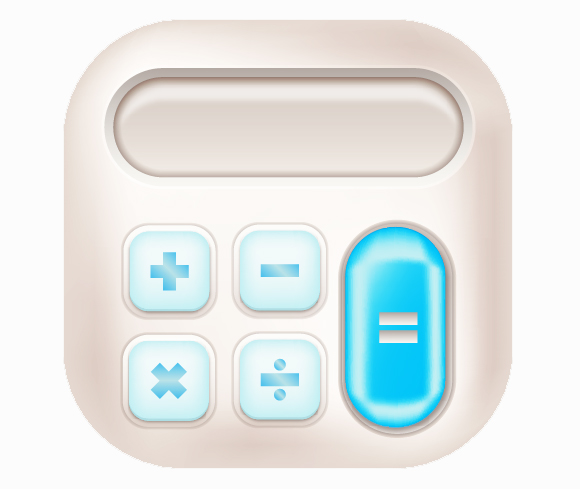
Now we’ll create 4 basic shapes and fill the with the gradient as in the image below. Then using the Transparency palette, change the Blending Mode to Multiply with lower the Opacity to 70%.

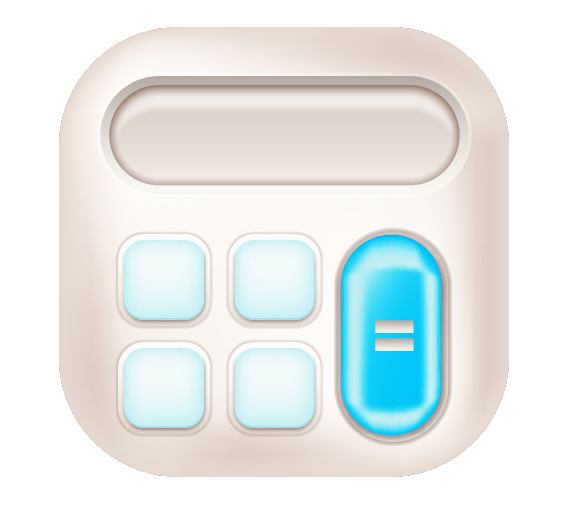
And you should get result like this.
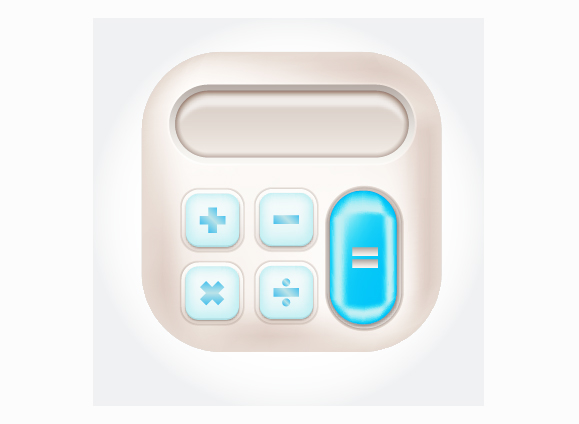
Step 13
Now we need to add a background. Draw a rectangle using the Rectangle Tool (M) and apply a radial gradient to it using the Gradient Palette with a white color in the middle and gray on the edges. Then create a copy in front by hitting Ctrl + C (Copy) and Ctrl + F (Paste in front), and using theAppearance palette, change the Blending Mode to Overlay.
Step 14
Next, we need to add a drop shadow on the icon, draw a rectangle using the Rectangle Tool (M) with Width = 460px , Height = 460 px , Corner Radius = 120 px , fill with color # 231F20, then go to Effect > Blur > Gaussian blur and set the Radius = 25px. Change the Blending Mode toMultiply the Opacity to 40% using the Transparency palette.
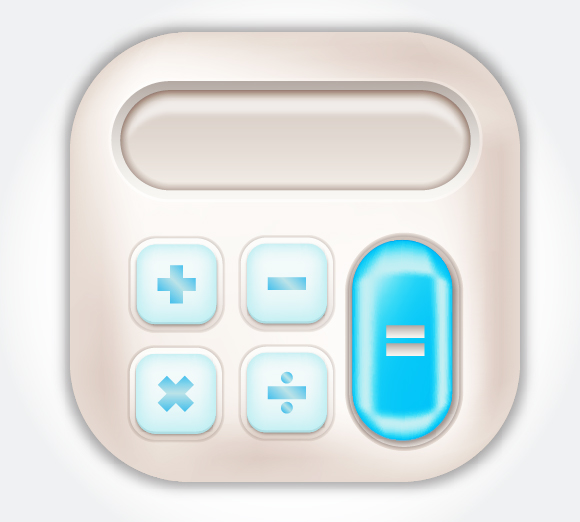
And this is final result.
Nếu bạn có nhu cầu học khóa học Adobe illustrator (Ai) vui lòng NHẤP VÀO ĐÂY để xem chi tiết về khóa học hoặc NHẤP VÀO ĐÂY để gửi thắc mắc về khóa học của bạn cho chúng tôi.
Những bài viết có nội dung liên quan khác:
Phím tắt trong phần mềm Illustrator (AI)
Giáo trình illustrator cs6 tiếng việt
Hệ thống bài học Adobe illustrator (Ai) (tiếng Việt) có hướng dẫn chi tiết - Bài 1
Hệ thống bài học Adobe illustrator (Ai) có hướng dẫn chi tiết - Bài 1 (Phiên bản gốc)
Hệ thống bài học Adobe illustrator (Ai) có hướng dẫn chi tiết - Bài 2 (Phiên bản gốc)
Hệ thống bài học Adobe illustrator (Ai) có hướng dẫn chi tiết - Bài 3 (Phiên bản gốc)
Hệ thống bài học Adobe illustrator (Ai) có hướng dẫn chi tiết - Bài 4 (Phiên bản gốc)
Hệ thống bài học Adobe illustrator (Ai) có hướng dẫn chi tiết - Bài 5 (Phiên bản gốc)
Hệ thống bài học Adobe illustrator (Ai) có hướng dẫn chi tiết - Bài 6 (Phiên bản gốc) Phần 1
Hệ thống bài học Adobe illustrator (Ai) có hướng dẫn chi tiết - Bài 6 (Phiên bản gốc) Phần 2
Hệ thống bài học Adobe illustrator (Ai) có hướng dẫn chi tiết - Bài 7 (Phiên bản gốc)
Hệ thống bài học Adobe illustrator (Ai) có hướng dẫn chi tiết - Bài 8 (Phiên bản gốc)
Hệ thống bài học Adobe illustrator (Ai) có hướng dẫn chi tiết - Bài 9 (Phiên bản gốc)
Hệ thống bài học Adobe illustrator (Ai) có hướng dẫn chi tiết - Bài 10 (Phiên bản gốc) Phần 1
Hệ thống bài học Adobe illustrator (Ai) có hướng dẫn chi tiết - Bài 10 (Phiên bản gốc) Phần 2
Hệ thống bài học Adobe illustrator (Ai) có hướng dẫn chi tiết - Bài 11 (Phiên bản gốc)
Hệ thống bài học Adobe illustrator (Ai) có hướng dẫn chi tiết - Bài 12 (Phiên bản gốc) Phần 1
Trung tâm TIN HỌC KEY
ĐC : 203-205 Lê Trọng Tấn – Sơn Kỳ - Tân Phú – TPHCM
ĐT : (028) 22 152 521
Web : key.com.vn
Địa chỉ: 203 - 205 Lê Trọng Tấn, P. Sơn Kỳ, Q. Tân Phú, TP. HCM.
Điện thoại: (028) 22 152 521
Website: key.com.vn - Email: key@key.com.vn
Địa chỉ: 765-767A (Số mới: 558-560A) Nguyễn Ảnh Thủ, P. Tân Chánh Hiệp, Q. 12, TP. HCM.
Điện thoại: (028) 2242 2244
Website: key.com.vn - Email: key@key.com.vn