Turn Drab Text Into an Amazing Design Using This Simple USB Vector Text Effect
là một chương trình vẽ vector, thường được sử dụng để vẽ hình minh hoạ, hoạt hình, biểu đồ, đồ thị. Adobe Illustrator được dùng để thiết kế : như thiết kế những sản phẩm trong ngành thiết kế quảng cáo, thiết kế in ấn, thiết kế logo, thiết kế bản hiệu, thiết kế thời trang, thiết kế thiệp mời, Tạo các sản phẩm tờ rơi, Cataloge, Card Visit, Broucher, Profile,vẽ hoạt hình, tích hợp chuyển động cho Flash...Adobe Illustrator ưu diểm là dễ dàng thay đổi và trao đổi dữ liệu, kích thước file nhẹ, dễ dàng tương thích với Photoshop, Corel Draw, và hỗ trợ in ấn rất tốt.
Hôm nay, trung tâm TIN HỌC KEY xin giới thiệu đến các bạn một hệ thống bài tập thực hành vẽ các đối tượng trong Adobe illustrator (Ai) (phiên bản tiếng anh, theo: vectips.com) có hướng dẫn chi tiết các bước thực hiện cụ thể để các bạn dễ dàng thực hành theo. Hôm nay chúng ta sẽ học bài 18: Turn Drab Text Into an Amazing Design Using This Simple USB Vector Text Effect . Hy vọng hệ thống bài học này sẽ mang lại cho bạn những kiến thức hữu ích trong quá trình bạn học Adobe illustrator (Ai).
Chúc các bạn thành công!
Turn Drab Text Into an Amazing Design Using This Simple USB Vector Text Effect
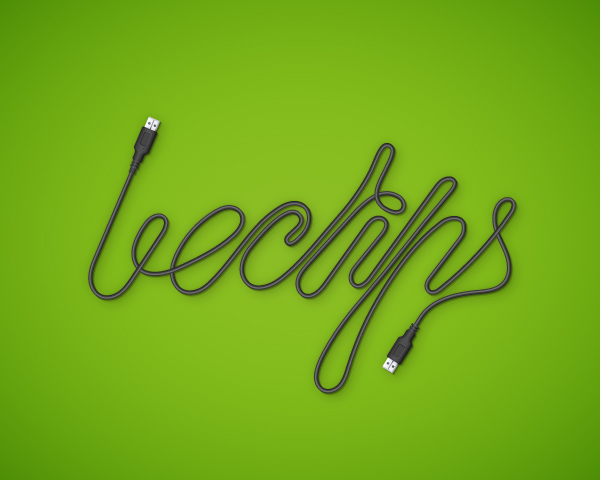
Final Image
As always, this is the final image that we’ll be creating:
Step 1
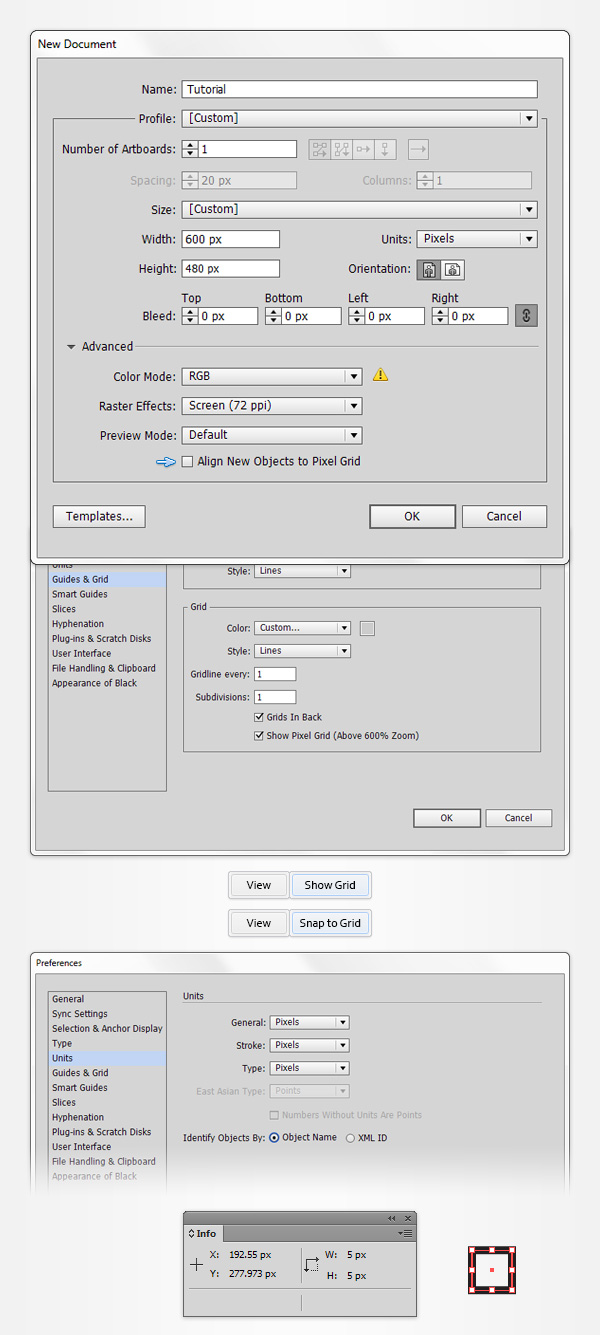
Hit CTRL + N to create a new document. Select Pixels from the Units drop-down menu, enter 600 in the width box and 480 in the height box, then click on the Advanced button. Select RGB, Screen (72ppi) and make sure that the Align New Objects to Pixel Grid box is unchecked before you clickOK. Enable the Grid (View > Show Grid) and the Snap to Grid (View > Snap to Grid). You will need a grid every 1px, so simply go to Edit > Preferences > Guides > Grid, enter 1 in the Gridline every box and 1 in the Subdivisions box. You should also open the Info panel (Window > Info) for a live preview with the size and position of your shapes. Do not forget to set the unit of measurement to pixels from Edit > Preferences > Units > General. All these options will significantly increase your work speed.
Step 2
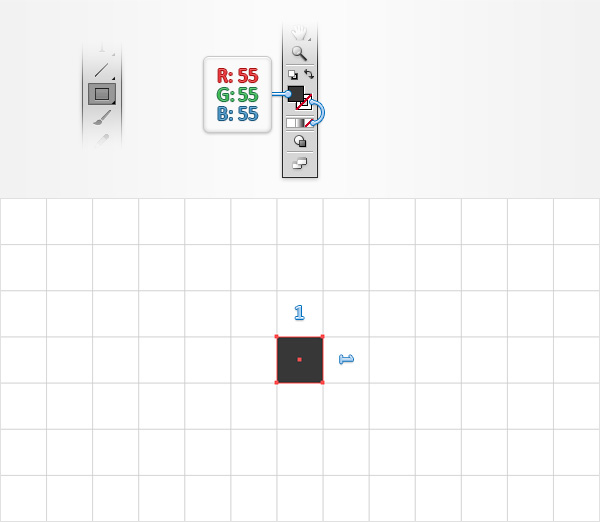
Pick the Rectangle Tool (M) and focus on your Toolbar. Remove the color from the stroke, then select the fill and set its color at R=55 G=55 B=55. Move to your artboard and simply create a 1px square.
Step 3
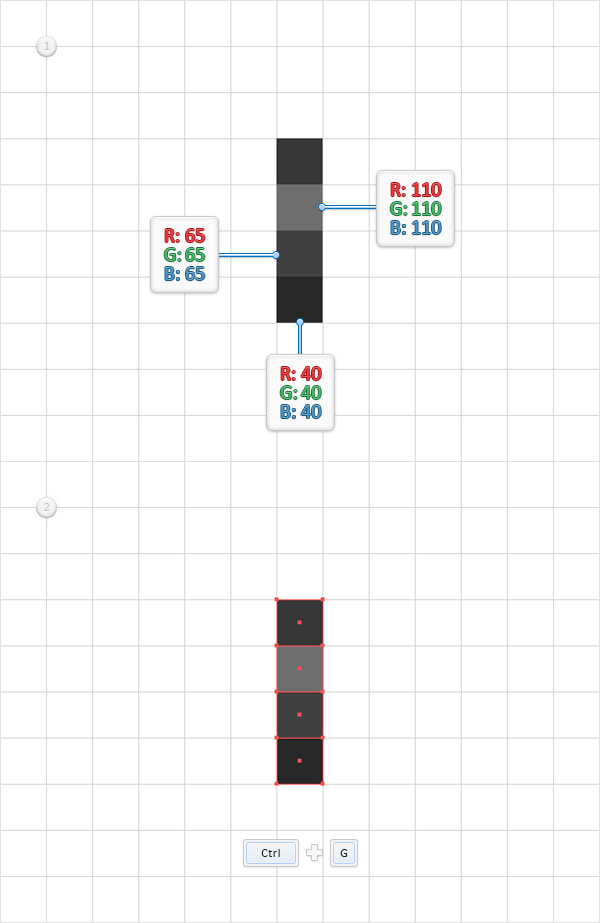
Make sure that the Rectangle Tool (M) is still active, create three additional 1px squares, and place them as shown in the following image, using the fill colors shown below. Select all four shapes created so far, and simply hit CTRL + G to Group them.
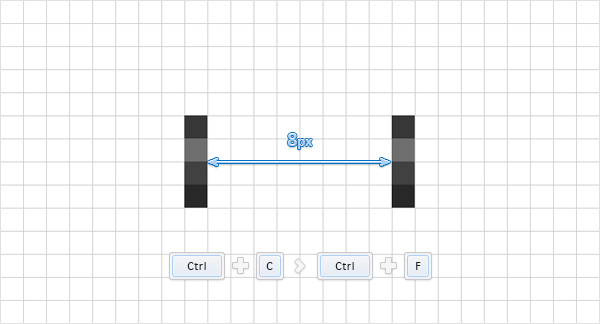
Step 4
Make sure that your group of squares is still selected, and make a copy in front (CTRL + C > CTRL + F). Select this group copy, and move it 9px to the right.
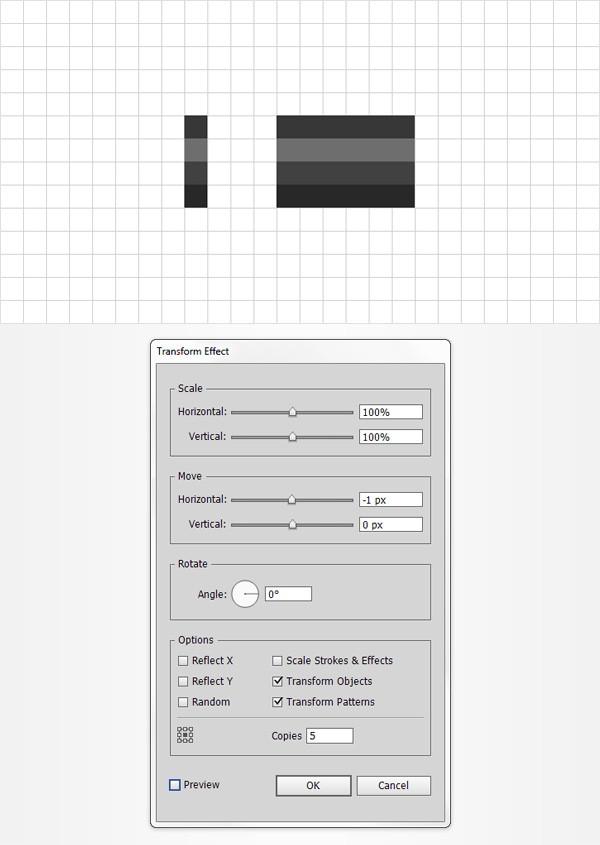
Step 5
Reselect the group copy made in the previous step, and go to Effect > Distort & Transform > Transform. Enter 5 in the Copies box and drag the Move-Horizontal slider at -1px; then click OK. In the end, things should look like in the following image.
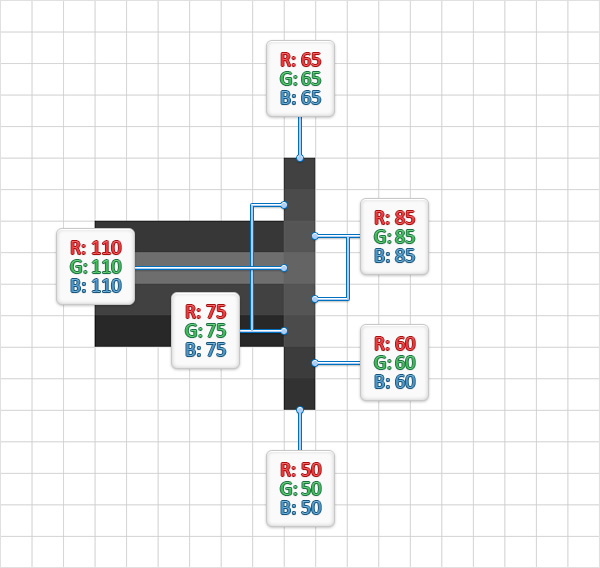
Step 6
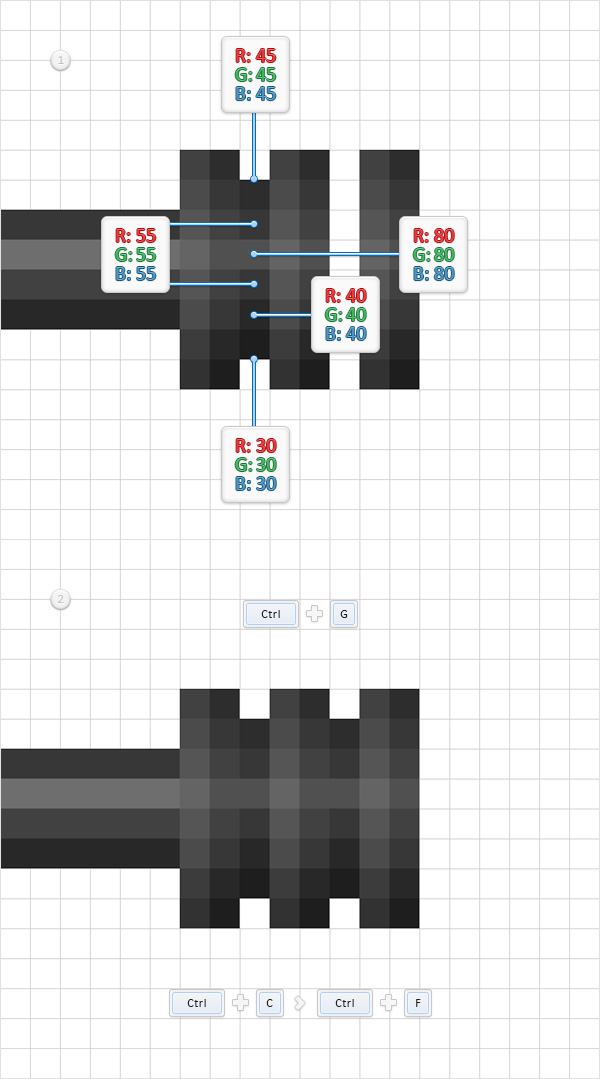
Using the Rectangle Tool (M), create eight, 1px squares. Place these new shapes as shown in the following image, and use the fill colors shown below.
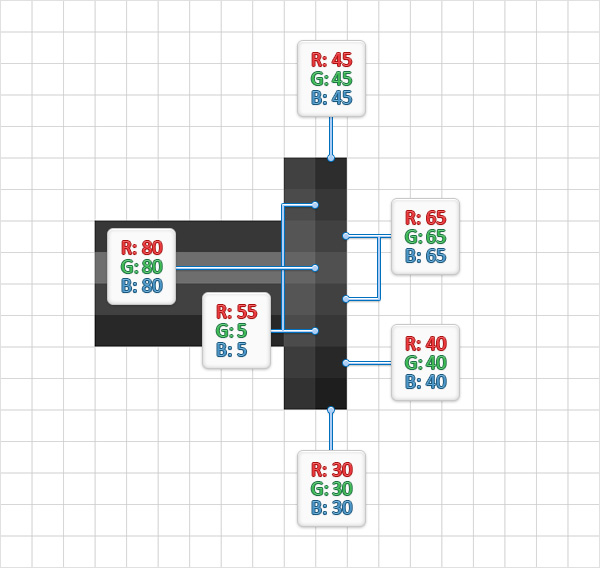
Step 7
Reselect the eight squares made in the previous step and duplicate them (CTRL + C > CTRL + F). Drag these copies 1px to the right, then simply replace the existing fill colors with the ones shown in the following image.
Step 8
Reselect the two columns of squares made in the last two steps and Group them (CTRL + G). Make sure that this new group stays selected, and go toEffect > Distort & Transform > Transform. Enter 2 in the Copies box and drag the Move-Horizontal slider to 3px, then click OK. In the end, things should look like in the following image.

Step 9
Using the Rectangle Tool (M), create six, 1px squares. Place these new shapes as shown in the following image, and use the fill colors shown below. Make sure that all the shapes made in this step are selected, and Group them (CTRL + G). Duplicate this new group (CTRL + C > CTRL + F). Select the copy and simply drag it 3px to the right as shown in the second image.
Step 10
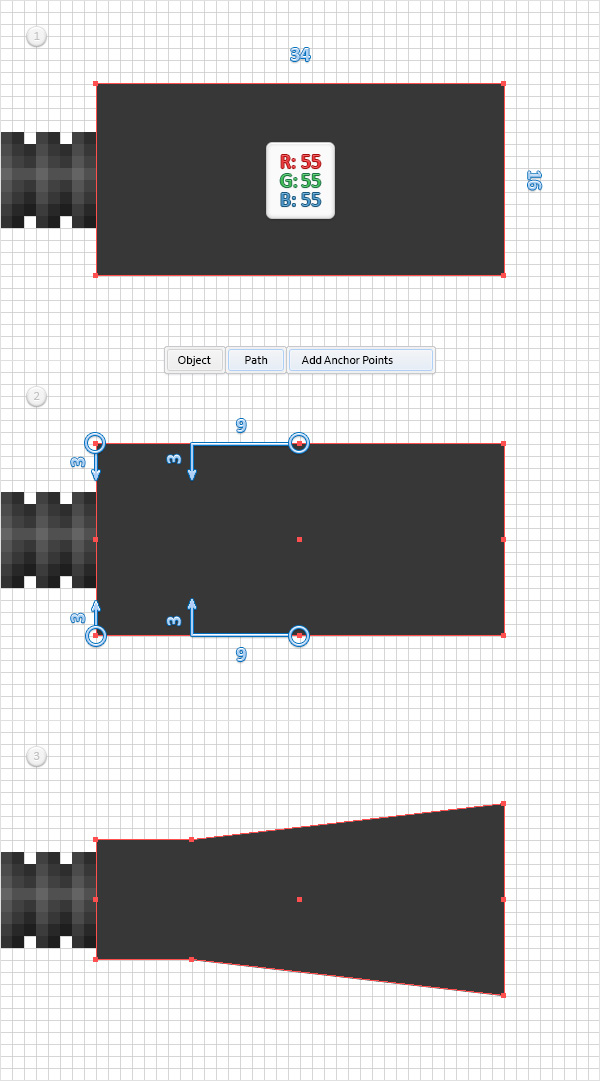
Using the Rectangle Tool (M), create a 34 x 16px shape, set the fill color at R=55 G=55 B=55, and place it as shown in the first image. Make sure that this new shape stays selected, and go to Object > Path > Add Anchor Points. Switch to the Direct Selection Tool (A), select the middle, top anchor point, and drag it 3px down and 9px to the left. Move to the middle, bottom anchor point and drag it 3px up and 9px to the left. Move to the left side, select the top anchor point and drag it 3px down, then select the bottom anchor point and drag it 3px up. In the end, things should look like in the third image. Move to the Layers panel (Window > Layers), simply double click on the shape made in this step and name it “main“.
Step 11
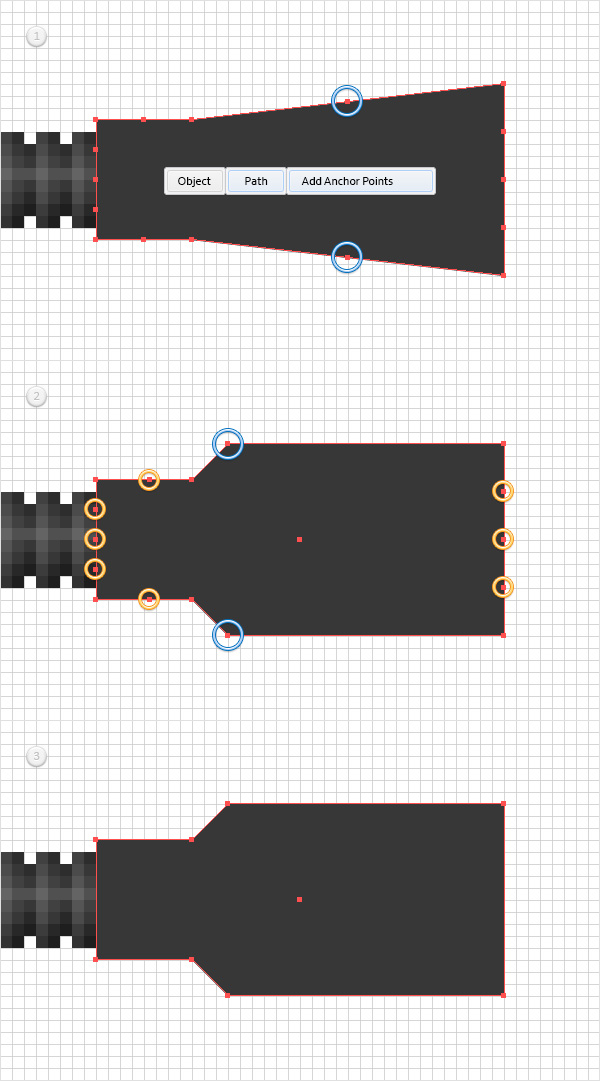
Reselect your “main” shape and go to Object > Path > Add Anchor Points. Using the Direct Selection Tool (A), select the two anchor points highlighted in the first image and drag them as shown in the second image. Switch to the Delete Anchor Point Tool (-), and simply click on the eight anchor point highlighted by the yellow circles to remove them. In the end, your “main” shape should look like in the third image.
Step 12
Next, we’ll round the corners of our USB. Keep focusing on your “main” shape and make sure that the Direct Selection Tool (A) is still active. Select the four anchor points highlighted by the yellow circles in the following image, move to the top bar and simply enter 2 in the Corners box. Select the two anchor points highlighted by the green circles in the following image, move to the top bar and simply enter 5 in the Corners box. Select the two anchor points highlighted by the blue circles in the following image, move to the top bar and enter 0.65 in the Corners box. In the end, your “main” shape should look like in the second image.

Step 13
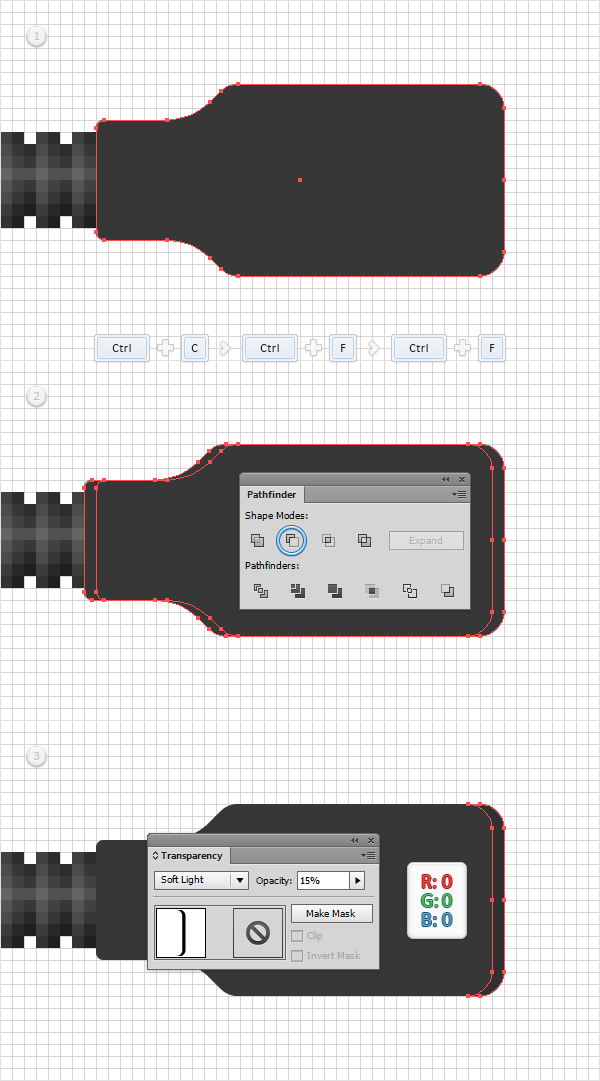
Disable the Snap to Grid (View > Snap to Grid), then go to Edit > Preferences > General and make sure that the Keyboard Increment is set at 1px. Reselect your “main” shape and make two copies in front (CTRL + C > CTRL + F > CTRL + F). Select the top copy and move it 1px to the left using the left arrow button from your keyboard. Reselect both copies made in this step, open the Pathfinder panel (Window > Pathfinder) and click the Minus Front button. Fill the resulting shape with black (R=0 G=0 B=0), then open the Transparency panel (Window > Transparency), lower the Opacity to15% and change the Blending Mode to Soft Light.
Step 14
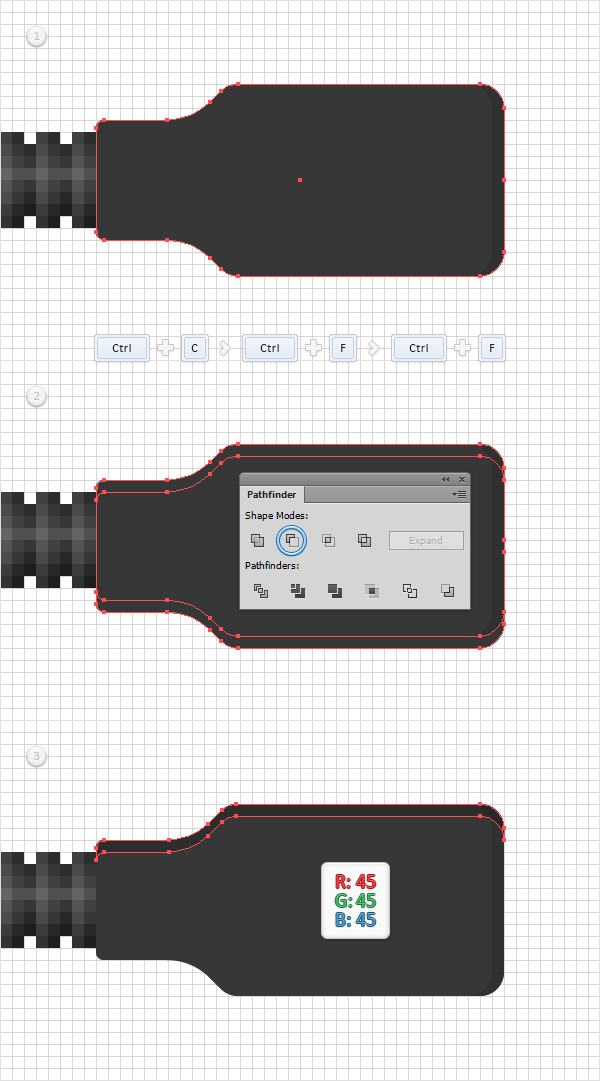
Reselect your “main” shape and make two copies in front (CTRL + C > CTRL + F > CTRL + F). Select the top copy and move it 1px down using the down arrow button from your keyboard. Reselect both copies made in this step, and click the Minus Front button from the Pathfinder panel. Make sure that the resulting shape is selected, and set the fill color at R=45 G=45 B=45.
Step 15
Reselect your “main” shape and make two copies in front (CTRL + C > CTRL + F > CTRL + F). Select the top copy and move it 2px down using the down arrow button from your keyboard. Reselect both copies made in this step and click the Minus Front button from the Pathfinder panel. 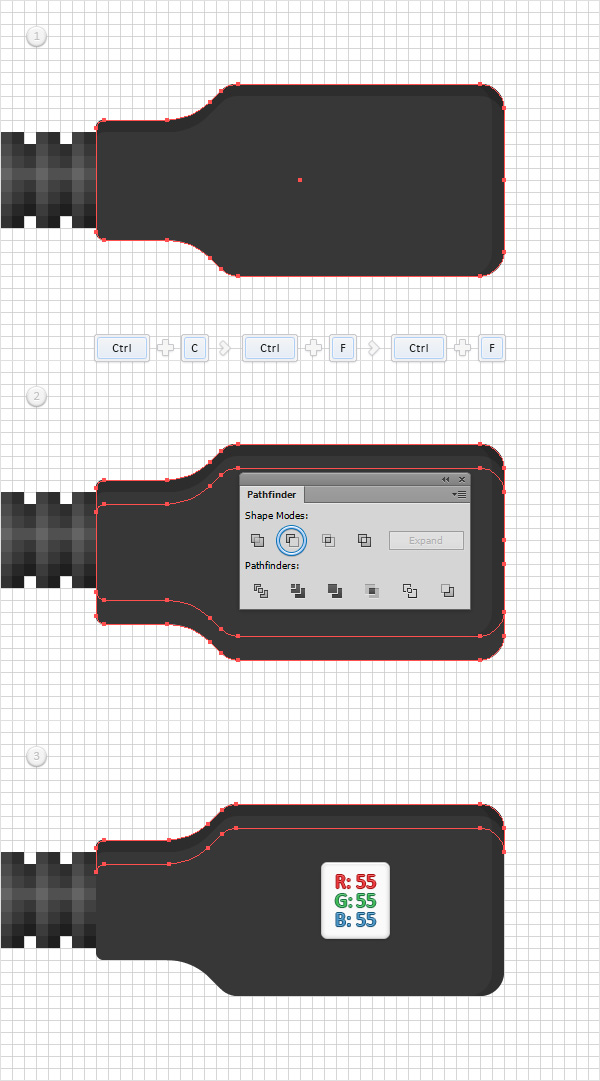
Step 16
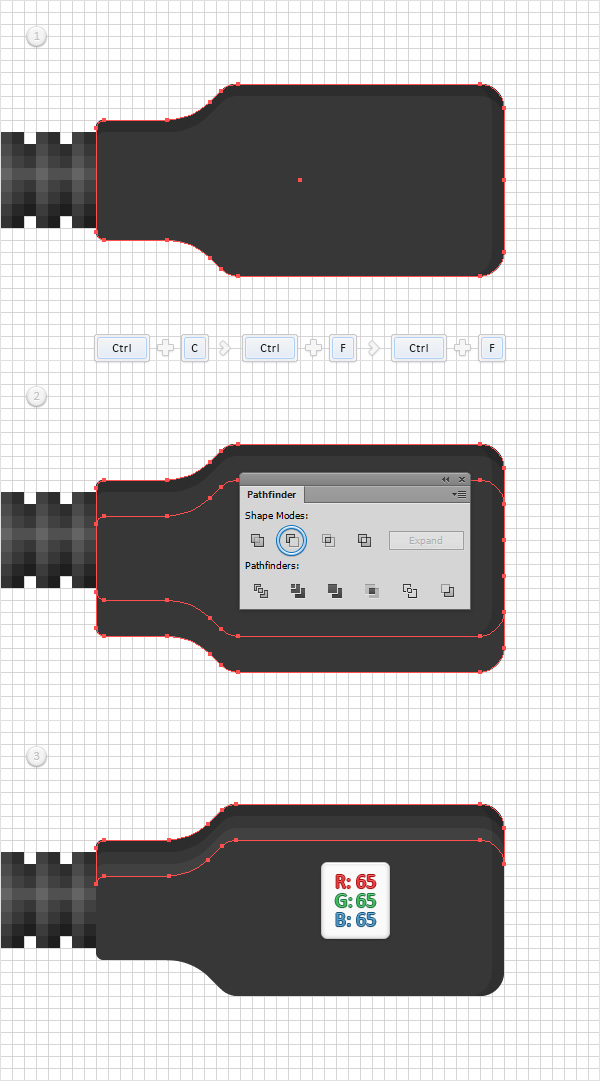
Reselect your “main” shape and make two copies in front (CTRL + C > CTRL + F > CTRL + F). Select the top copy and move it 3px down using the down arrow button from your keyboard. Reselect both copies made in this step, and click the Minus Front button from the Pathfinder panel. Make sure that the resulting shape is selected, and set the fill color at R=65 G=65 B=65.
Step 17
Reselect your “main” shape, and make two copies in front (CTRL + C > CTRL + F > CTRL + F). Select the top copy, and move it 1px up using the up arrow button from your keyboard. Reselect both copies made in this step, and click the Minus Front button from the Pathfinder panel. Make sure that the resulting shape is selected, and set the fill color at R=30 G=30 B=30.

NHẤP VÀO ĐÂY để xem các bước tiếp theo ......
TRUNG TÂM TIN HỌC KEY
ĐC: 203 - 205 Lê Trọng Tấn - Sơn Kỳ - Tân Phú - TP HCM
ĐT: (028) 22 152 521
Địa chỉ: 203 - 205 Lê Trọng Tấn, P. Sơn Kỳ, Q. Tân Phú, TP. HCM.
Điện thoại: (028) 22 152 521
Website: key.com.vn - Email: key@key.com.vn
Địa chỉ: 765-767A (Số mới: 558-560A) Nguyễn Ảnh Thủ, P. Tân Chánh Hiệp, Q. 12, TP. HCM.
Điện thoại: (028) 2242 2244
Website: key.com.vn - Email: key@key.com.vn