How to Draw a Bookshelf Illustration Using 3D Modeling Techniques
là một chương trình vẽ vector, thường được sử dụng để vẽ hình minh hoạ, hoạt hình, biểu đồ, đồ thị. Adobe Illustrator được dùng để thiết kế : như thiết kế những sản phẩm trong ngành thiết kế quảng cáo, thiết kế in ấn, thiết kế logo, thiết kế bản hiệu, thiết kế thời trang, thiết kế thiệp mời, Tạo các sản phẩm tờ rơi, Cataloge, Card Visit, Broucher, Profile,vẽ hoạt hình, tích hợp chuyển động cho Flash...Adobe Illustrator ưu diểm là dễ dàng thay đổi và trao đổi dữ liệu, kích thước file nhẹ, dễ dàng tương thích với Photoshop, Corel Draw, và hỗ trợ in ấn rất tốt.
Hôm nay, trung tâm TIN HỌC KEY xin giới thiệu đến các bạn một hệ thống bài tập thực hành vẽ các đối tượng trong Adobe illustrator (Ai) (phiên bản tiếng anh, theo: vectips.com) có hướng dẫn chi tiết các bước thực hiện cụ thể để các bạn dễ dàng thực hành theo. Hôm nay chúng ta sẽ học bài 19: How to Draw a Bookshelf Illustration Using 3D Modeling Techniques . Hy vọng hệ thống bài học này sẽ mang lại cho bạn những kiến thức hữu ích trong quá trình bạn học Adobe illustrator (Ai).
Chúc các bạn thành công!
How to Draw a Bookshelf Illustration Using 3D Modeling Techniques
Final Image

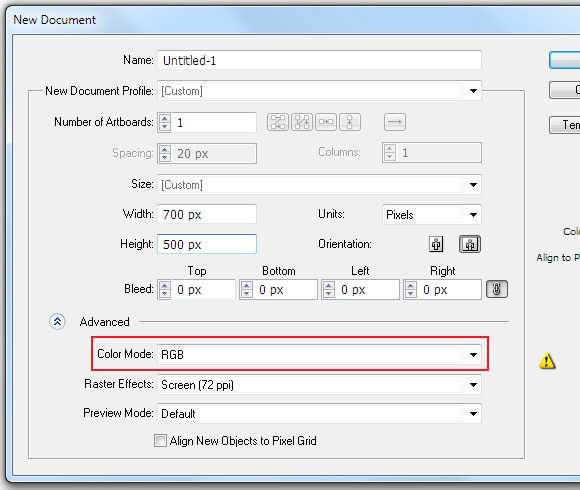
Step 1
Start Adobe Illustrator, then go to the File > New…. In the opened dialog box, set the necessary size of our artboard and choose the RGB color mode.
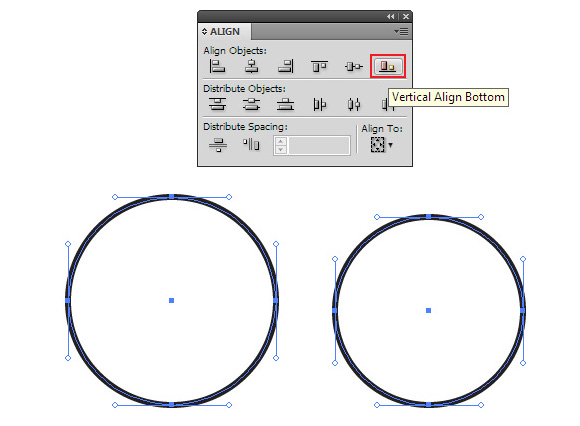
Step 2
Draw two circles of different sizes with the help of the Ellipse Tool (L). Apply a stroke and set the fill to blank using the Tools palette. Select both objects with the Selection Tool (V), then click on the Vertical Align Bottom button in the Align panel.
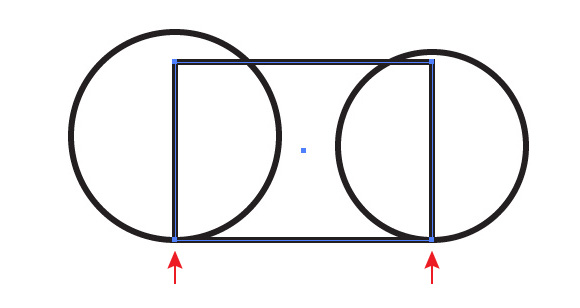
Step 3
Create a rectangle with the help of the Rectangle Tool (M). The lower vertices of our rectangle should match the lower points of the circle. It’s not very difficult to do if you work in the Smart Guides mode (Cmd/Ctrl + U).
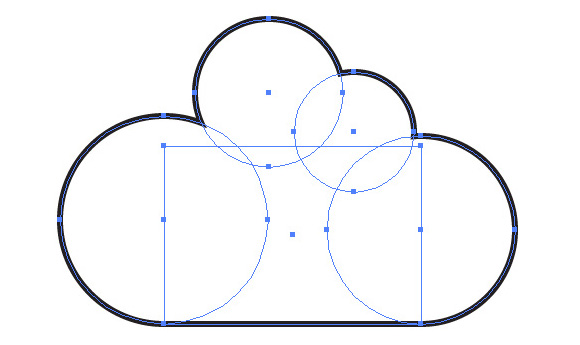
Draw two more circles as it is indicated on the figure below.

Step 4
With the help of simple shapes, we created a cloud, but it is difficult to estimate its shape like this. Select all the objects, then group them (Cmd/Ctrl + G). Keep the group selected, go to the Effect > Pathfinder > Add. The forms were united into one, but we’re still able to edit the location and size of the objects included in the group.
Let’s use this opportunity and make the cloud’s form perfect.

To finish combining the objects, go to Object > Expand Appearance.
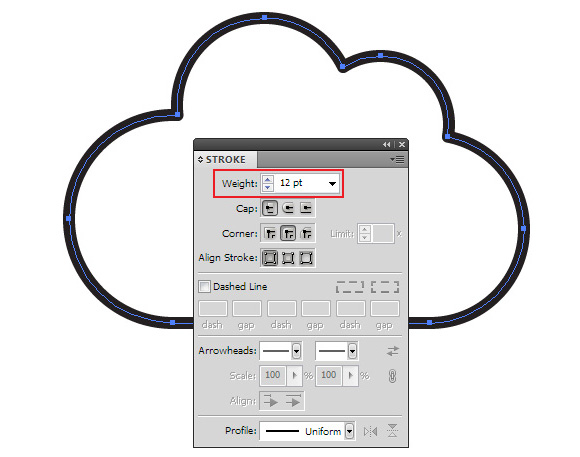
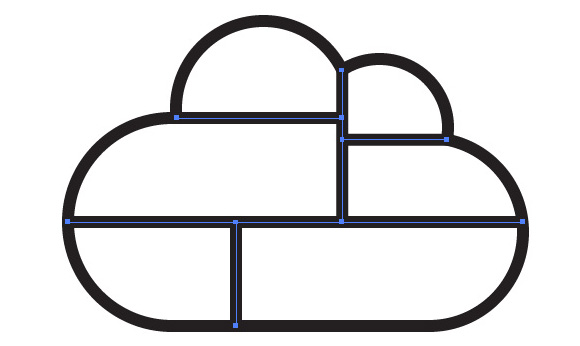
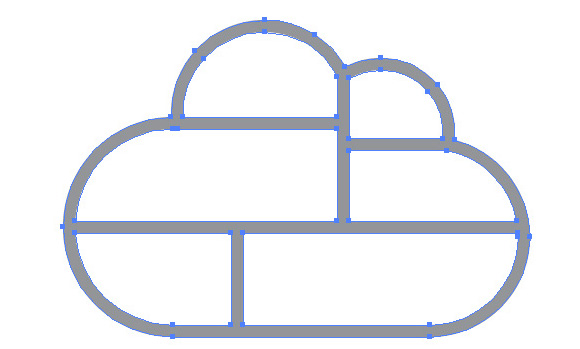
Step 5
Next, pick the required thickness of the stroke in the Stroke panel.
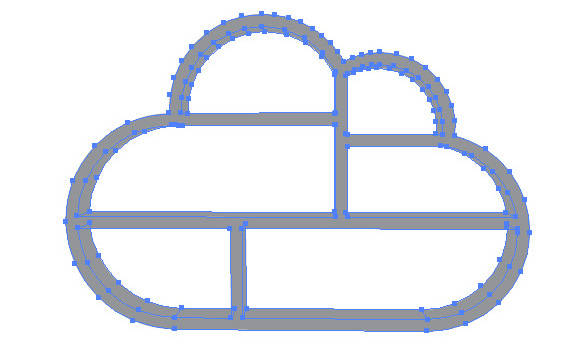
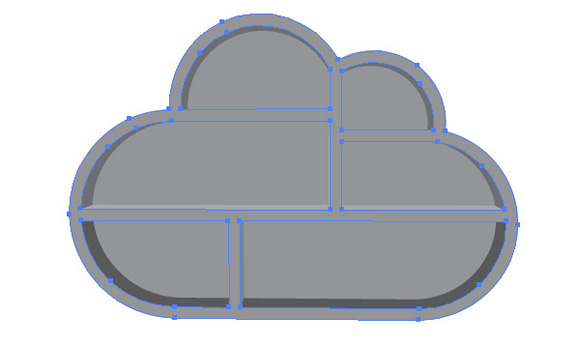
And now with the help of the Line Tool (\) + Shift create a couple of horizontal and vertical segments as it is indicated on the figure below.
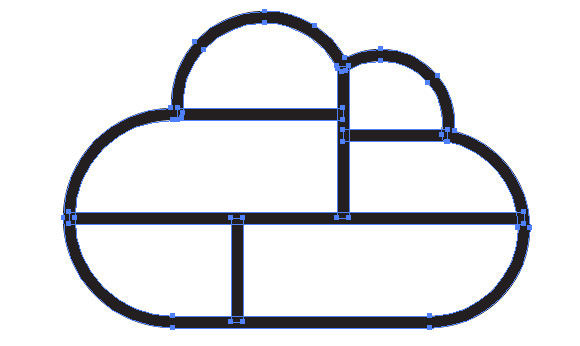
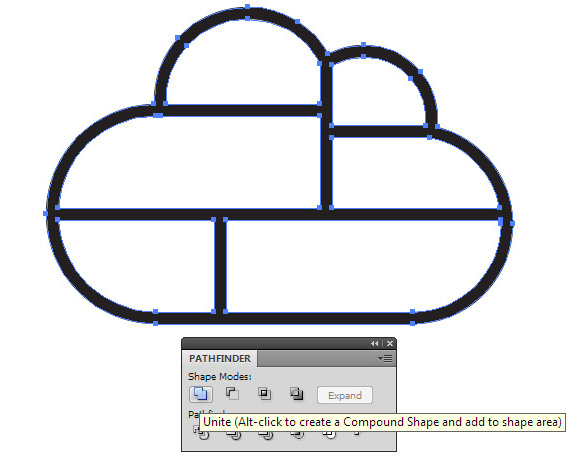
Step 6
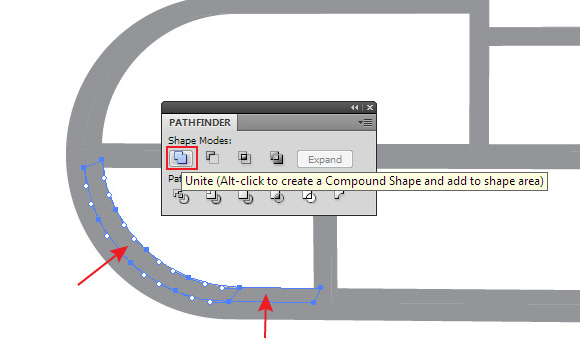
Select all the objects, then go to the Object > Path > Outline Stroke.
Now click on the Unite button in the Pathfinder panel. As a result of these actions, we received the Compound path.
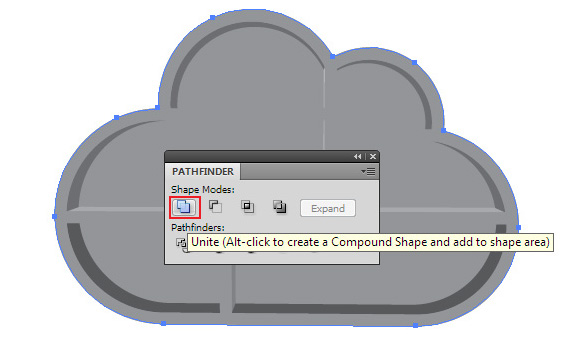
Step 7
Fill the compound path with a neutral color.
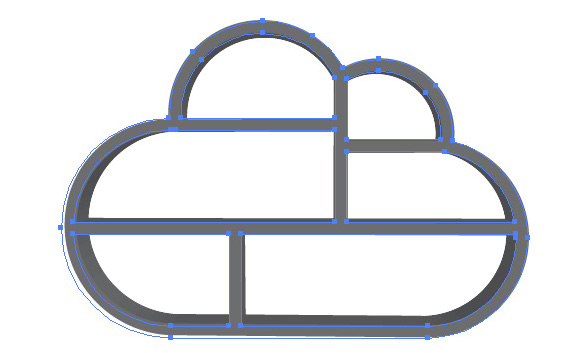
Let’s start the 3D modeling. Keep the object selected, go to the Effect > 3D > Extrude & Bevel… and set the parameters indicated on the figure below.
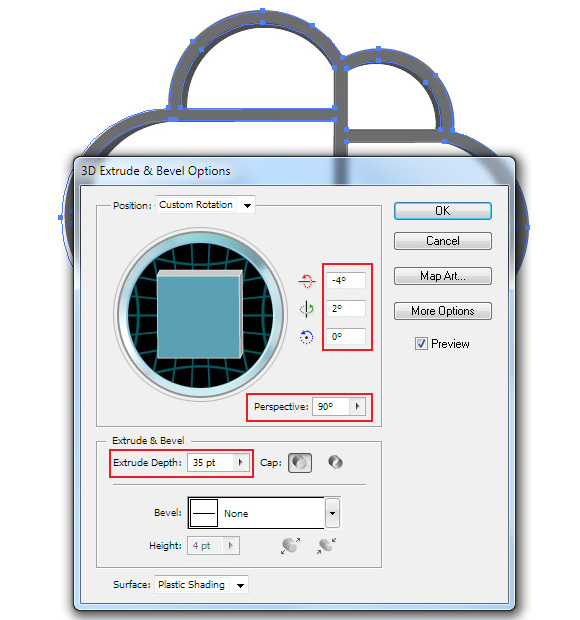
Visually, rate your 3D object and if you don’t like something, change the effect’s parameters.
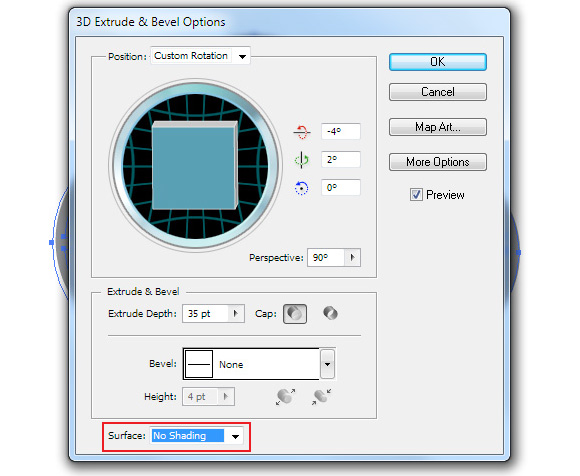
To simplify the process further, choose No Shading for the surface in the 3D Extrude & Bevel Options window.
Step 8
The process of 3D object construction is complete, so let’s continue working with ordinary vector objects; to do so, go to the Object > Expand Appearance…
Now we need to unite objects that belong to one surface. Select such objects with the help of the Direct Selection Tool (A) then click on the Unite in the Pathfinder panel.
Similar actions should be performed on all surfaces if they consist of a couple of objects. Usually I color surface into different colors so I don’t get confused from the big number of objects.

Step 9
Often the objects received from 3D modeling have open paths which may complicate their further processing.
To use the quick closing, use the Close All Paths script.
Step 10
Create a back wall for our book shelf. Select the compound path indicated on the figure below. 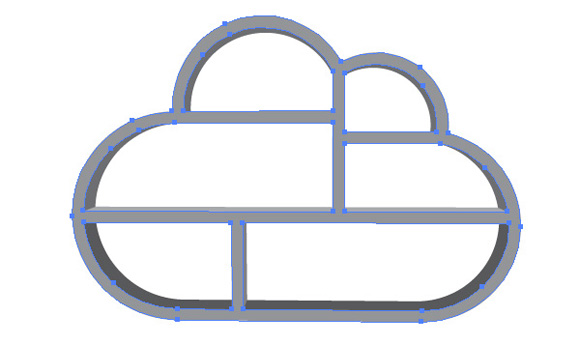
Copy and paste it back (Cmd/Ctrl + C; Cmd/Ctrl + B), then place it below all the created objects (Object > Arrange > Send to Back). Now go to the Object > Compound Path > Release.
Click on the Unite in the Pathfinder panel.
Recolor the back wall into another shade of grey for clarity. As you can see, all the forms of the shelf are ready.

Step 11
Create a wooden vector texture for the shelf. I’ve used a free raster image for it; you can download it on the following websitefreestocktextures.com.
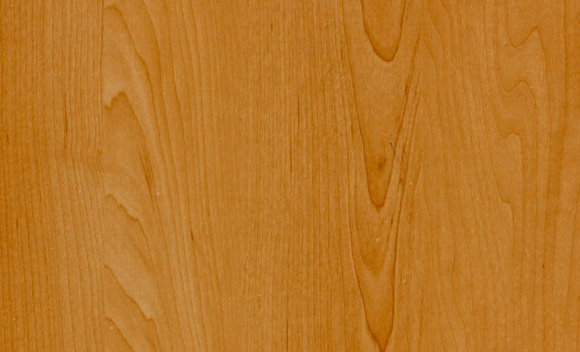
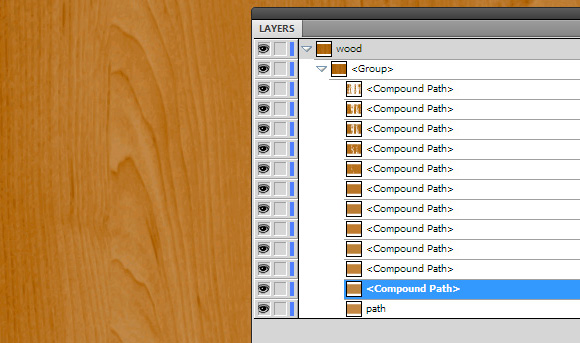
You can turn it into the vector texture by using the Live Trace function in Adobe Illustrator. However, such vector texture will have many colors and points which will increase the size of your file. I prefer to use the free vector software – Inkscape for tracing. And if you want to find out how to trace in the Inscape and about advantages of this method, then you can read about it in my article here. The received vector texture is pasted in illustrator’s document.
TRUNG TÂM TIN HỌC KEY
ĐC: 203-205 Lê Trọng Tấn - Sơn Kỳ - Tân Phú - TPHCM
ĐT: (028) 22 152 521
Địa chỉ: 203 - 205 Lê Trọng Tấn, P. Sơn Kỳ, Q. Tân Phú, TP. HCM.
Điện thoại: (028) 22 152 521
Website: key.com.vn - Email: key@key.com.vn
Địa chỉ: 765-767A (Số mới: 558-560A) Nguyễn Ảnh Thủ, P. Tân Chánh Hiệp, Q. 12, TP. HCM.
Điện thoại: (028) 2242 2244
Website: key.com.vn - Email: key@key.com.vn