là một chương trình vẽ vector, thường được sử dụng để vẽ hình minh hoạ, hoạt hình, biểu đồ, đồ thị. Adobe Illustrator được dùng để thiết kế : như thiết kế những sản phẩm trong ngành thiết kế quảng cáo, thiết kế in ấn, thiết kế logo, thiết kế bản hiệu, thiết kế thời trang, thiết kế thiệp mời, Tạo các sản phẩm tờ rơi, Cataloge, Card Visit, Broucher, Profile,vẽ hoạt hình, tích hợp chuyển động cho Flash...Adobe Illustrator ưu diểm là dễ dàng thay đổi và trao đổi dữ liệu ,kích thước file nhẹ, dễ dàng tương thích với Photoshop, Corel Draw, và hỗ trợ in ấn rất tốt.
Hôm nay, trung tâm TIN HỌC KEY xin giới thiệu đến các bạn một hệ thống bài tập thực hành vẽ các đối tượng trong Adobe illustrator (Ai) (phiên bản tiếng anh, theo: vectips.com) có hướng dẫn chi tiết các bước thực hiện cụ thể để các bạn dễ dàng thực hành theo. Hôm nay chúng ta sẽ học bài12: How to Create a Calculator Icon That Will Rock Your Next App Design. Hy vọng hệ thống bài học này sẽ mang lại cho bạn những kiến thức hữu ích trong quá trình bạn học Adobe illustrator (Ai).
Chúc các bạn thành công!
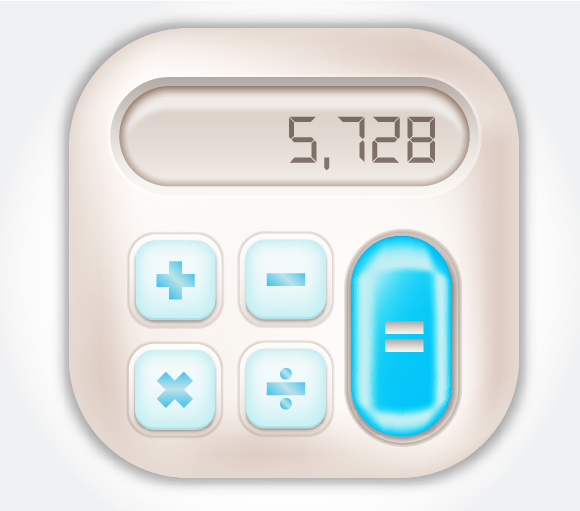
How to Create a Calculator Icon That Will Rock Your Next App Design
Final Image
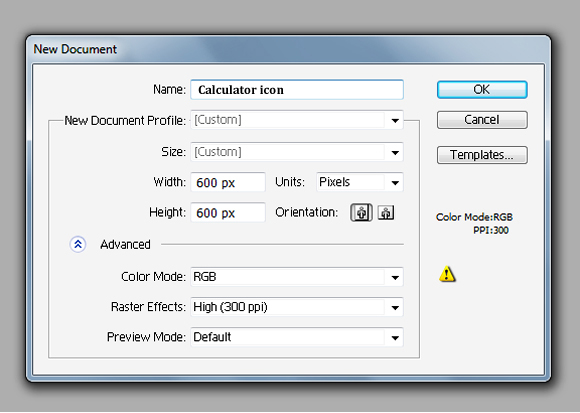
Start Adobe Illustrator, then go to the File > New…. create a new document with size of 600 x 600px, and in the opened dialog box choose RGB color mode.
Step 2
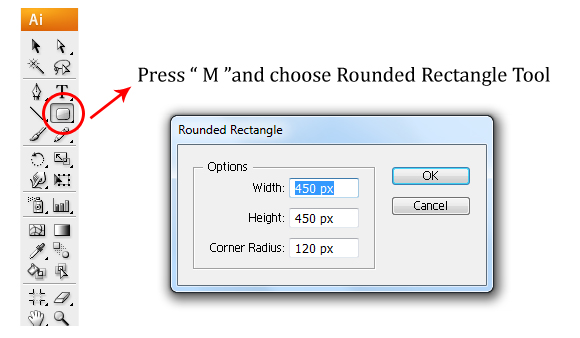
Next we’ll create the main shape of our calculator. Press “ M ” and choose the Rounded Rectangle Tool, set the Width = 450px , Height = 450px and the Corner Radius = 120px. Then using the Color Palette, set the fill color to #B4AAA4 with no stroke.
Step 3
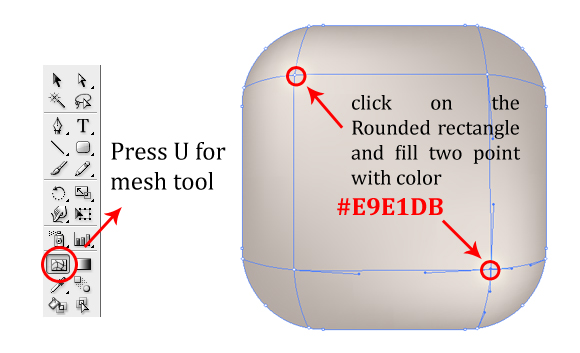
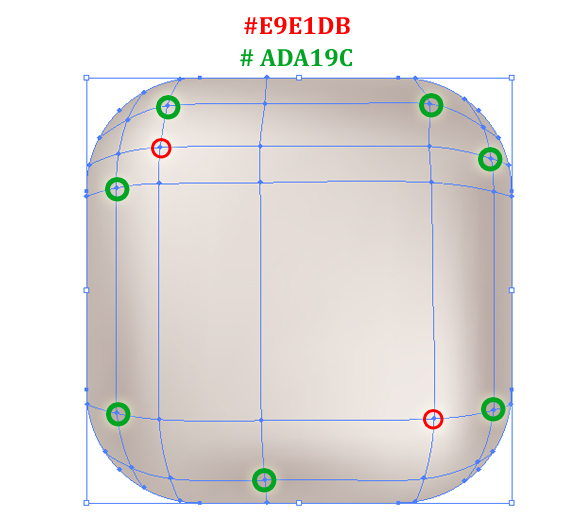
In the Layer Palette, name that layer is ”Body ”. Next, press “ U “ for the Mesh Tool, click on Rounded rectangle and create the mesh, then fill the points with the color #E9E1D1
Continuing with the mesh, click around the Rounded rectangle again, and fill with the color #ADA19C. You can see the effect in the image below.
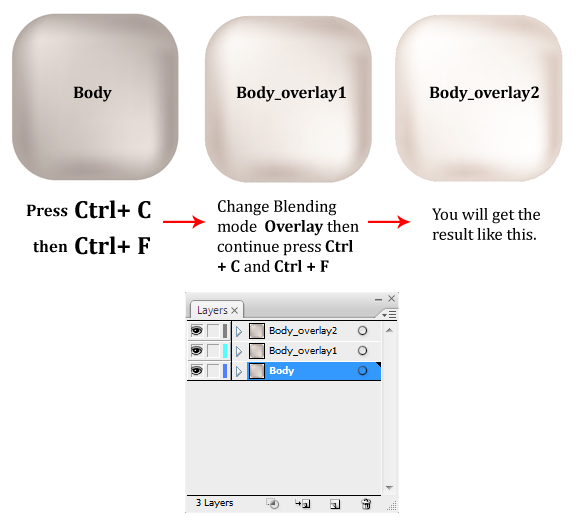
Now we’re almost done with the body. But wait, I want this icon look shiny so we will do a trick. Click on the icon and press Ctrl + C (copy) then Ctrl + F (Paste in front). Using the Appearance Palette, change the Blending mode to Overlay; then repeat these same steps to create an additional Body Layer.
Step 4
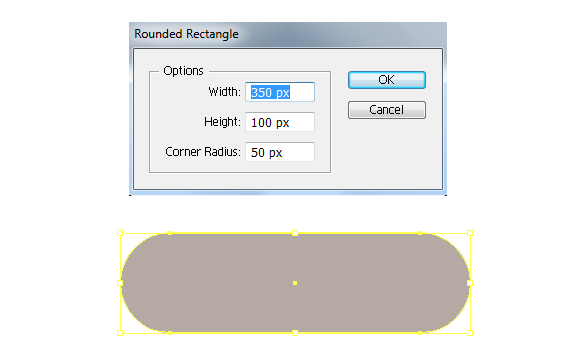
Next, we’ll create another shape, so press “ U “ again to create a new Rounded Rectangle, and set the dimensions to Width = 350px, Height = 100px, Corner Radius = 50px.
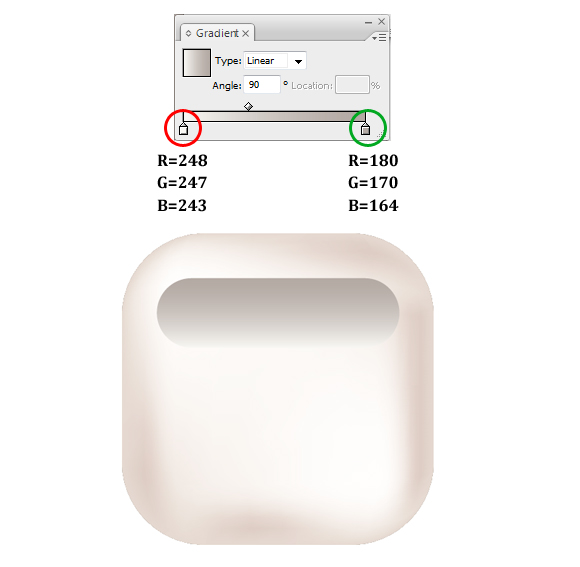
Then using the Gradient Palette, fill it the gradient like the image below.
Step 5
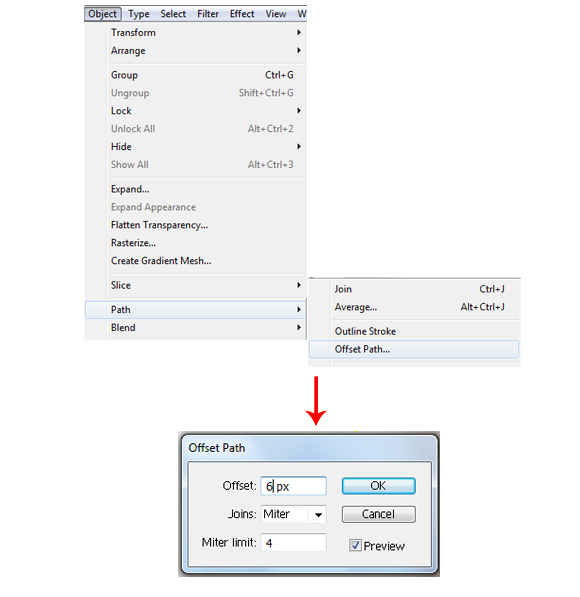
Select the Rounded rectangle that we have just created, click Object > Path > Offset Path.
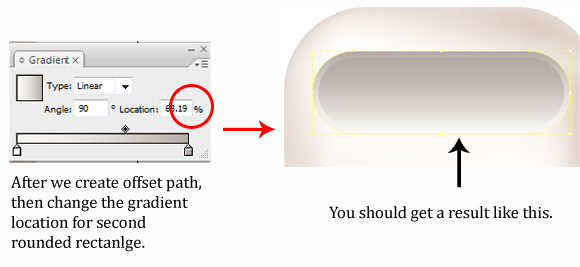
Now we have two rounded rectangles. Again using the Gradient Palette, change the gradient’s location to 69.19% on the second rounded rectangle that we have just created.
Step 6
Next, let’s work with highlights. Click on the second rounded rectangle and repeat step 5 to create a third rounded rectangle.
Using the Appearance Pallete, change the Blending Mode to Overlay and lower the Opacity = 50. Your image should look like the image below.

Step 7
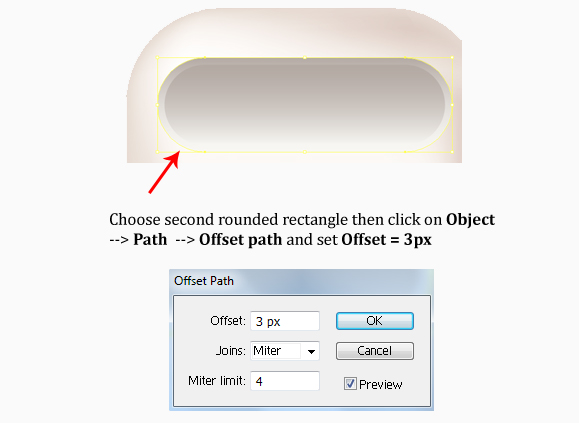
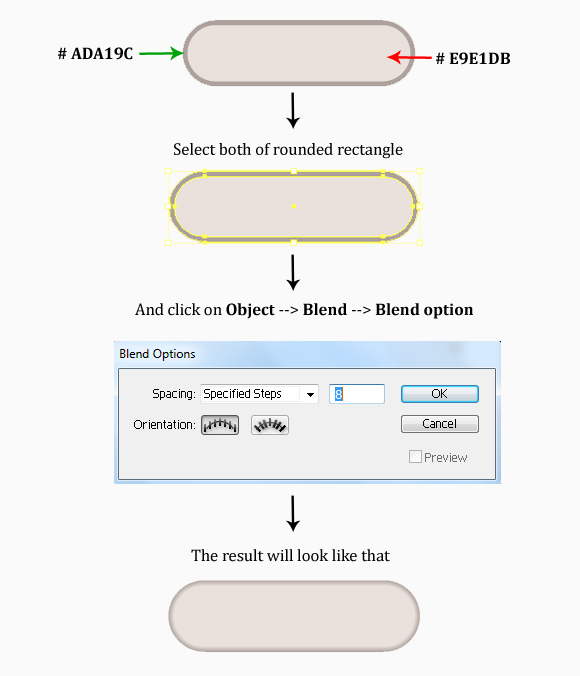
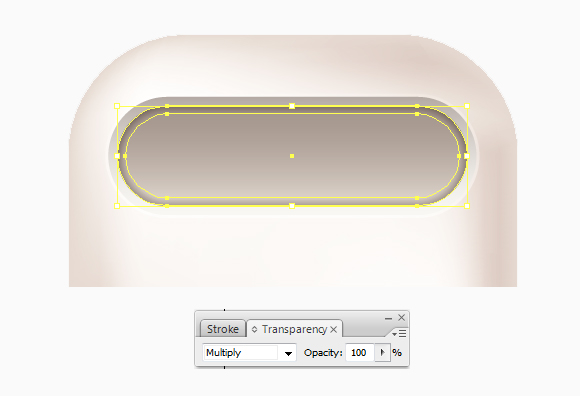
In this step, we’re going to create an inner shadow inside the screen of this calculator icon. Press “ M “ and set Width = 350px, Height = 100px,Corner Radius = 50. Then fill it with the color #ADA19C. Next click on Object > Path > Offset Path and set the Offset = – 8. Fill it with the color#E9E1DB. Select of both rounded rectangle and click on Object > Blend > Blend Options; Set Spacing : Specified Steps = 8 then press OK.
Change the Blending Mode to Multiply using the Appearance Palette.
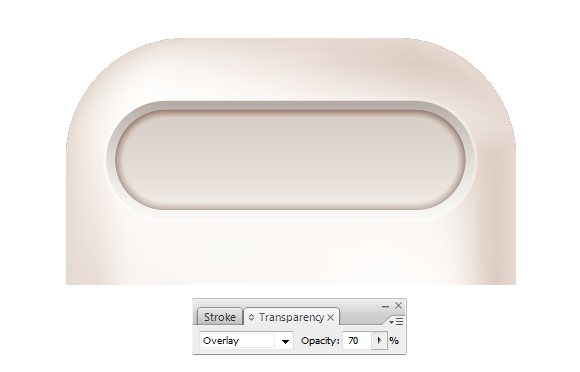
Press Ctrl + C (copy) then Ctrl + F (Paste in front). Using the Appearance Palette, change the Blending mode to Overlay and lower the Opacity to70%.
NHẤP VÀO ĐÂY để xem các bước tiếp theo ....
Trung Tâm TIN HỌC KEY
ĐC: 203-205 Lê Trọng Tấn - Sơn Kỳ - Tân Phú - TP HCM
ĐT: (028) 22 152 521
Địa chỉ: 203 - 205 Lê Trọng Tấn, P. Sơn Kỳ, Q. Tân Phú, TP. HCM.
Điện thoại: (028) 22 152 521
Website: key.com.vn - Email: key@key.com.vn
Địa chỉ: 765-767A (Số mới: 558-560A) Nguyễn Ảnh Thủ, P. Tân Chánh Hiệp, Q. 12, TP. HCM.
Điện thoại: (028) 2242 2244
Website: key.com.vn - Email: key@key.com.vn