How to Create a Polygonal Vector Mosaic That Will Wow Any Crowd
là một chương trình vẽ vector, thường được sử dụng để vẽ hình minh hoạ, hoạt hình, biểu đồ, đồ thị. Adobe Illustrator được dùng để thiết kế : như thiết kế những sản phẩm trong ngành thiết kế quảng cáo, thiết kế in ấn, thiết kế logo, thiết kế bản hiệu, thiết kế thời trang, thiết kế thiệp mời, Tạo các sản phẩm tờ rơi, Cataloge, Card Visit, Broucher, Profile,vẽ hoạt hình, tích hợp chuyển động cho Flash...Adobe Illustrator ưu diểm là dễ dàng thay đổi và trao đổi dữ liệu, kích thước file nhẹ, dễ dàng tương thích với Photoshop, Corel Draw, và hỗ trợ in ấn rất tốt.
Hôm nay, trung tâm TIN HỌC KEY xin giới thiệu đến các bạn một hệ thống bài tập thực hành vẽ các đối tượng trong Adobe illustrator (Ai) (phiên bản tiếng anh, theo: vectips.com) có hướng dẫn chi tiết các bước thực hiện cụ thể để các bạn dễ dàng thực hành theo. Hôm nay chúng ta sẽ học bài 17: How to Create a Polygonal Vector Mosaic That Will Wow Any Crowd. Hy vọng hệ thống bài học này sẽ mang lại cho bạn những kiến thức hữu ích trong quá trình bạn học Adobe illustrator (Ai).
Chúc các bạn thành công!
How to Create a Polygonal Vector Mosaic That Will Wow Any Crowd
Step 1
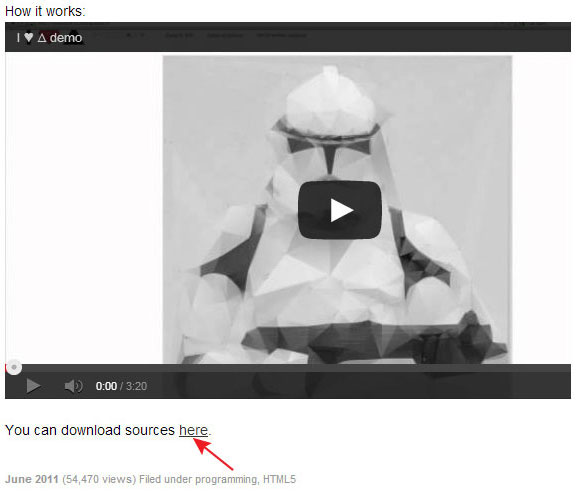
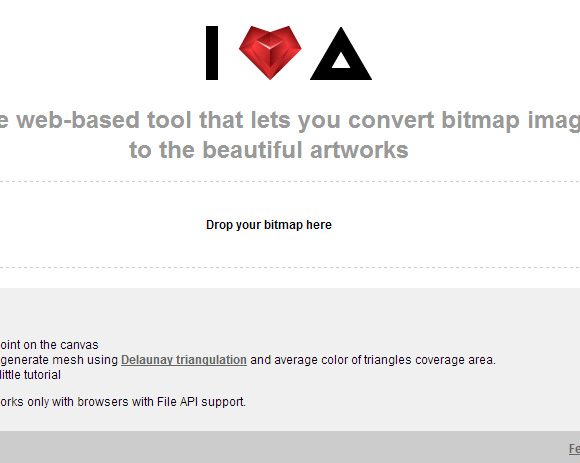
For this tutorial, we need a web-based tool, which is called Triangulator that lets us convert bitmap images to vector art. Follow the link above, scroll to the bottom left, and click on the text link to download the tool on your computer.
Step 2
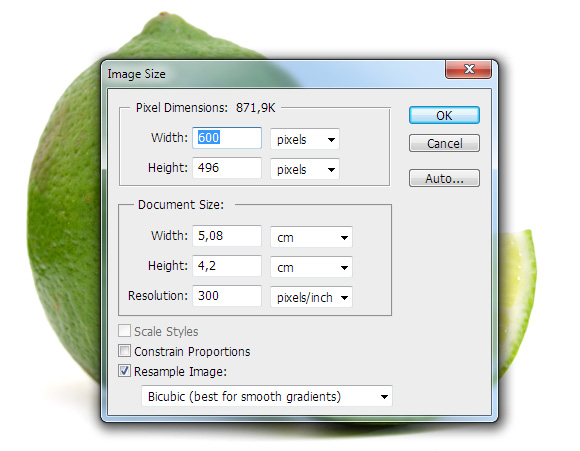
Now we need a raster image that we’ll convert into vector. Triangulator works with all widely-spread image formats (GIF, JPG, PNG8 and PNG24). I’ll use the Fresh ripe lime from Shutterstock. Of course, you can use any other image. Reduce the size of the image in any raster editor, for example, in Photoshop if its size is too big. I think for convenient operation, the width of the image should be between 600-800px. The quality of the image is not significant.
Step 3
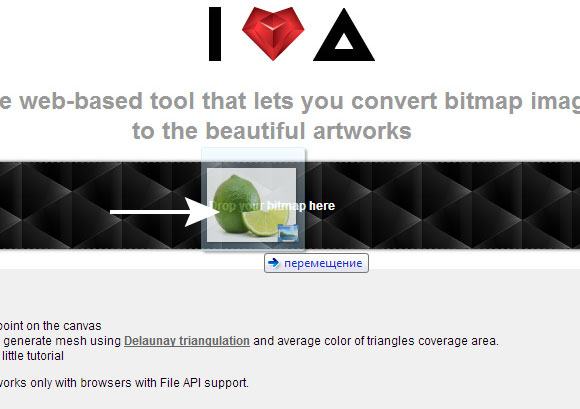
Drag your image to the drop zone as indicated in the picture below.

Step 4
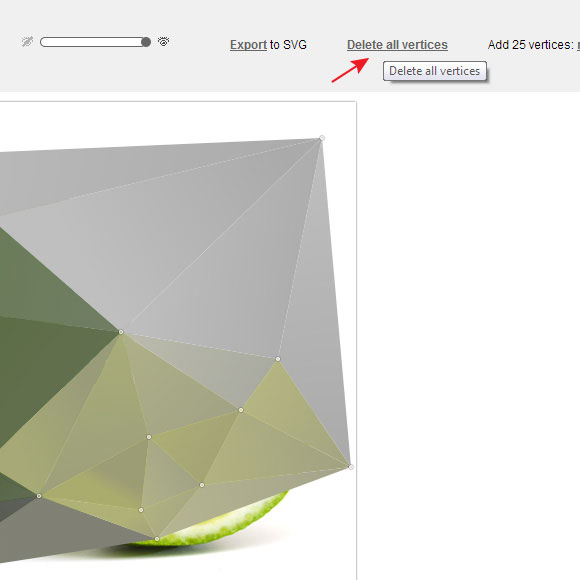
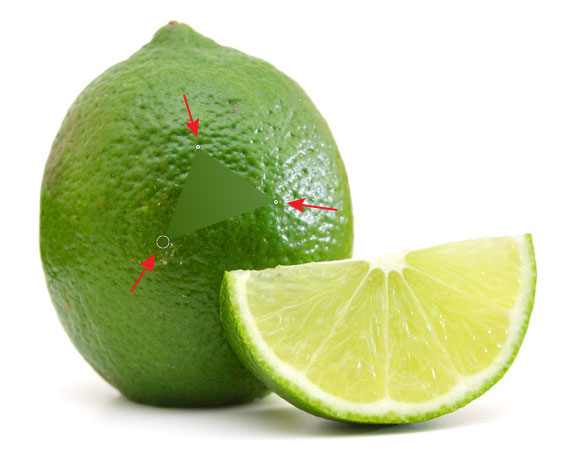
To create polygons, click on different places of our image. Sometimes, for reasons unknown to me, this cannot be done from the first time. In this case, click on Randomly in the upper panel.

Step 5
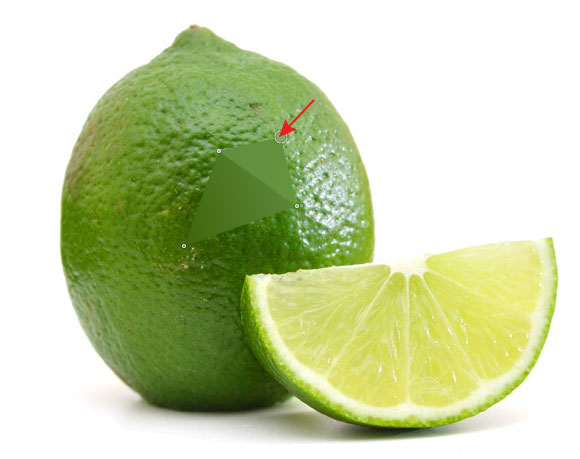
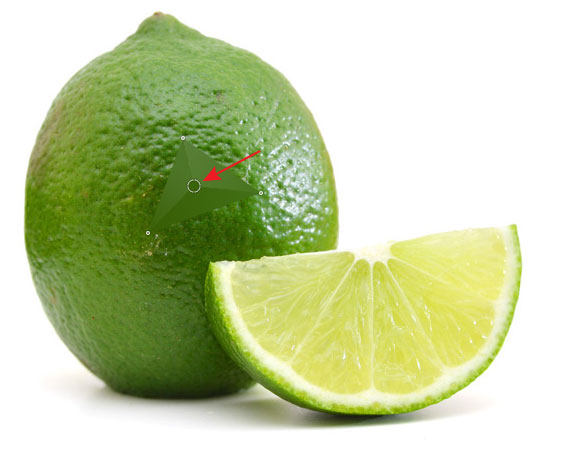
The click on a new point creates a new polygon or separates the existent one if the click was done inside it.
Step 6
I think that vertices of polygons should be placed on the borders of the object forms and on the borders of color. Try to emphasize the structure using the forms of the polygons themselves. I cannot say that it is an easy task, but with a little experimentation, you’ll learn how to do it.
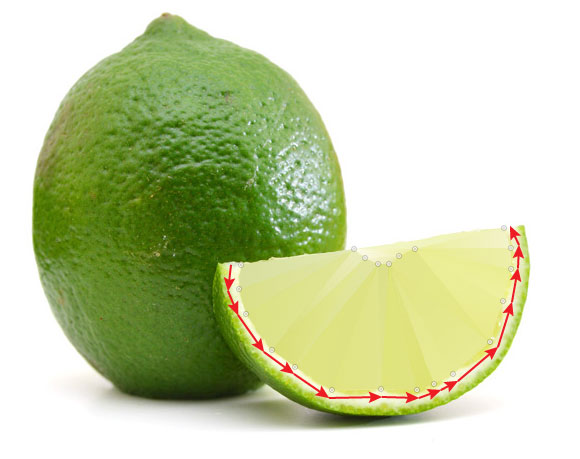
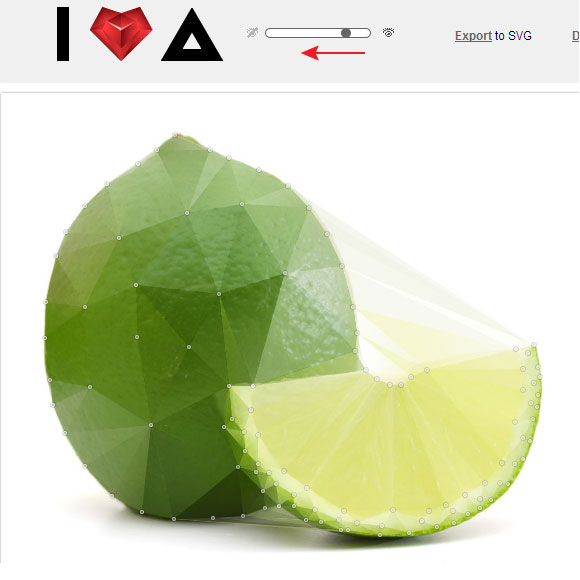
Step 7
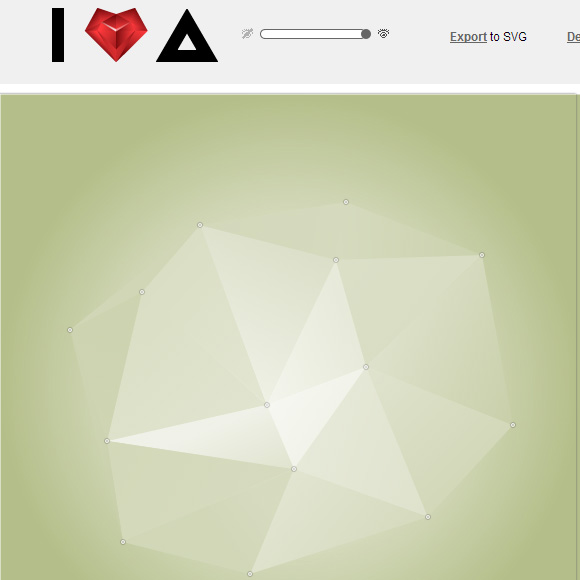
Soon the most part of the image will be hidden by the mosaic, and it will be difficult to understand where to put the next point. In this case, we can reduce the opacity of all polygons by shifting the left slider on the upper panel.
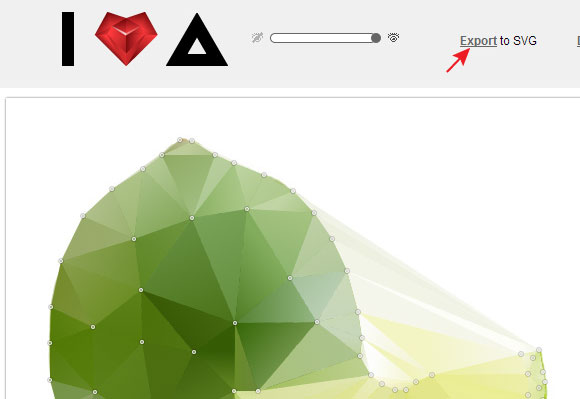
Step 8
Once mosaics from polygons have been created, click Export.
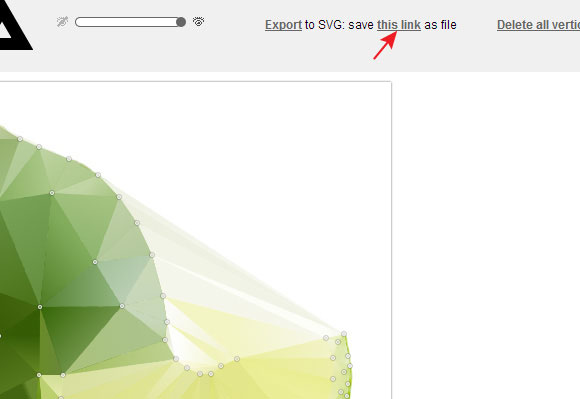
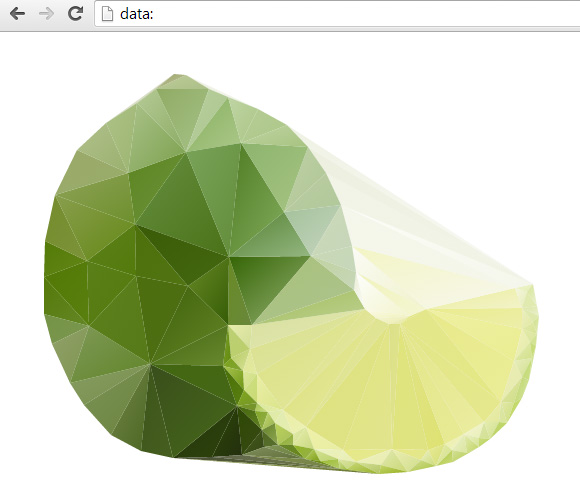
Step 9
Click on the mosaic with the right mouse button, then choose Save as… in the opened context menu.
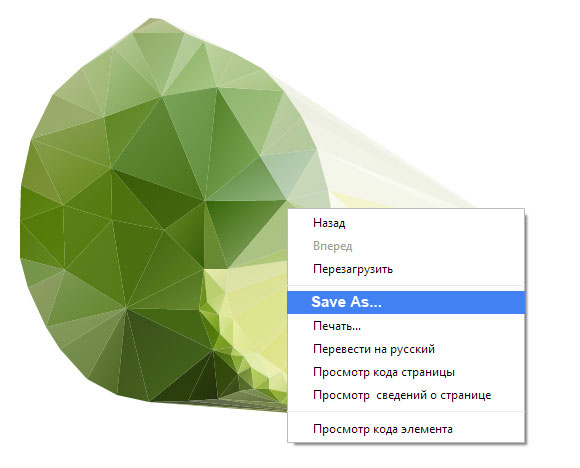
Step 10
Open the file in Adobe Illustrator. As you can see, the mosaic represents regular vector objects which are filled with linear gradients.
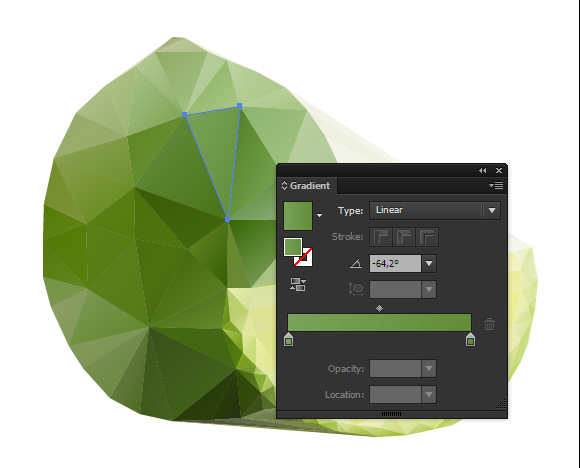
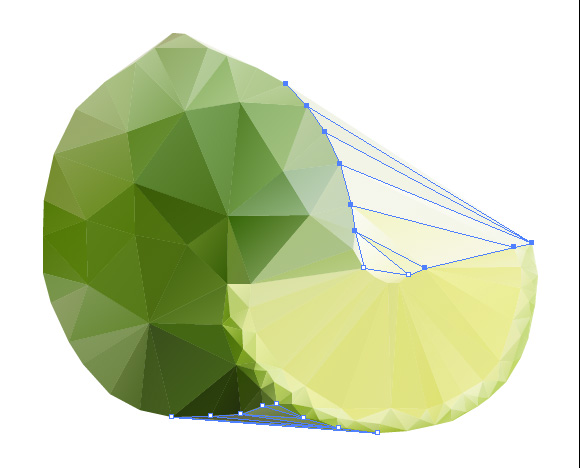
Step 11
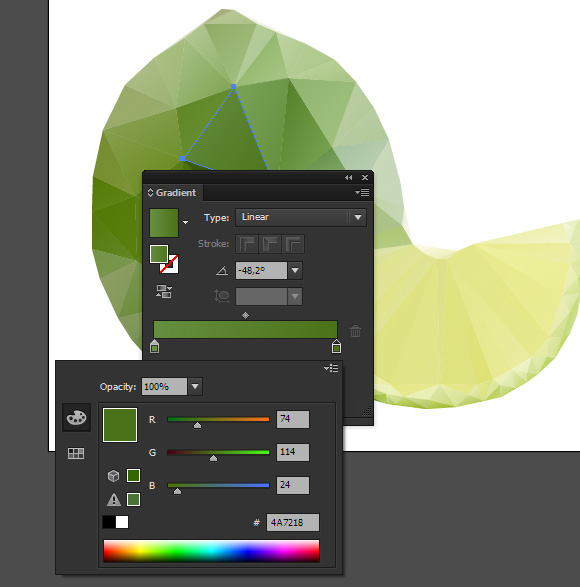
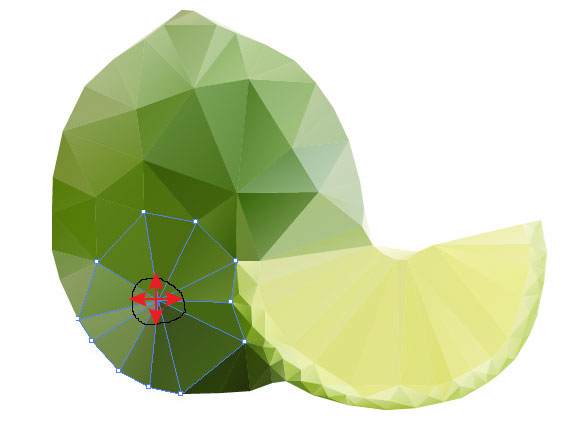
Because of the vector format of images, we can, if necessary, change the colors of the linear gradients a little and the location of vertices. To modify the color, click twice on the slider in the Gradient panel which opens the Color panel.
Step 12
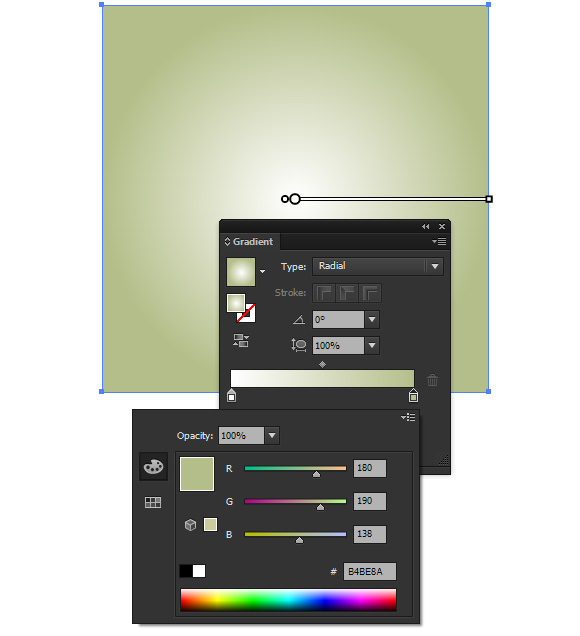
Let’s start creating the background. Draw a rectangle with the help of the Rectangle Tool (M). The size of the rectangle should correspond to the size of the artboard. Fill this object with a radiant gradient from white to light-green.
Step 13
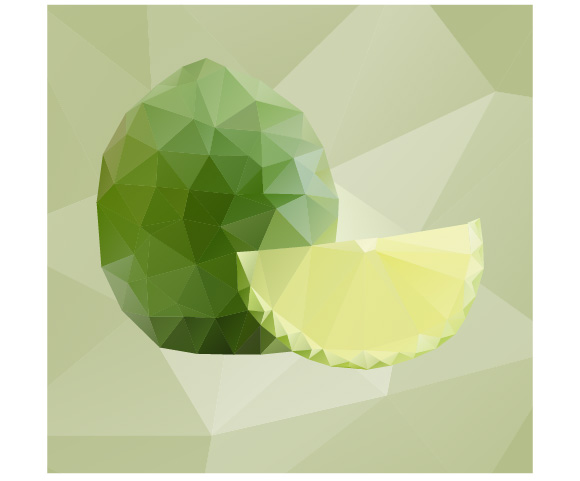
Drag the file with the raster background into Triangulator, then create a mosaic the same way we did it with the lime.
Step 14
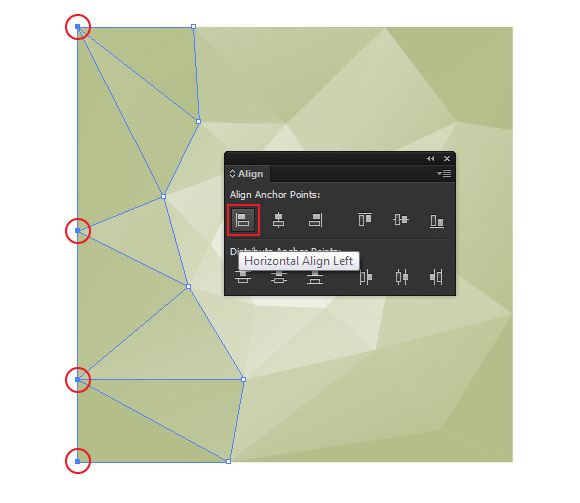
Easily align the uneven edges in the background with the help of Align panel, then group all its objects (Cmd/Ctrl + G).
Step 15
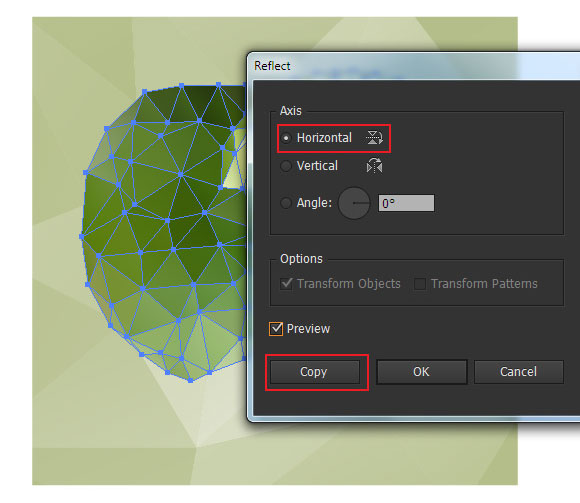
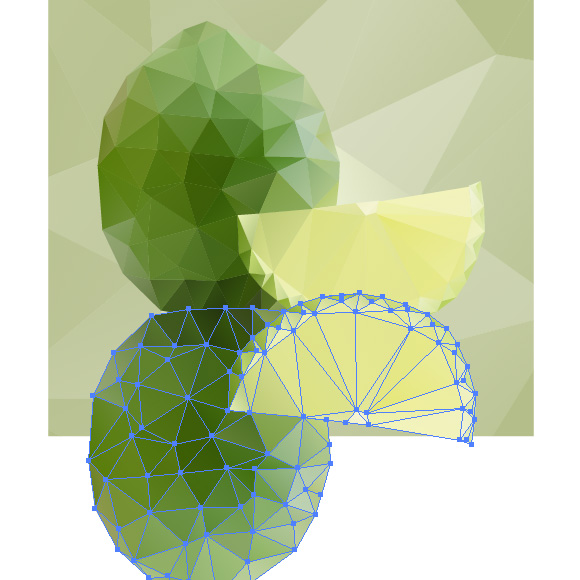
Let’s create a reflection. Select all the lime objects, then go to the Object > Transform > Reflect…. In the opened dialog box, choose the Horizontal Axis and click the Copy button.
Step 16
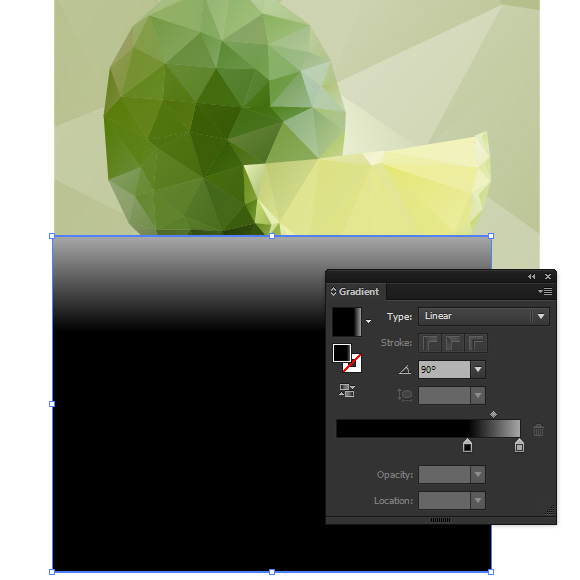
With the help of the Rectangle Tool (M), create a rectangle which will cover all of the lime’s reflection. Fill this rectangle with vertical linear gradient from grey to black.
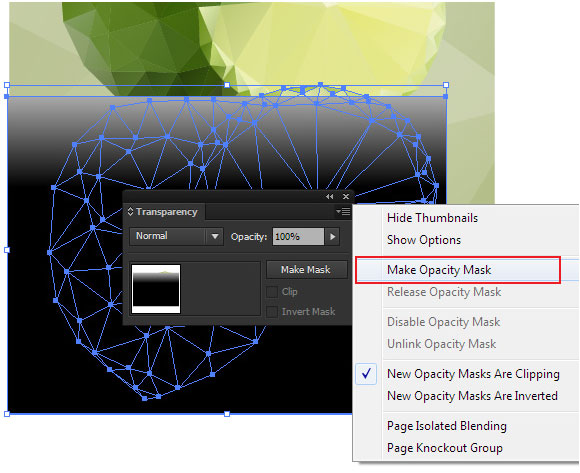
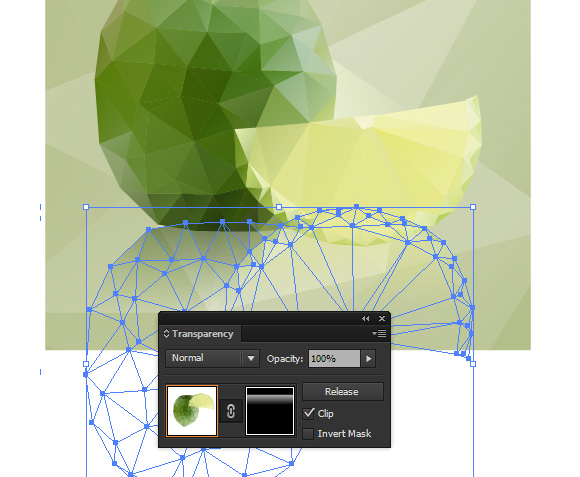
Place the Opacity Mask below the lime’s objects by shifting it down in the Layers panel.
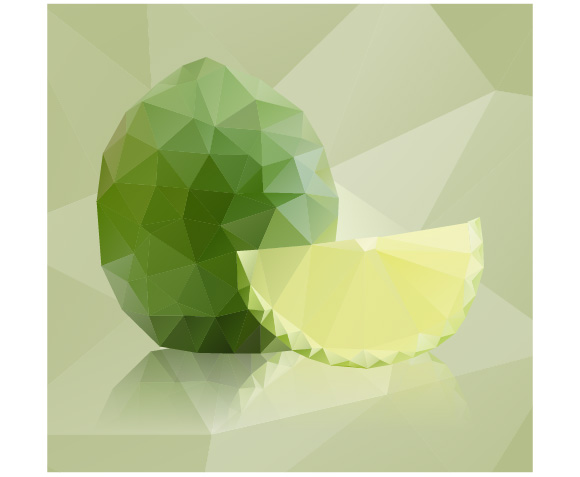
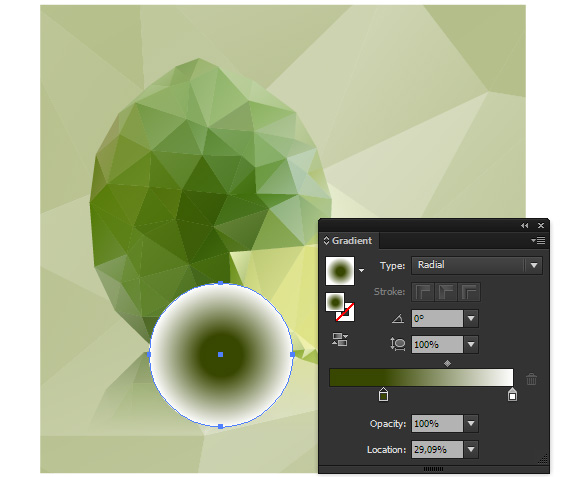
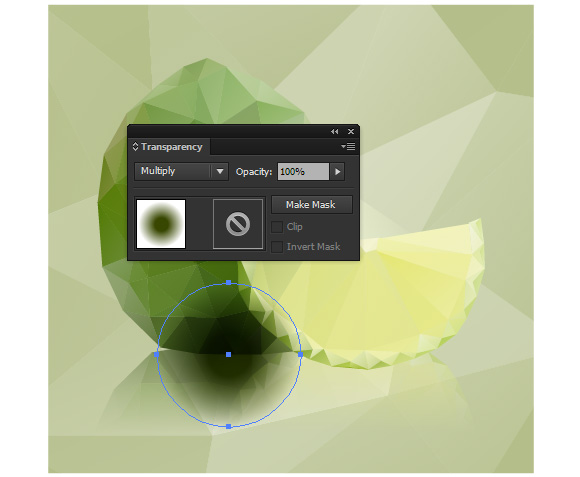
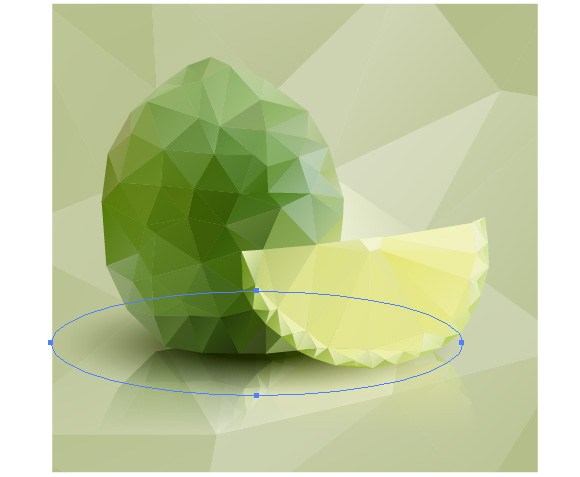
Create a drop shadow. Draw a circle with the help of the Ellipse Tool (L), and fill it with radiant gradient from dark-grey to white.

Nếu bạn có nhu cầu học khóa học Adobe illustrator (Ai) vui lòng NHẤP VÀO ĐÂY để xem chi tiết về khóa học hoặc NHẤP VÀO ĐÂY để gửi thắc mắc về khóa học của bạn cho chúng tôi.
Những bài viết có nội dung liên quan khác:
Phím tắt trong phần mềm Illustrator (AI)
Giáo trình illustrator cs6 tiếng việt
Hệ thống bài học Adobe illustrator (Ai) (tiếng Việt) có hướng dẫn chi tiết - Bài 1
Hệ thống bài học Adobe illustrator (Ai) có hướng dẫn chi tiết - Bài 1 (Phiên bản gốc)
Hệ thống bài học Adobe illustrator (Ai) có hướng dẫn chi tiết - Bài 2 (Phiên bản gốc)
Hệ thống bài học Adobe illustrator (Ai) có hướng dẫn chi tiết - Bài 3 (Phiên bản gốc)
Hệ thống bài học Adobe illustrator (Ai) có hướng dẫn chi tiết - Bài 4 (Phiên bản gốc)
Hệ thống bài học Adobe illustrator (Ai) có hướng dẫn chi tiết - Bài 5 (Phiên bản gốc)
Hệ thống bài học Adobe illustrator (Ai) có hướng dẫn chi tiết - Bài 6 (Phiên bản gốc) Phần 1
Hệ thống bài học Adobe illustrator (Ai) có hướng dẫn chi tiết - Bài 6 (Phiên bản gốc) Phần 2
Hệ thống bài học Adobe illustrator (Ai) có hướng dẫn chi tiết - Bài 7 (Phiên bản gốc)
Hệ thống bài học Adobe illustrator (Ai) có hướng dẫn chi tiết - Bài 8 (Phiên bản gốc)
Hệ thống bài học Adobe illustrator (Ai) có hướng dẫn chi tiết - Bài 9 (Phiên bản gốc)
Hệ thống bài học Adobe illustrator (Ai) có hướng dẫn chi tiết - Bài 10 (Phiên bản gốc) Phần 1
Hệ thống bài học Adobe illustrator (Ai) có hướng dẫn chi tiết - Bài 10 (Phiên bản gốc) Phần 2
Hệ thống bài học Adobe illustrator (Ai) có hướng dẫn chi tiết - Bài 11 (Phiên bản gốc)
Hệ thống bài học Adobe illustrator (Ai) có hướng dẫn chi tiết - Bài 12 (Phiên bản gốc) Phần 1
Hệ thống bài học Adobe illustrator (Ai) có hướng dẫn chi tiết - Bài 12 (Phiên bản gốc) Phần 2
Hệ thống bài học Adobe illustrator (Ai) có hướng dẫn chi tiết - Bài 13 (Phiên bản gốc) Phần 1
Hệ thống bài học Adobe illustrator (Ai) có hướng dẫn chi tiết - Bài 13 (Phiên bản gốc) Phần 2
Hệ thống bài học Adobe illustrator (Ai) có hướng dẫn chi tiết - Bài 14 (Phiên bản gốc) Phần 1
Hệ thống bài học Adobe illustrator (Ai) có hướng dẫn chi tiết - Bài 14 (Phiên bản gốc) Phần 2
Hệ thống bài học Adobe illustrator (Ai) có hướng dẫn chi tiết - Bài 15 (Phiên bản gốc)
Hệ thống bài học Adobe illustrator (Ai) có hướng dẫn chi tiết - Bài 16 (Phiên bản gốc)
Trung tâm TIN HỌC KEY
ĐC : 203-205 Lê Trọng Tấn – Sơn Kỳ - Tân Phú – TPHCM
ĐT : (028) 22 152 521
Web : key.com.vn
