NHẤP VÀO ĐÂY để xem các bước trước đó .....
Step 12
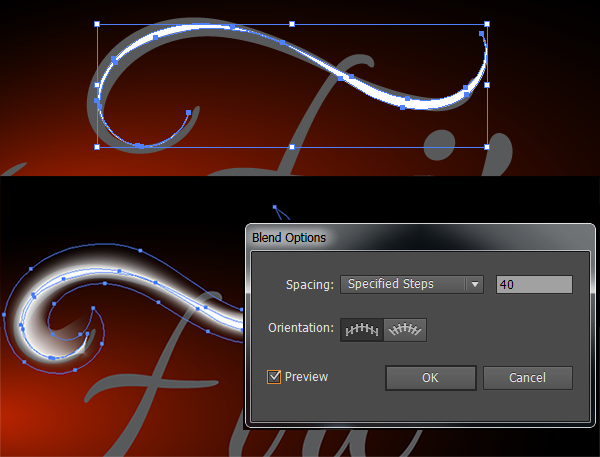
Moving along to the top of the F, set the blend at 40 steps. The wider the margin between the interior and exterior shapes within the blend, the more steps are needed to keep it smooth and gradient-like. Otherwise, it’ll be very obvious that it’s essentially multiple shapes layered on top of each other at varying levels of transparency.
Step 13
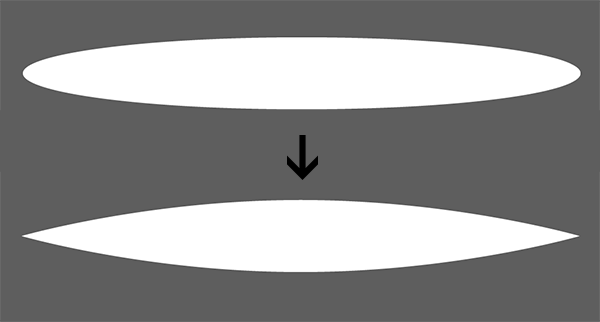
Another method of designing the fiery shape and paths for this text treatment involves creating a simply custom art brush. Start with the Ellipse Tool (L) and create a long, horizontal ellipse. Use the Convert Anchor Point Tool (Shift-C) on the right and left anchor points of the ellipse to bring them to points (rather than remain rounded).
Step 14
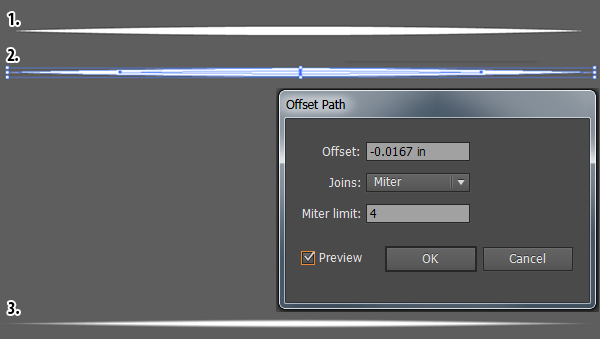
Use the Scale Tool (S) to squish the ellipse down so it’s thin. Much like the blending technique from above, select the ellipse and go to Object > Path > Offset Path…. Offset the ellipse by 1-2px (make sure its negative, as you want the new shape to be smaller). Reduce the opacity of the larger shape to 0% and use the Blend Tool to create a smooth blend between the tool (again just like Steps 3-5).
Step 15
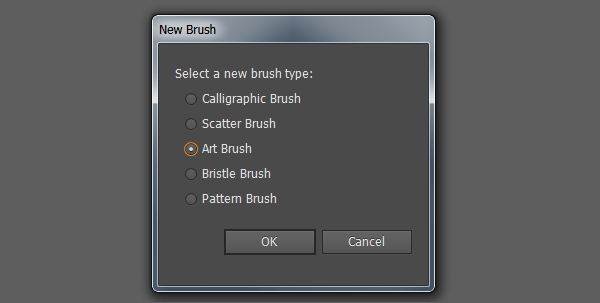
Select the newly blended shape, and in the Brushes panel, hit New Brush in the panel’s options. Choose Art Brush from the list and hit OK.
Step 16
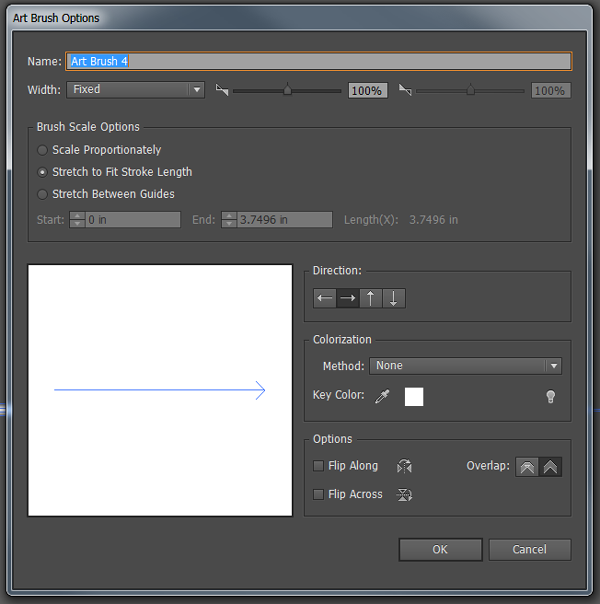
This brush is fairly simple, so the default options seen below will work just fine. Make sure the Direction of the brush is going to the right.
Step 17
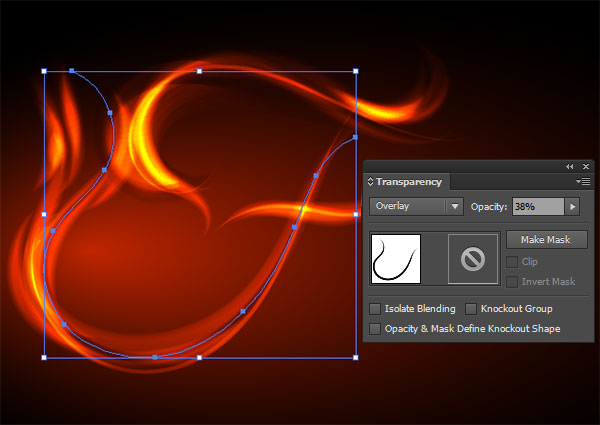
With your new brush selected, draw on top of your text with the Paintbrush Tool (B). Make sure to set each stroke to Overlay or Color Dodge in theTransparency panel.

Step 18
Adjust the stroke width in the Strokes panel to your liking. You can also adjust the stroke with the Width Tool (Shift-W) in case you don’t have a pressure sensitive tablet.

Step 19
Continue layering white blended shapes and strokes (with the new brush) so your fiery shapes burn bright.

Step 20
You can also create a black version of the art brush from Steps 13-16 that is set to Overlay or Color Burn in order to give your fire some depth by creating shadowed components. Adjust the Opacity of each stroke to your liking as well, as you want the fire shapes and paths to be gradual changes between their layers.
Step 21
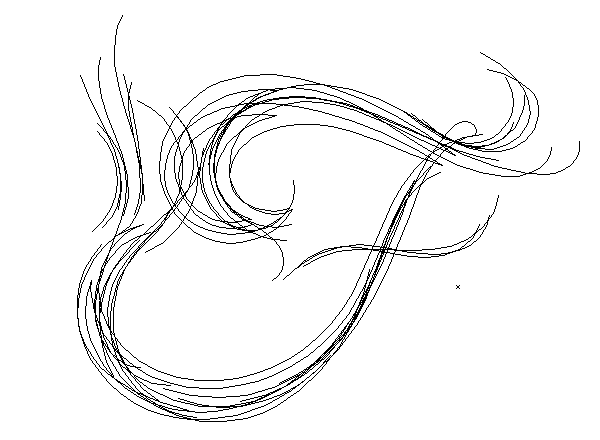
Alternatively, you could use only brush strokes for the fire look. Seen below for the F in Outline Preview Mode. This makes smaller shapes overall, but also requires more layers in order to cover larger spaces and create brighter spots of fire.
Step 22
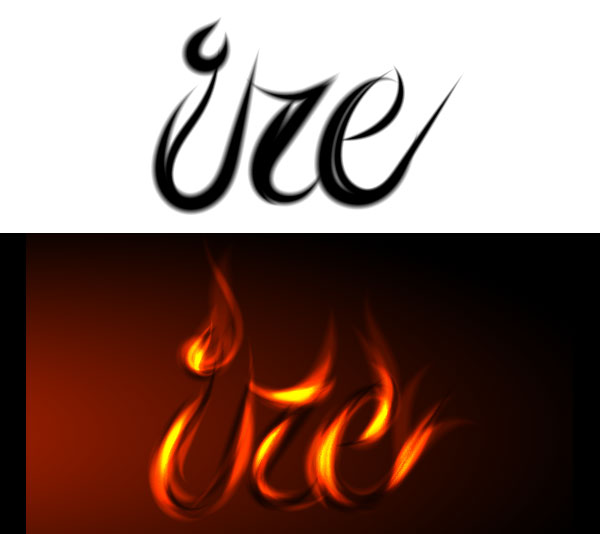
Continue using the font from Step 1 for drawing strokes and blended shapes of fire for the rest of your text. I suggest layering black shapes (set toOverlay) underneath white pieces (set to Overlay or Color Dodge). As you create bits of “fire,” consider the direction of your flames and how you wish for your pieces to appear to be burning. In this case, they’re pulling upwards and largely to the right of the picture plane. I’ve also concentrated most of the bright layers on the curves of each letter.
Step 23
If you change the color of your background gradient, you’ll change the color of your entire piece. This can lend to creating smoke-like letters, blue fire or assorted rainbow gradients of fiery words.

Group together your letters when you’re satisfied with your text, and prepare your file for whatever use you may have for flaming text.

Nếu bạn có nhu cầu học khóa học Adobe illustrator (Ai) vui lòng NHẤP VÀO ĐÂY để xem chi tiết về khóa học hoặc NHẤP VÀO ĐÂY để gửi thắc mắc về khóa học của bạn cho chúng tôi.
Những bài viết có nội dung liên quan khác:
Phím tắt trong phần mềm Illustrator (AI)
Giáo trình illustrator cs6 tiếng việt
Hệ thống bài học Adobe illustrator (Ai) (tiếng Việt) có hướng dẫn chi tiết - Bài 1
Hệ thống bài học Adobe illustrator (Ai) có hướng dẫn chi tiết - Bài 1 (Phiên bản gốc)
Hệ thống bài học Adobe illustrator (Ai) có hướng dẫn chi tiết - Bài 2 (Phiên bản gốc)
Hệ thống bài học Adobe illustrator (Ai) có hướng dẫn chi tiết - Bài 3 (Phiên bản gốc)
Hệ thống bài học Adobe illustrator (Ai) có hướng dẫn chi tiết - Bài 4 (Phiên bản gốc)
Hệ thống bài học Adobe illustrator (Ai) có hướng dẫn chi tiết - Bài 5 (Phiên bản gốc)
Hệ thống bài học Adobe illustrator (Ai) có hướng dẫn chi tiết - Bài 6 (Phiên bản gốc) Phần 1
Hệ thống bài học Adobe illustrator (Ai) có hướng dẫn chi tiết - Bài 6 (Phiên bản gốc) Phần 2
Hệ thống bài học Adobe illustrator (Ai) có hướng dẫn chi tiết - Bài 7 (Phiên bản gốc)
Hệ thống bài học Adobe illustrator (Ai) có hướng dẫn chi tiết - Bài 8 (Phiên bản gốc)
Hệ thống bài học Adobe illustrator (Ai) có hướng dẫn chi tiết - Bài 9 (Phiên bản gốc)
Hệ thống bài học Adobe illustrator (Ai) có hướng dẫn chi tiết - Bài 10 (Phiên bản gốc) Phần 1
Hệ thống bài học Adobe illustrator (Ai) có hướng dẫn chi tiết - Bài 10 (Phiên bản gốc) Phần 2
Hệ thống bài học Adobe illustrator (Ai) có hướng dẫn chi tiết - Bài 11 (Phiên bản gốc)
Hệ thống bài học Adobe illustrator (Ai) có hướng dẫn chi tiết - Bài 12 (Phiên bản gốc) Phần 1
Hệ thống bài học Adobe illustrator (Ai) có hướng dẫn chi tiết - Bài 12 (Phiên bản gốc) Phần 2
Hệ thống bài học Adobe illustrator (Ai) có hướng dẫn chi tiết - Bài 13 (Phiên bản gốc) Phần 1
Hệ thống bài học Adobe illustrator (Ai) có hướng dẫn chi tiết - Bài 13 (Phiên bản gốc) Phần 2
Hệ thống bài học Adobe illustrator (Ai) có hướng dẫn chi tiết - Bài 14 (Phiên bản gốc) Phần 1
Trung tâm TIN HỌC KEY
ĐC : 203-205 Lê Trọng Tấn – Sơn Kỳ - Tân Phú – TPHCM
ĐT : (028) 22 152 521
Web : key.com.vn
