là một chương trình vẽ vector, thường được sử dụng để vẽ hình minh hoạ, hoạt hình, biểu đồ, đồ thị. Adobe Illustrator được dùng để thiết kế : như thiết kế những sản phẩm trong ngành thiết kế quảng cáo, thiết kế in ấn, thiết kế logo, thiết kế bản hiệu, thiết kế thời trang, thiết kế thiệp mời, Tạo các sản phẩm tờ rơi, Cataloge, Card Visit, Broucher, Profile,vẽ hoạt hình, tích hợp chuyển động cho Flash...Adobe Illustrator ưu diểm là dễ dàng thay đổi và trao đổi dữ liệu ,kích thước file nhẹ, dễ dàng tương thích với Photoshop, Corel Draw, và hỗ trợ in ấn rất tốt.
Hôm nay, trung tâm TIN HỌC KEY xin giới thiệu đến các bạn một hệ thống bài tập thực hành vẽ các đối tượng trong Adobe illustrator (Ai) (phiên bản tiếng anh, theo: vectips.com) có hướng dẫn chi tiết các bước thực hiện cụ thể để các bạn dễ dàng thực hành theo. Hôm nay chúng ta sẽ học bài 8: Create Your Own Realistic Leather Texture!. Hy vọng hệ thống bài học này sẽ mang lại cho bạn những kiến thức hữu ích trong quá trình bạn học Adobe illustrator (Ai).
Chúc các bạn thành công!
Final Image

Step 1
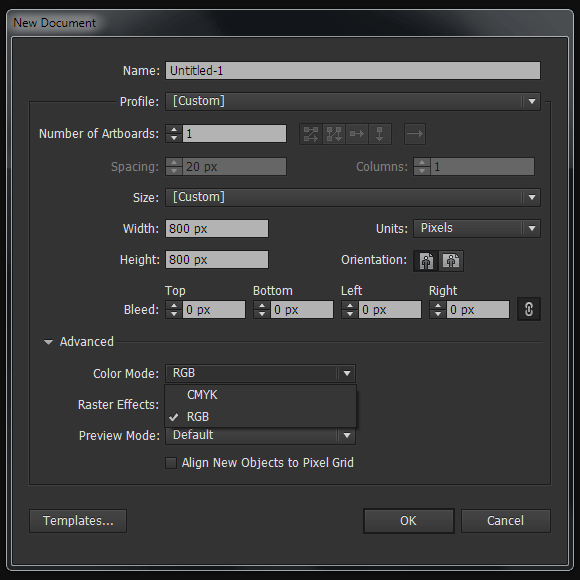
Open Adobe Illustrator and create a new document (Cmd/Ctrl + N). Your artboard can be any size. The leather texture we’ll create will work equally well in the RGB and in the CMYK color modes, even though I worked in the RGB mode.
Step 2
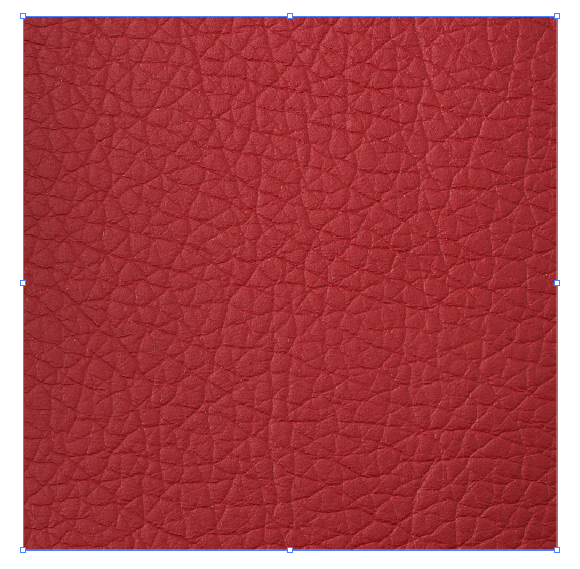
I used red leather texture from Shutterstock as our reference image. Place the image into current document (File > Place…)
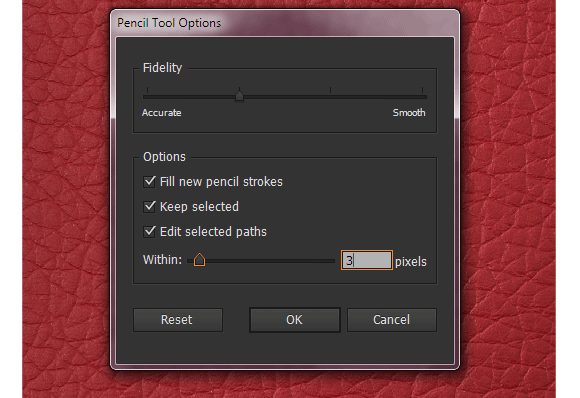
The elements of our leather texture will be created with the help of Pencil Tool (N). The settings of this tool are indicated on the figure below. To open the dialog box of the Pencil Tool Options, click twice on the Pencil Tool icon on the Tools panel.
Step 3
Based on the raster image, create patches of leather between folds with the help of the Pencil Tool (N). Choose brown (R= 110, G= 49, B= 0) as the color of background. To create such objects I used a graphic tablet, which speeds up the work process.
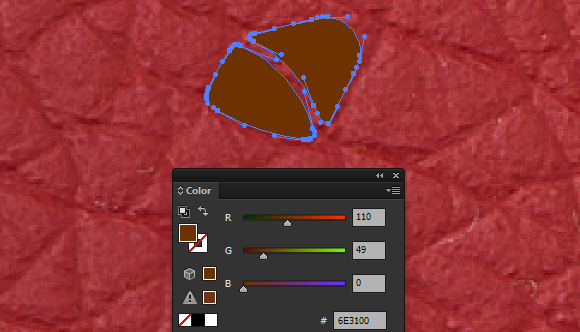
There is no need to create such elements above the entire raster texture. It is enough to recreate a small patch as it is indicated on the figure below.
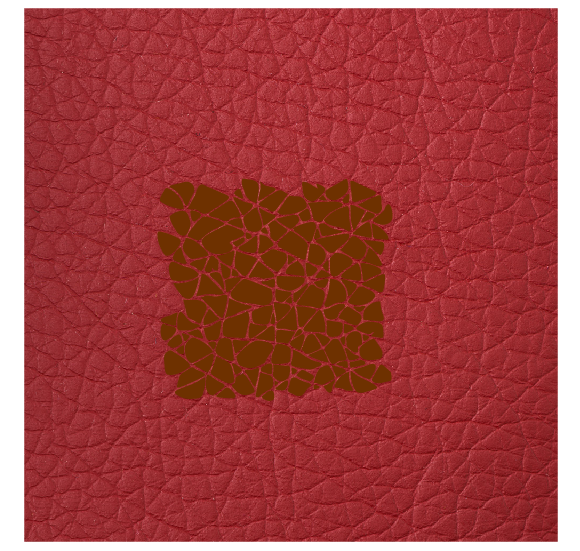
And now raster texture of leather can be deleted.
Step 4
Select all the created objects, then go to the Object > Pattern > Make which switches to Pattern Editing mode.
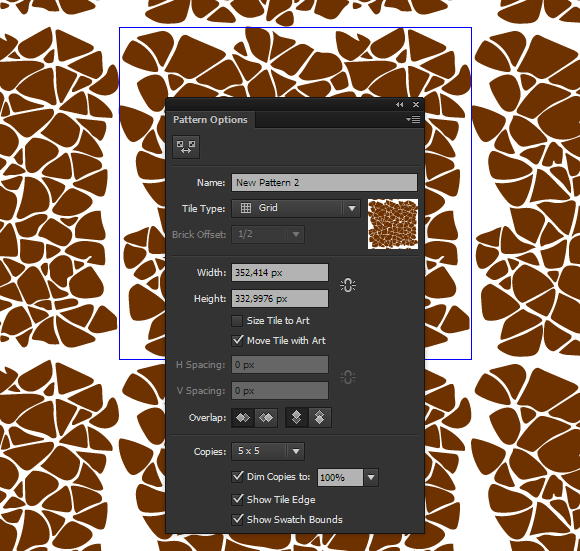
With the help of the Pencil Tool (N) fill empty spaces with new objects trying not to disturb the uniformity of texture.
Step 5
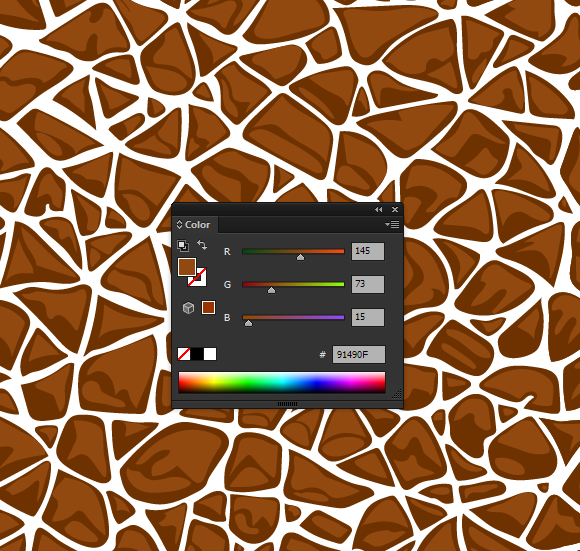
On each skin flake create objects of any form with a brown fill (R= 145, G= 73, B= 15). These objects are created with the help of the Pencil Tool (N) and cover most of the area of skin flakes.
Step 6
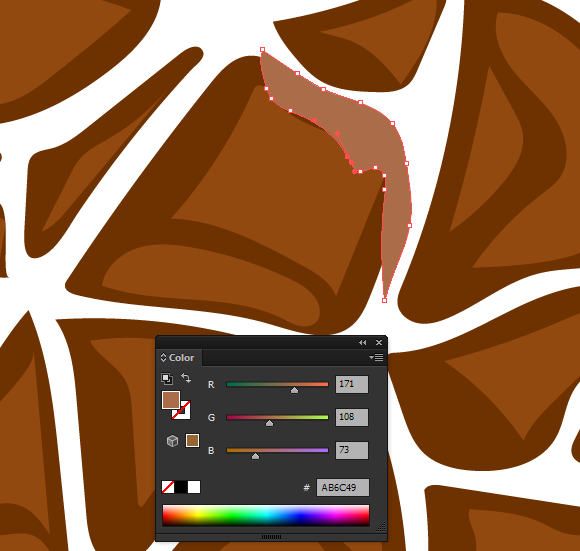
Now we’ll create highlight on skin flakes. Such objects can be created with the help of the Pencil Tool (N) and should be placed in the right upper corner of each flake. In this case we consider that the light source is located at the top right. Choose light-brown (R= 171, G= 108, B= 73) for the fill. Borders of highlight extend the borders of flakes. Extra parts of highlights will be deleted in the next step.
Step 7
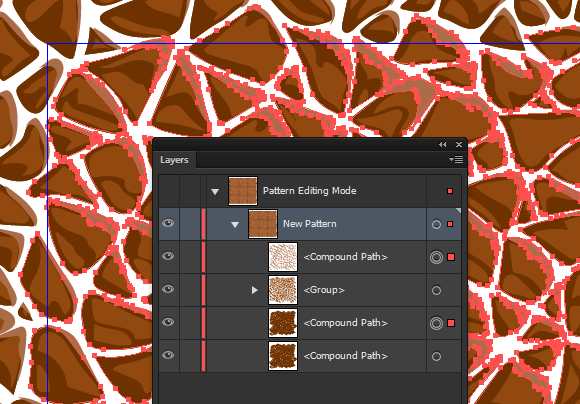
Select one of the dark-brown object, then go the Select > Same > Fill Color. And now go to the Object > Compound Path > Make or use Cmd/Ctrl + 8. Double the received Compound Path (Cmd/Ctrl + C; Cmd/Ctrl + F). Select one of the light-brown objects then go to the Select > Same > Fill Colorand after it go to the Object > Compound Path > Make. Select light-brown and dark-brown compound paths. It’s easily done in the Layers panel.
Click on the Intersect button in the Pathfinder panel.
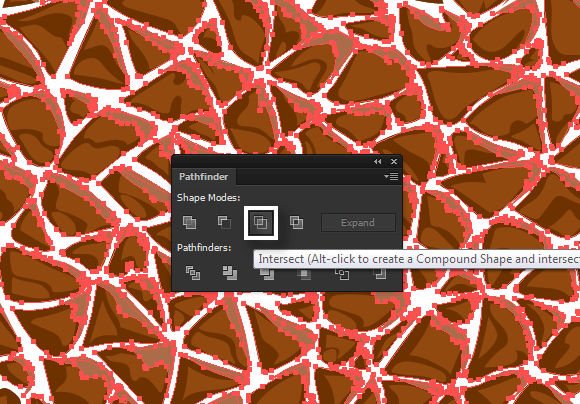
This will delete all extra parts of glares.
Step 8
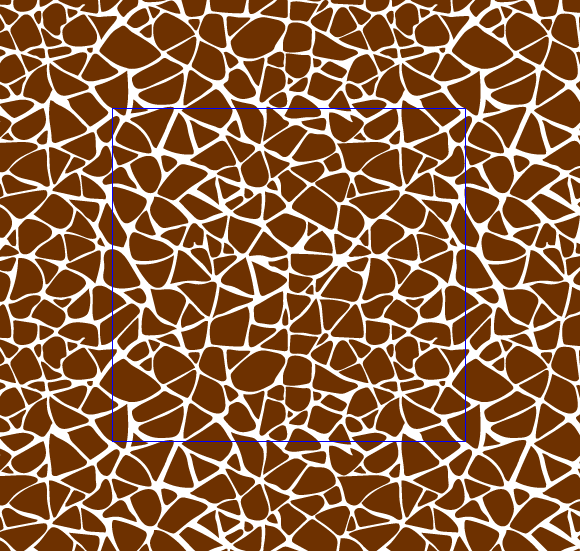
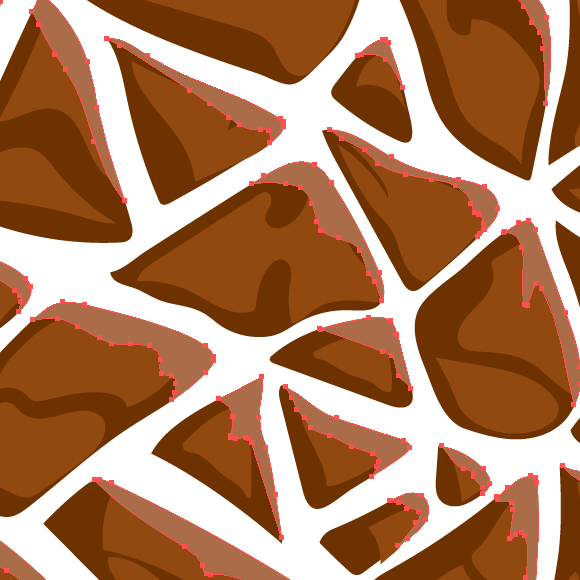
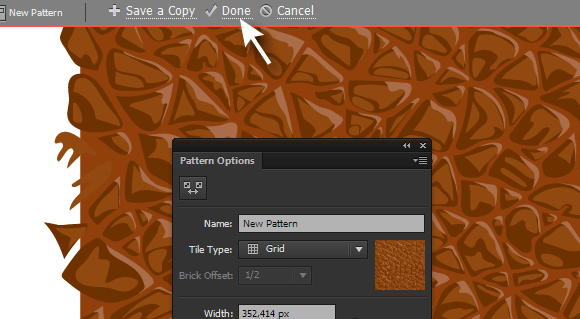
Create a rectangle with the help of the Rectangle Tool (M); the size of the rectangle corresponds to the size of the pattern tile. Place the rectangle below all existing objects. This objects has a brown fill R= 145, G= 64, B= 11.
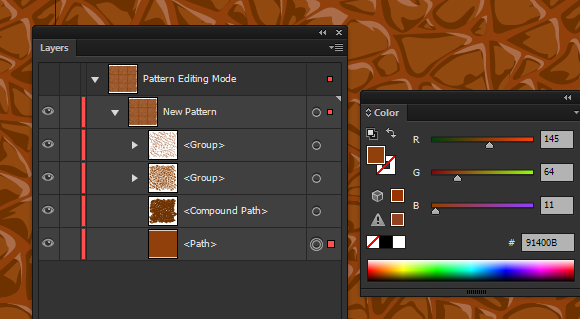
And now, when our seamless leather texture is completely ready click on Done.
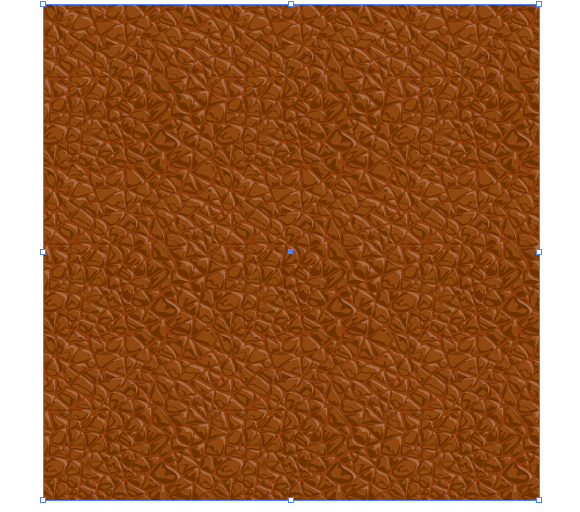
Step 9
The new seamless leather texture was saved in the Swatches panel. This means that we can use it as a fill for any objects.
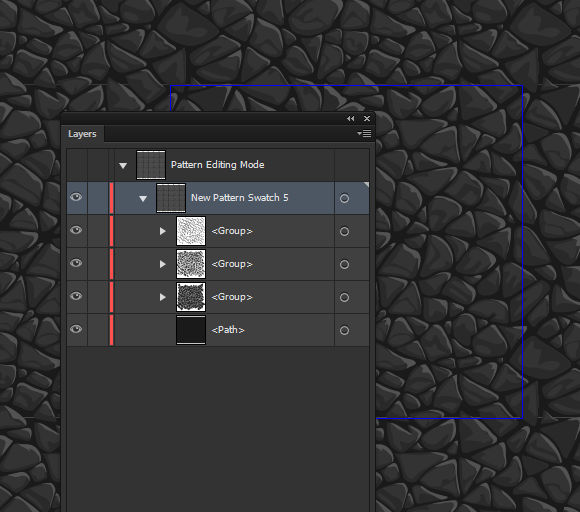
Step 10
If you need to change the color of the leather texture click twice on its thumbnail in the Swatches panel which will go to the Pattern Editing mode. And now switch the colors of its elements. Our texture has only four colors, and so changing the color won’t take much time.
I hope that you liked this tutorial and the knowledge received today will be useful in other vector textures creations as well.
Nếu bạn có nhu cầu học khóa học Adobe illustrator (Ai) vui lòng NHẤP VÀO ĐÂY để xem chi tiết về khóa học hoặc NHẤP VÀO ĐÂY để gửi thắc mắc về khóa học của bạn cho chúng tôi.
Những bài viết có nội dung liên quan khác:
Phím tắt trong phần mềm Illustrator (AI)
Giáo trình illustrator cs6 tiếng việt
Hệ thống bài học Adobe illustrator (Ai) (tiếng Việt) có hướng dẫn chi tiết - Bài 1
Hệ thống bài học Adobe illustrator (Ai) có hướng dẫn chi tiết - Bài 1 (Phiên bản gốc)
Hệ thống bài học Adobe illustrator (Ai) có hướng dẫn chi tiết - Bài 2 (Phiên bản gốc)
Hệ thống bài học Adobe illustrator (Ai) có hướng dẫn chi tiết - Bài 3 (Phiên bản gốc)
Hệ thống bài học Adobe illustrator (Ai) có hướng dẫn chi tiết - Bài 4 (Phiên bản gốc)
Hệ thống bài học Adobe illustrator (Ai) có hướng dẫn chi tiết - Bài 5 (Phiên bản gốc)
Hệ thống bài học Adobe illustrator (Ai) có hướng dẫn chi tiết - Bài 6 (Phiên bản gốc) Phần 1
Hệ thống bài học Adobe illustrator (Ai) có hướng dẫn chi tiết - Bài 6 (Phiên bản gốc) Phần 2
Hệ thống bài học Adobe illustrator (Ai) có hướng dẫn chi tiết - Bài 7 (Phiên bản gốc)
Trung tâm TIN HỌC KEY
ĐC : 203-205 Lê Trọng Tấn – Sơn Kỳ - Tân Phú – TPHCM
ĐT : (028) 22 152 521
Web : key.com.vn
Địa chỉ: 203 - 205 Lê Trọng Tấn, P. Sơn Kỳ, Q. Tân Phú, TP. HCM.
Điện thoại: (028) 22 152 521
Website: key.com.vn - Email: key@key.com.vn
Địa chỉ: 765-767A (Số mới: 558-560A) Nguyễn Ảnh Thủ, P. Tân Chánh Hiệp, Q. 12, TP. HCM.
Điện thoại: (028) 2242 2244
Website: key.com.vn - Email: key@key.com.vn