là một chương trình vẽ vector, thường được sử dụng để vẽ hình minh hoạ, hoạt hình, biểu đồ, đồ thị. Adobe Illustrator được dùng để thiết kế : như thiết kế những sản phẩm trong ngành thiết kế quảng cáo, thiết kế in ấn, thiết kế logo, thiết kế bản hiệu, thiết kế thời trang, thiết kế thiệp mời, Tạo các sản phẩm tờ rơi, Cataloge, Card Visit, Broucher, Profile,vẽ hoạt hình, tích hợp chuyển động cho Flash... Adobe Illustrator ưu diểm là dễ dàng thay đổi và trao đổi dữ liệu ,kích thước file nhẹ, dễ dàng tương thích với Photoshop, Corel Draw, và hỗ trợ in ấn rất tốt.
Hôm nay, trung tâm TIN HỌC KEY xin giới thiệu đến các bạn một hệ thống bài tập thực hành vẽ các đối tượng trong Adobe illustrator (Ai) (phiên bản tiếng anh, theo: vectips.com) có hướng dẫn chi tiết các bước thực hiện cụ thể để các bạn dễ dàng thực hành theo. Hôm nay chúng ta sẽ học bài 2: Turn Any Font Into a Sketch Font. Hy vọng hệ thống bài học này sẽ mang lại cho bạn những kiến thức hữu ích trong quá trình bạn học Adobe illustrator (Ai).
Chúc các bạn thành công!
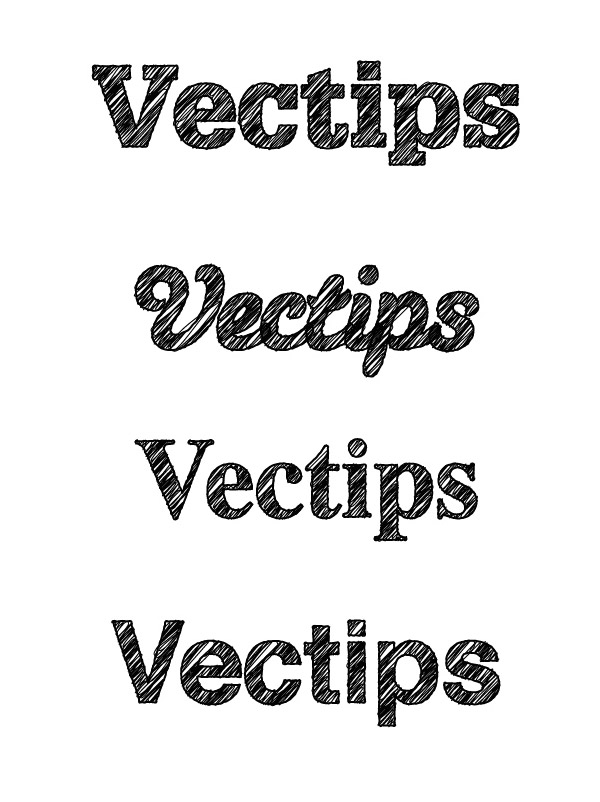
Final Image
Below is an example of the sketch font we will be creating.
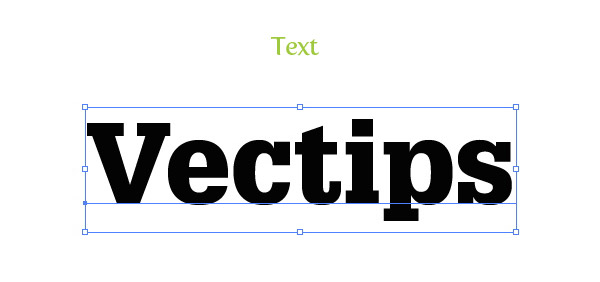
Step 1
Create a new document and with the Text tool (T), type out some text with the font of your choosing. I am using Glypha Black as my font.
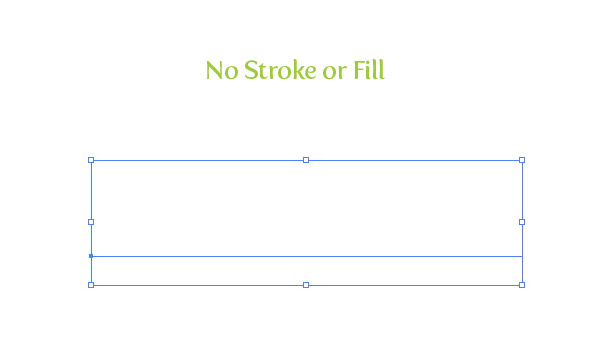
Step 2
With the text selected, take off any stroke and fill. We are going to add a stroke and fill separate from each other in the Appearance panel in the next couple of steps.
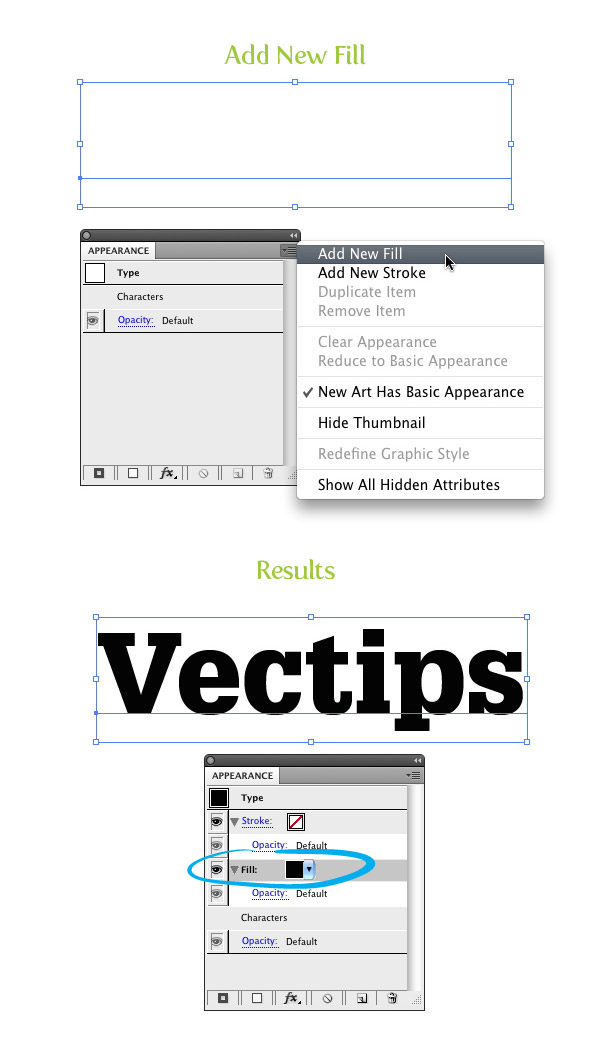
Step 3
With the no fill and no stroke text selected, open the pop-up menu in the Appearance panel, and chose Add New Fill. Keep the default black color of the fill.
Step 4
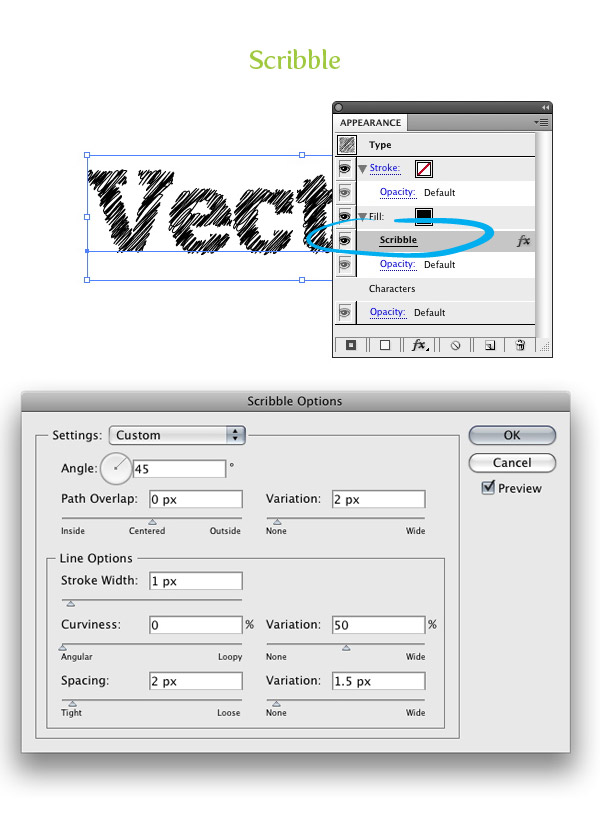
Select the new fill in the Appearance panel, and go Effect > Stylize > Scribble. With the Scribble Options dialog open, change the Angle to 45, the Path Overlap to 0 px, the Path Overlap Variation to 2 px, the Stroke Width to 1 px, the Curviness to 0, the Curviness Variation to 50, the Spacing to 2 px, and the Spacing Variation to 1.5 px.
Step 5
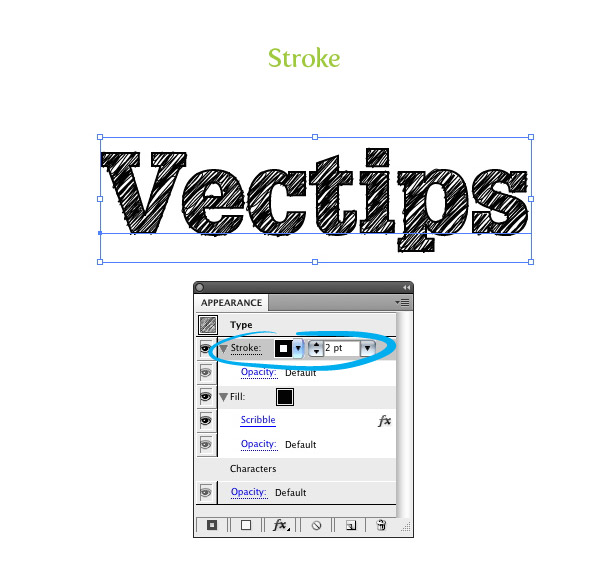
Select the Stroke option in the Appearance panel and give the text a 2 pt stroke.
Step 6
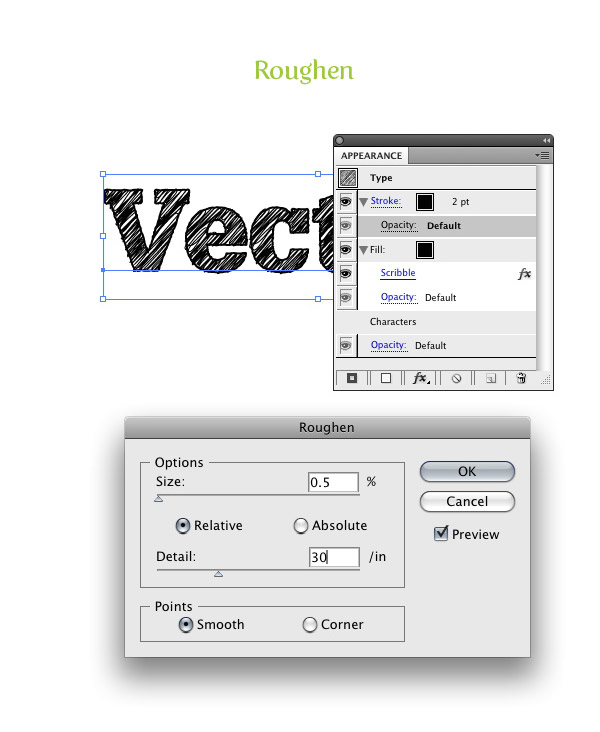
With the Stroke still selected in the Appearance panel, go Effect > Distort & Transform > Roughen. In the Roughen dialog, change the Size to .5, select the Relative radial button, change the Detail to 30, and select the Smooth radial button for Point. This will give the stroke a little distress.
Step 7
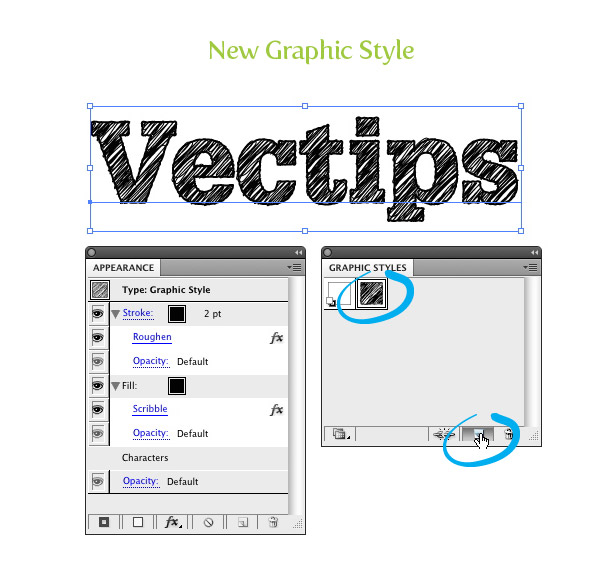
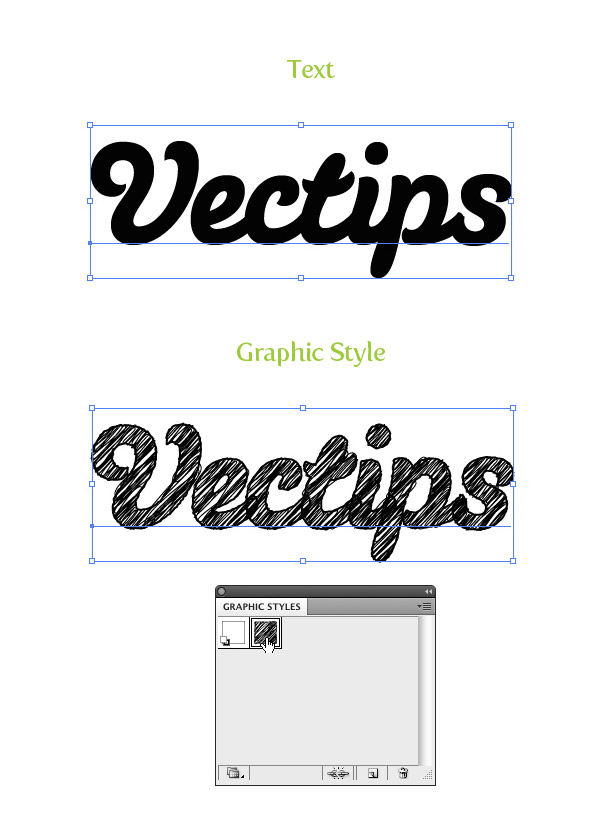
Now, we have a custom sketch font. Moreover, you can easily edit the font! To make this technique even more useful, let’s create a Graphic Style so we can quickly apply these effects to other fonts and text. First select your font and take a look at the Appearance panel. You can see all the effects in your type. Now, simply press the New Graphic Style Button in the Graphic Styles panel and name your new Graphic Style!
Step 8
Now type out some more text and change the font. With the text selected, press the thumbnail of your new sketchy Graphic Style and see all the wonderful sketchy results!
Nếu bạn có nhu cầu học khóa học Adobe illustrator (Ai) vui lòng NHẤP VÀO ĐÂY để xem chi tiết về khóa học hoặc NHẤP VÀO ĐÂY để gửi thắc mắc về khóa học của bạn cho chúng tôi.
Những bài viết có nội dung liên quan khác:
Phím tắt trong phần mềm Illustrator (AI)
Giáo trình illustrator cs6 tiếng việt
Hệ thống bài học Adobe illustrator (Ai) (tiếng Việt) có hướng dẫn chi tiết - Bài 1
Hệ thống bài học Adobe illustrator (Ai) có hướng dẫn chi tiết - Bài 1 (Phiên bản gốc)
Trung tâm TIN HỌC KEY
ĐC : 203-205 Lê Trọng Tấn – Sơn Kỳ - Tân Phú – TPHCM
ĐT : (028) 22 152 521
Web : key.com.vn
