NHẤP VÀO ĐÂY để xem các bước trước đó ......
Step 14
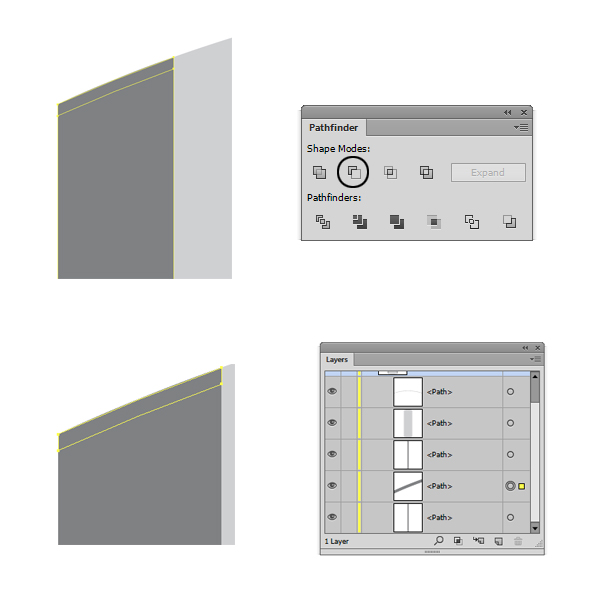
Select the copy that is in front of the other and, with your keyboard arrows, move it 2 points down. Select both copies and click the Minus Front button from the Pathfinder Panel. Now repeat steps 13 and 14 for the right shape.
Step 15
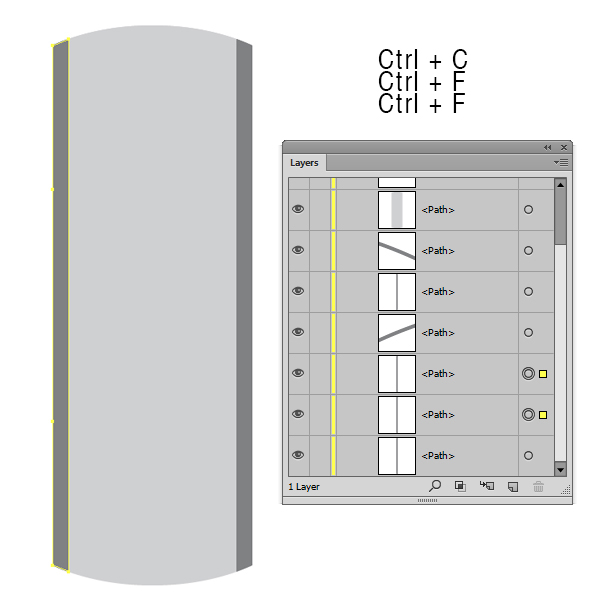
Select the left shape and make two copies in front of it (Ctrl + C > Ctrl + F > Ctrl +F).
Step 16
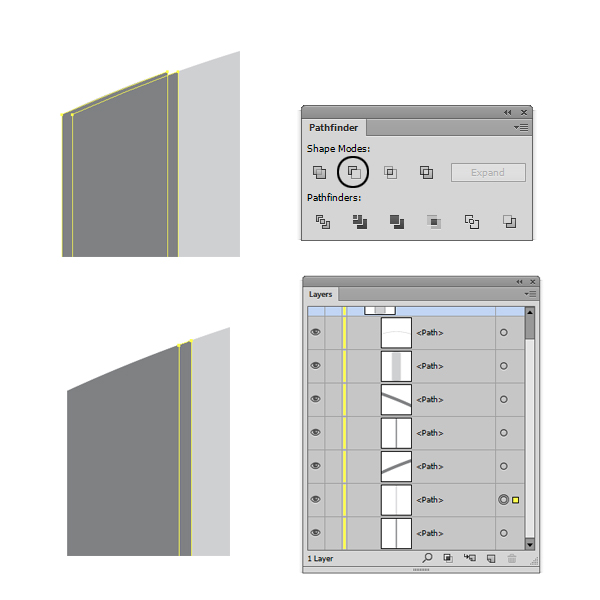
Select the copy that is in front of the other and, with your keyboard arrows, move it 2 points to the left. Select both copies and click the Minus Front button from the Pathfinder Panel. Now repeat steps 15 and 16 for the right shape, but, instead of moving the shape (that is on top) 2 points to the left, move it 2 points to the right.
Step 17
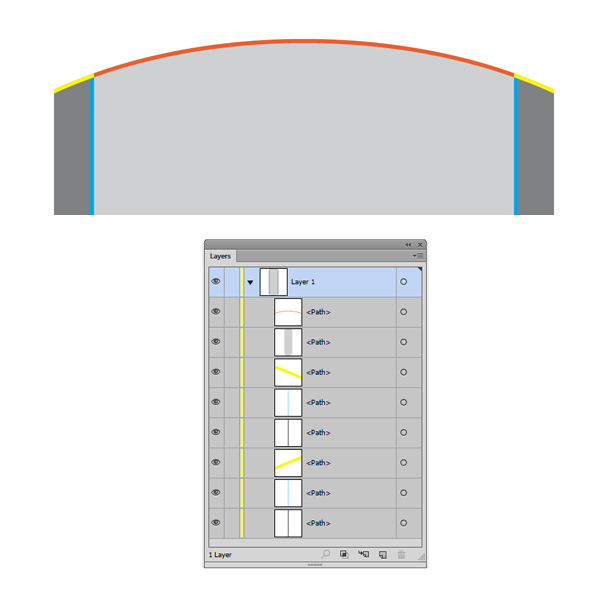
This is how it should look. I’ve added different colors to better see the shapes.
Step 18
Select the main shape and add a 1 point black (C=0 M=0 Y=0 K=100) stroke. Go to the Stroke Panel (Window > Stroke) and align the stroke to outside. Fill the shape with a two-color gradient (Window > Gradient). Change the angle of the gradient to 90 degrees. Select the Left slider from the Gradient Panel and fill it with C=69 M=62 Y=61 K=60. Then select the Right slider and fill it with C=65 M=57 Y=56 K=37.

Step 19
Select the left shape and add a 1 point black (C=0 M=0 Y=0 K=100) stroke. Go to the Stroke Panel (Window > Stroke) and align the stroke to outside. Fill the shape with a two-color gradient (Window > Gradient). Change the location percentage to 30% from the Gradient Panel. Select the Right slider from the Gradient Panel and fill it with C=69 M=62 Y=61 K=60. Then select the Left slider and fill it with C=62 M=53 Y=53 K=26.
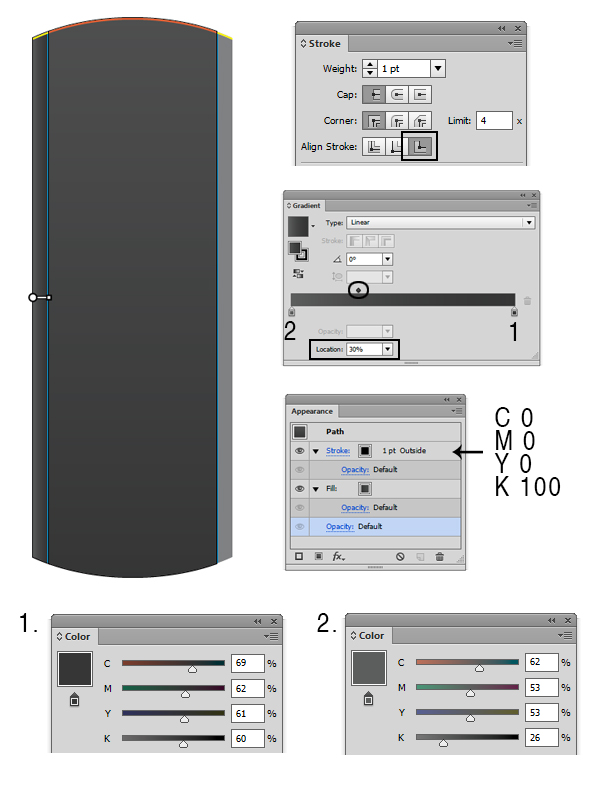
Step 20
Select the right shape and add a 1 point black (C=0 M=0 Y=0 K=100) stroke. Go to the Stroke Panel (Window > Stroke) and align the stroke to outside. Fill the shape with a two-color gradient (Window > Gradient) with the following steps. Change the location percentage to 70% from the Gradient Panel. Select the Left slider from the Gradient Panel and fill it with C=69 M=62 Y=61 K=60, then select the Right slider and fill it with C=62 M=53 Y=53 K=26.
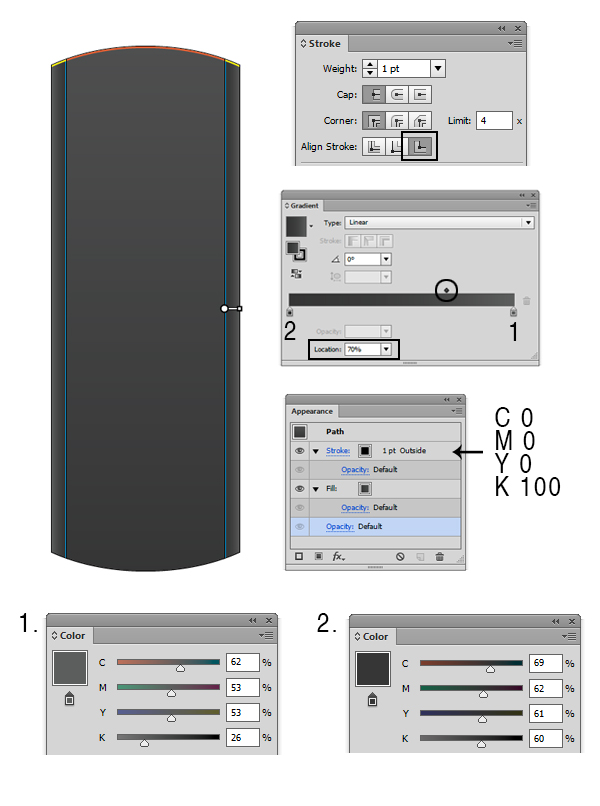
Step 21
Select the small shapes we’ve created at steps 12, 14 and 16 and fill them with C=0 M=0 Y=0 K=60.
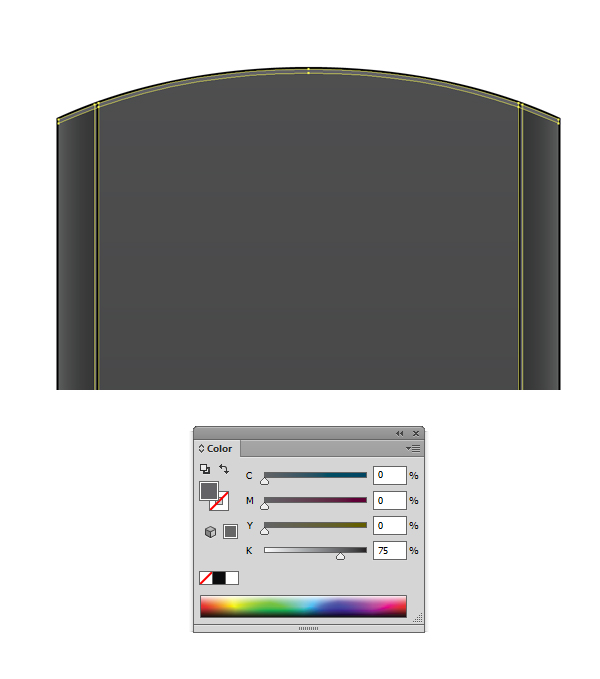
Step 22
Now let’s create the buttons for our TV Remote. Pick the Elipse Tool (L) and create a 36 x 36 pt circle.
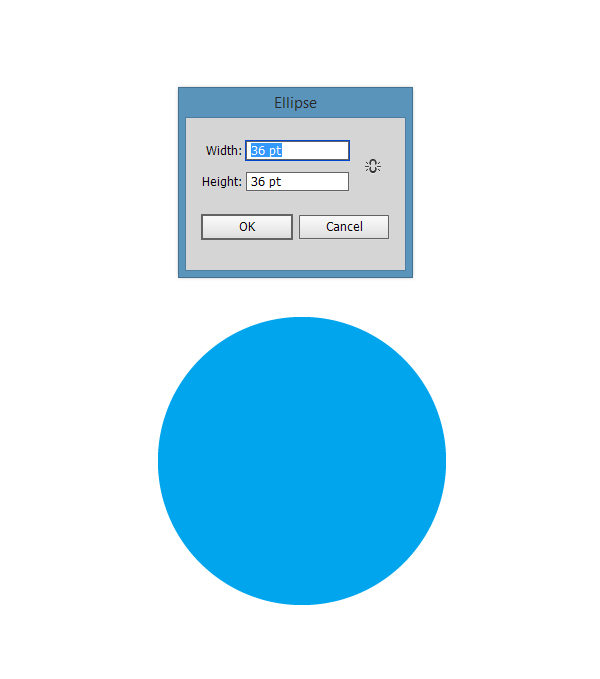
Step 23
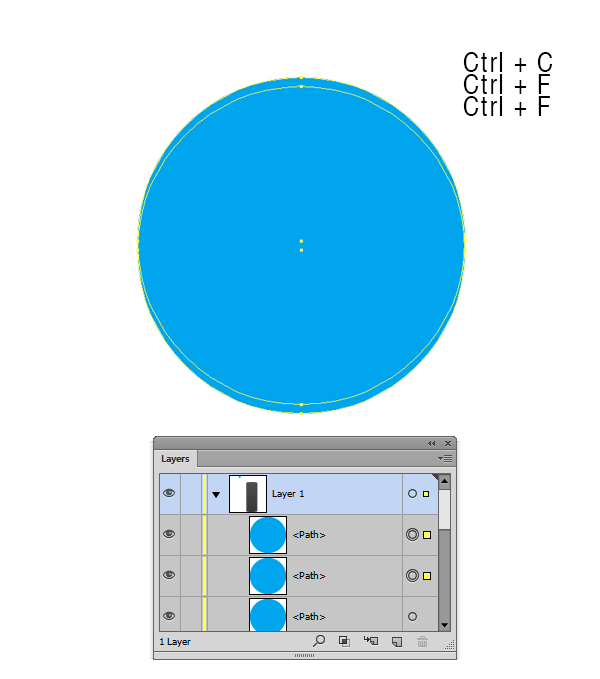
Select the circle shape and make two copies in front of it (Ctrl + C > Ctrl + F > Ctrl +F).
Step 24
Select the copy that is on top of the other and, with your keyboard arrows, move it 1 point down. Select both copies and click the Minus Front button from the Pathfinder Panel.

Step 25
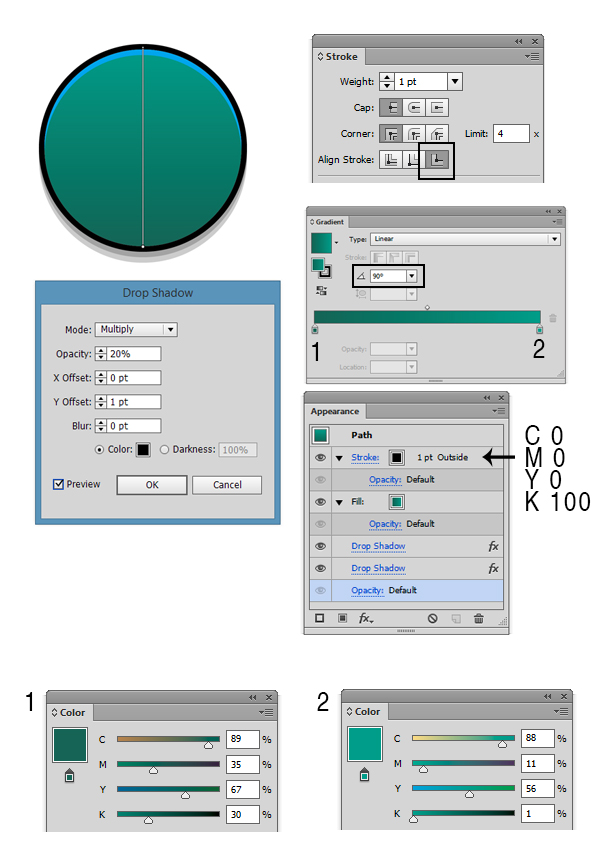
Select the elipse and add a 1 point black (C=0 M=0 Y=0 K=100) stroke. Go to the Stroke Panel (Window > Stroke) and align the stroke to outside. Fill the shape with a two-color gradient (Window > Gradient) by doing the following: Change the angle to 90 degrees from the Gradient Panel. Select the Left slider from the Gradient Panel and fill it with C=89 M=35 Y=67 K=30; then select the Right slider and fill it with C=88 M=11 Y=56 K=1. Add a Drop Shadow (Effects > Stylize > Drop Shadow) and enter the same values as in the image below. Go again to Effect > Stylize > Drop Shadow and add a new Drop Shadow. An alert message will appear, then click Apply New Effect button.
Step 26
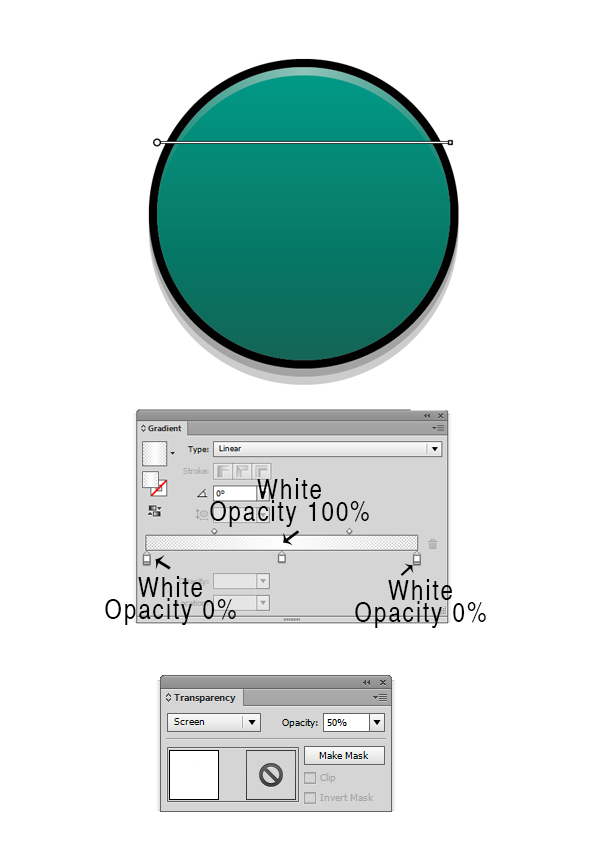
Select the shape we’ve created at step 24 and fill it with a three-color gradient (Window > Gradient); then lower the Opacity to 50% and change the Blending Mode to Screen.
Step 27
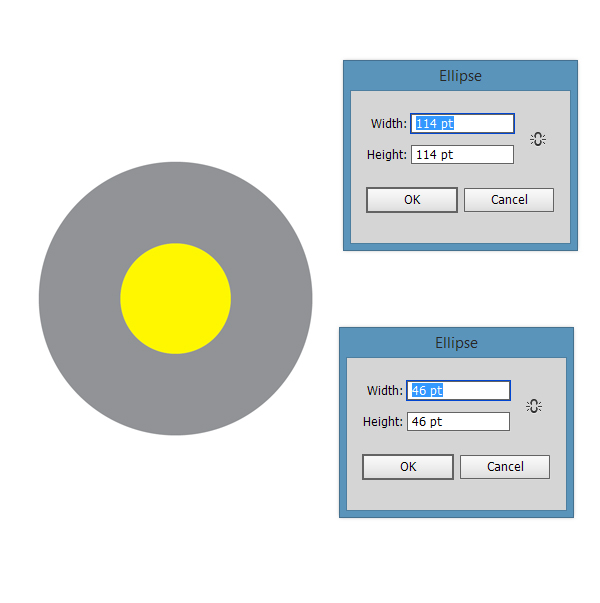
Using the Ellipse Tool (L), create two circles as in the image below.
NHẤP VÀO ĐÂY để xem các bước tiếp theo ......
TRUNG TÂM TIN HỌC KEY
ĐC: 203 -205 Lê Trọng Tấn - Sơn Kỳ - Tân Phú - TP HCM
ĐT: (028) 22 152 521
