NHẤP VÀO ĐÂY để xem các bước trước đó ......
Step 28
Select both circles and go to Object > Compound path > Make (Ctrl + 8) in order to create a compound path.

Step 29
Using the Rectangle tool (M) create two 3 x 150 pt rectangles. Position them as in the image below.

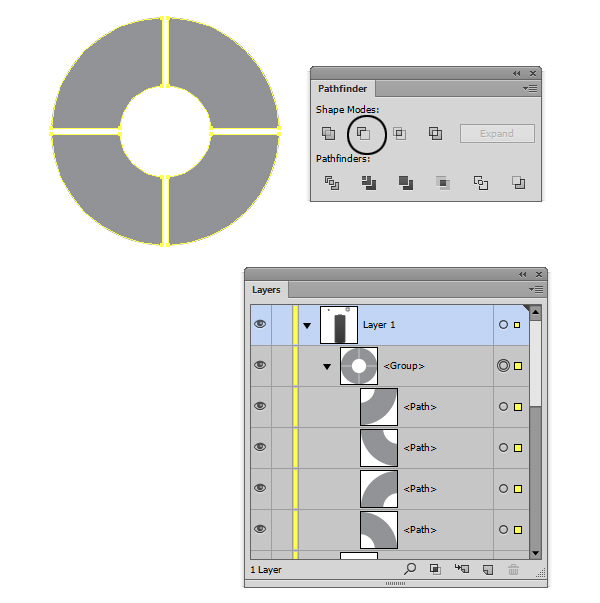
Step 30
Select all three shapes and hit the Minus Front button from the Pathfinder Panel.
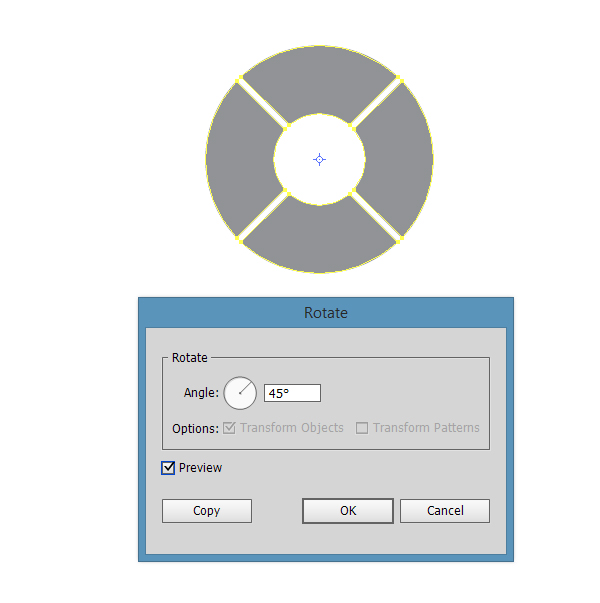
Step 31
Select all four shapes and rotate them 45 degrees using the Rotate Tool (R).
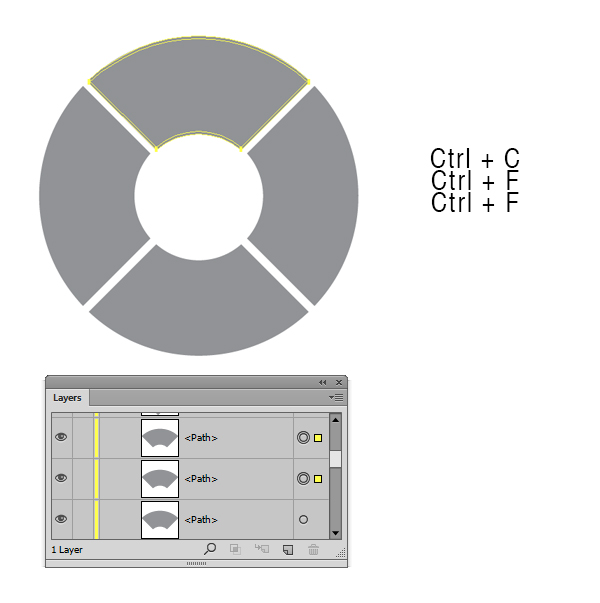
Step 32
Select the top shape and make two copies in front of it (Ctrl + C > Ctrl + F > Ctrl +F). Select the copy that is on top of the other and, using the keyboard arrows, move it 1 point down. Then go to the Pathfinder Panel (Window > Pathfinder) and hit the Minus Front button.
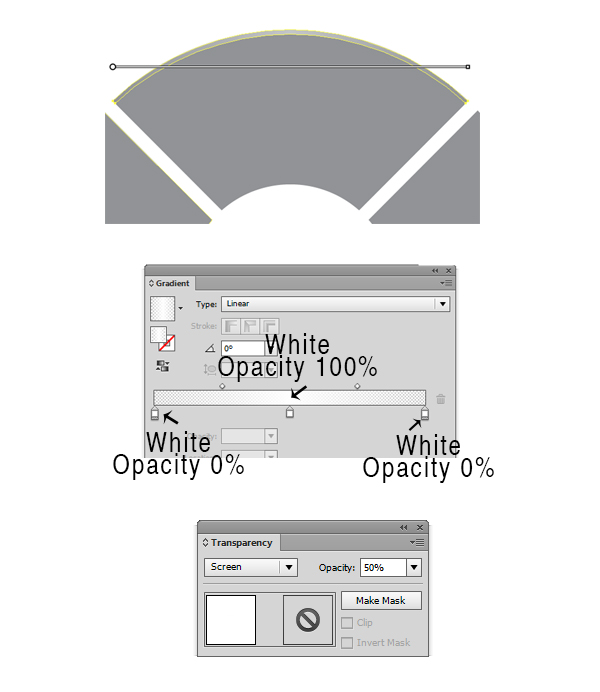
Step 33
Fill the resulted shape with a three-color gradient shown below (Window > Gradient). Then lower the Opacity to 50% and change the Blending Mode to Screen.
Step 34
Now repeat the steps 32 and 33 for the rest of the three shapes. That’s what you should obtain:

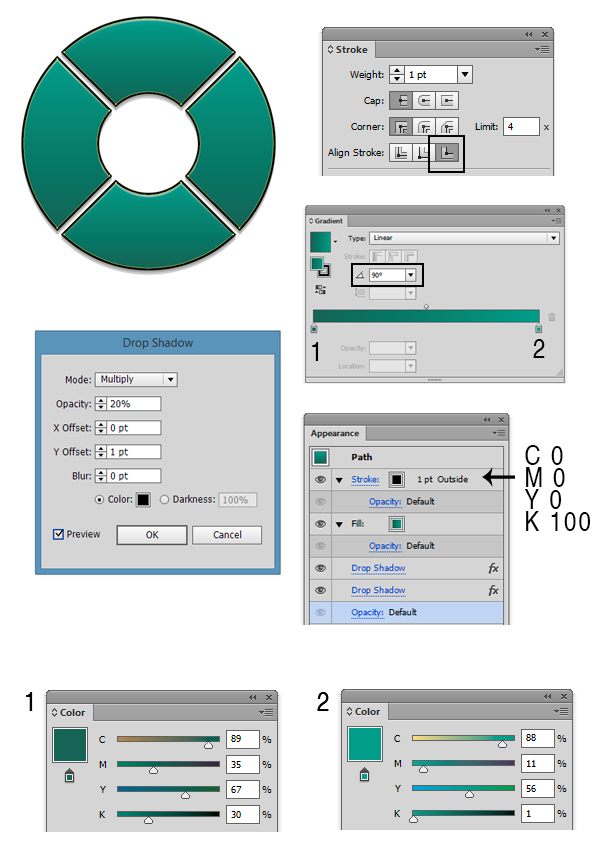
Step 35
Select all four shapes (without the shapes we created at steps 32 and 33) and add a 1 point black stroke (C=0 M=0 Y=0 K=100). Go to the Stroke Panel (Window > Stroke) and align the stroke to outside. Fill the shape with a two-color gradient (Window > Gradient). Change the angle to 90 degrees from the Gradient Panel. Select the Left slider from the Gradient Panel and fill it with C=89 M=35 Y=67 K=30, then select the Right slider and fill it with C=88 M=11 Y=56 K=1. Add a Drop Shadow (Effects > Stylize > Drop Shadow) and enter the same values as in the image below. Go again to Effect > Stylize > Drop Shadow and add a new Drop Shadow. An alert message will appear; then click Apply New Effect button.
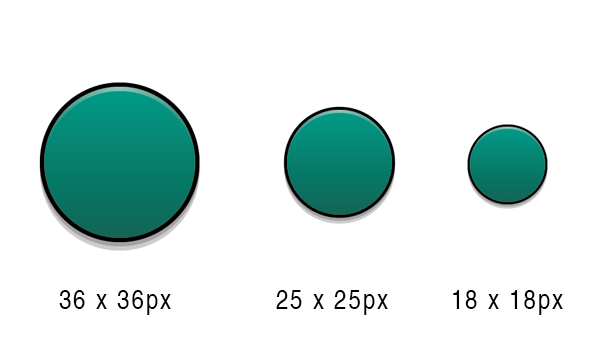
Step 36
Now select the buttons we’ve previously created (from step 22 to step 26) and make three different versions, as in the image below.
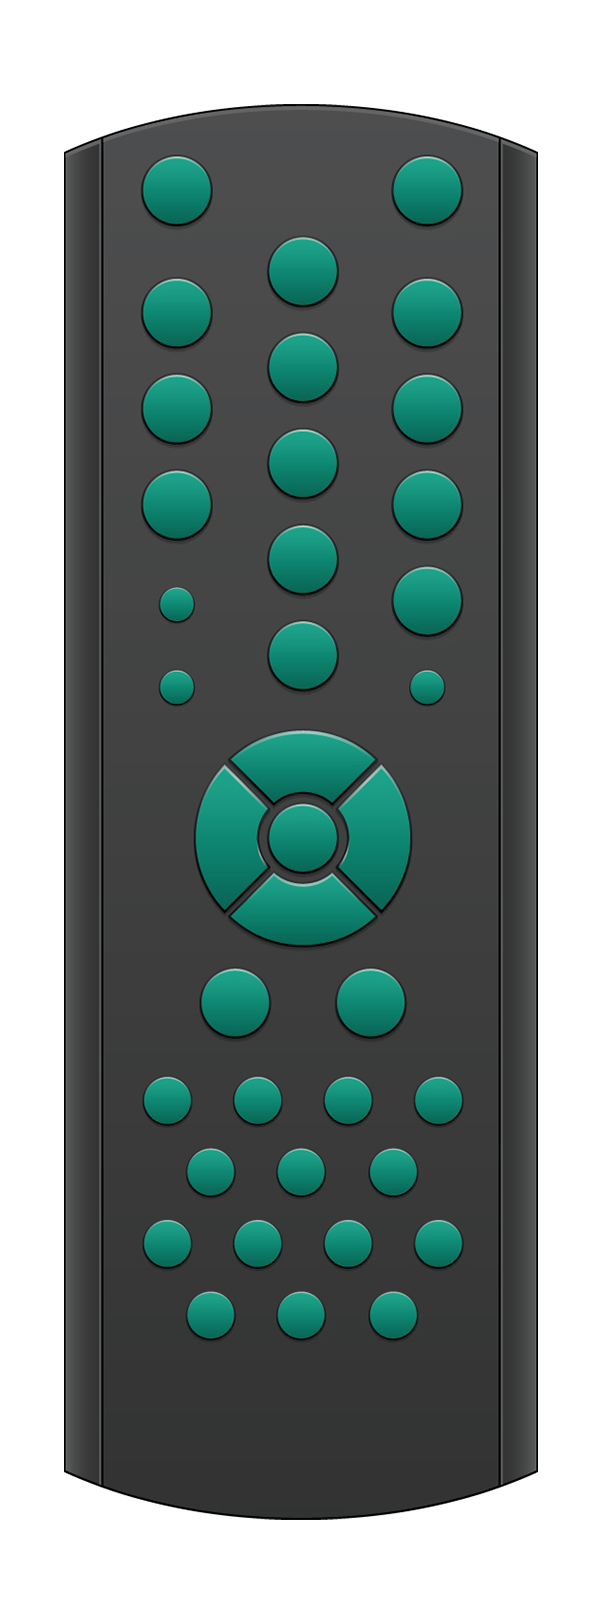
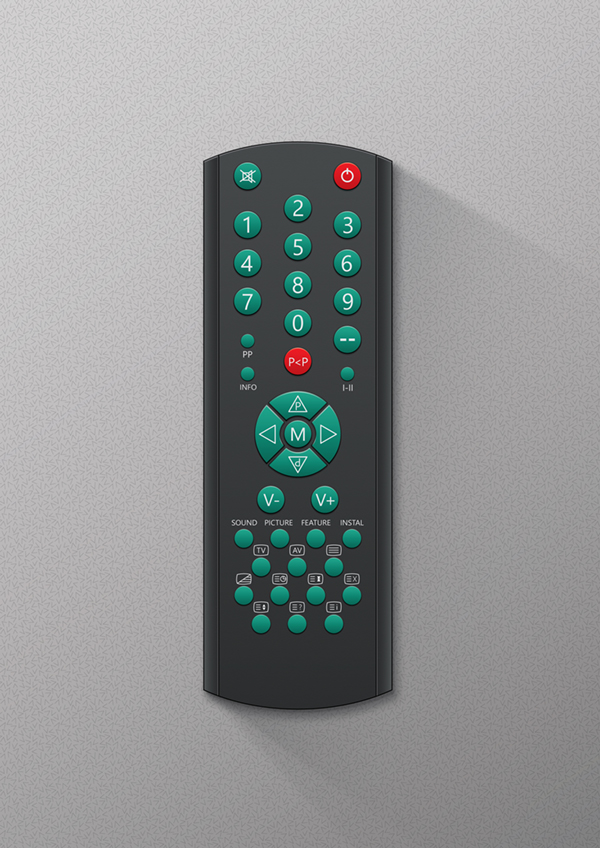
Step 37
Now that we have all the shapes we need, let’s arrange them like in the image below or feel free to arrange them as you like.
Step 38
Now let’s add labels to our buttons using the Type Tool (T) and the Pen Tool (P). Feel free to use whatever font you want and, of course, you can make your own unique icons.
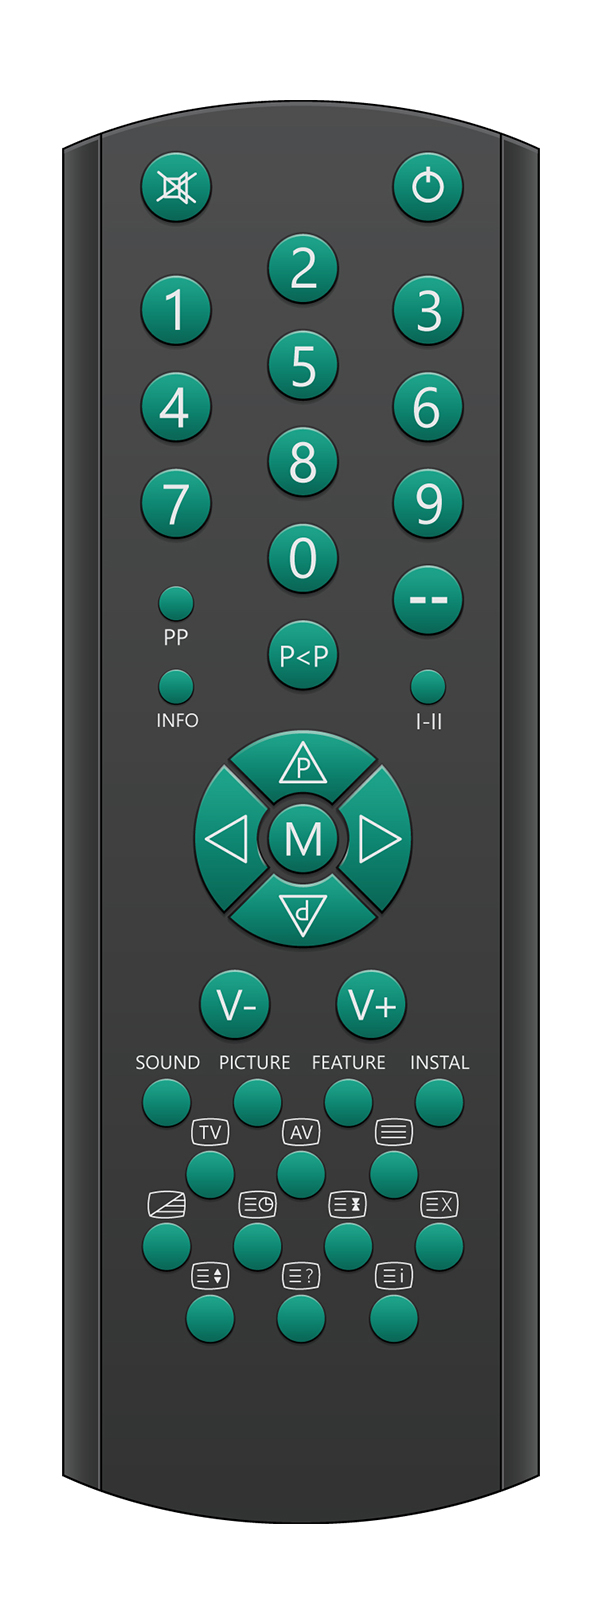
And we’re done!
Nếu bạn có nhu cầu học khóa học Adobe illustrator (Ai) vui lòng NHẤP VÀO ĐÂY để xem chi tiết về khóa học hoặc NHẤP VÀO ĐÂY để gửi thắc mắc về khóa học của bạn cho chúng tôi.
Trung Tâm TIN HỌC KEY
ĐC : 203-205 Lê Trọng Tấn – Sơn Kỳ - Tân Phú – TPHCM
ĐT : (028) 22 152 521
Địa chỉ: 203 - 205 Lê Trọng Tấn, P. Sơn Kỳ, Q. Tân Phú, TP. HCM.
Điện thoại: (028) 22 152 521
Website: key.com.vn - Email: key@key.com.vn
Địa chỉ: 765-767A (Số mới: 558-560A) Nguyễn Ảnh Thủ, P. Tân Chánh Hiệp, Q. 12, TP. HCM.
Điện thoại: (028) 2242 2244
Website: key.com.vn - Email: key@key.com.vn