NHẤP VÀO ĐÂY để xem các bước trước đó .......
Step 26
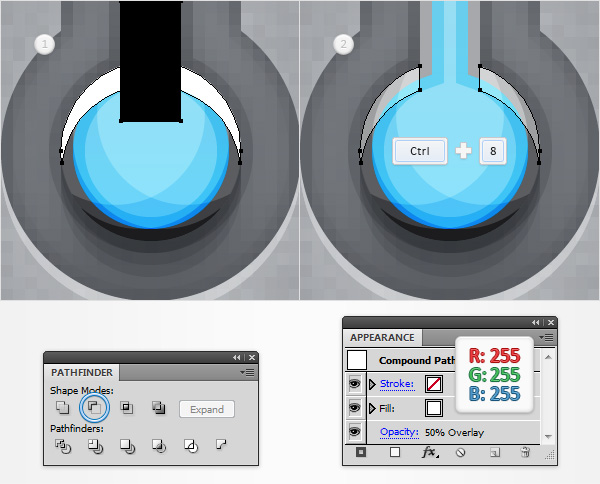
Reselect both shapes made in the previous step and click the Minus Front button from the Pathfinder panel. Turn the resulting group of shapes into a compound path (CTRL + 8 or Object > Compound Path > Make). Then lower its Opacity to 50% and change the Blending Mode to Overlay.
Step 27
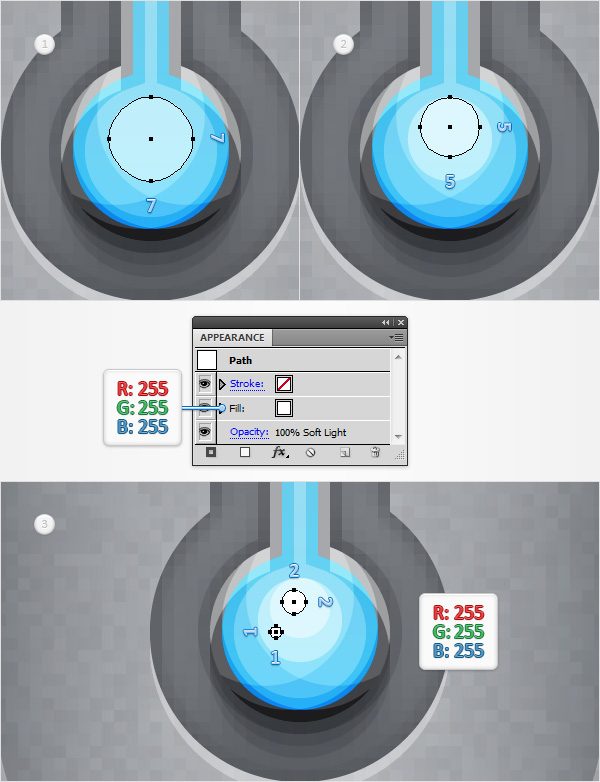
Enable the Snap to Grid (View > Snap to Grid). Using the Ellipse Tool (L), create a 7px, white circle, change the Blending Mode to Soft Light and place it as shown in the first image. Using the same tool, create a 5px and add the same Appearance attributes. Finally, create a 2px and a 1pxcircle, fill both shapes with white and place them as shown in the third image.
Step 28
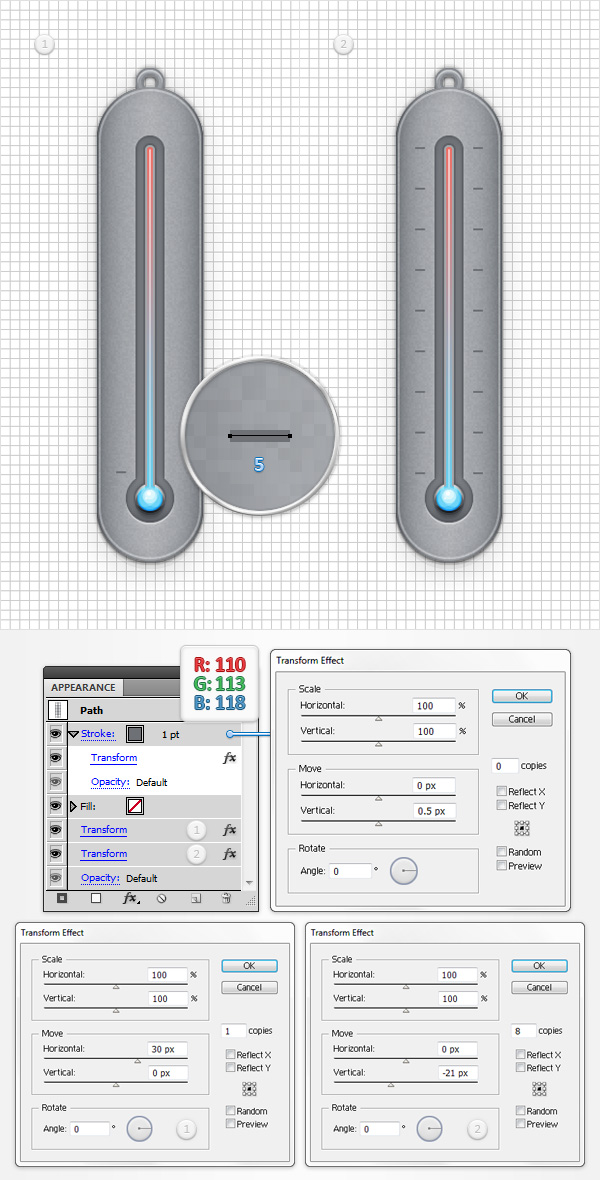
Return to “gridline every 5px “, so simply go to Edit > Preferences > Guides & Grid and enter 5 in the Gridline every box. Using the Pen Tool (P), create a 5px, horizontal path and place it as shown in the first image. Add a 1pt stroke for this little path, set its color at R=110 G=113 B=118 and focus on the Appearance panel. Select the stroke and go to Effect > Distort & Transform > Transform. Enter the properties shown in the top window (in the following image) and click OK. Return to the Appearance panel, select the entire path and go again to Effect > Distort & Transform > Transform. Enter the properties shown in the bottom, left window (in the following image), click OK and go one more time to Effect > Distort & Transform > Transform. Enter the properties shown in the bottom, right window (in the following image) and click OK.
Step 29
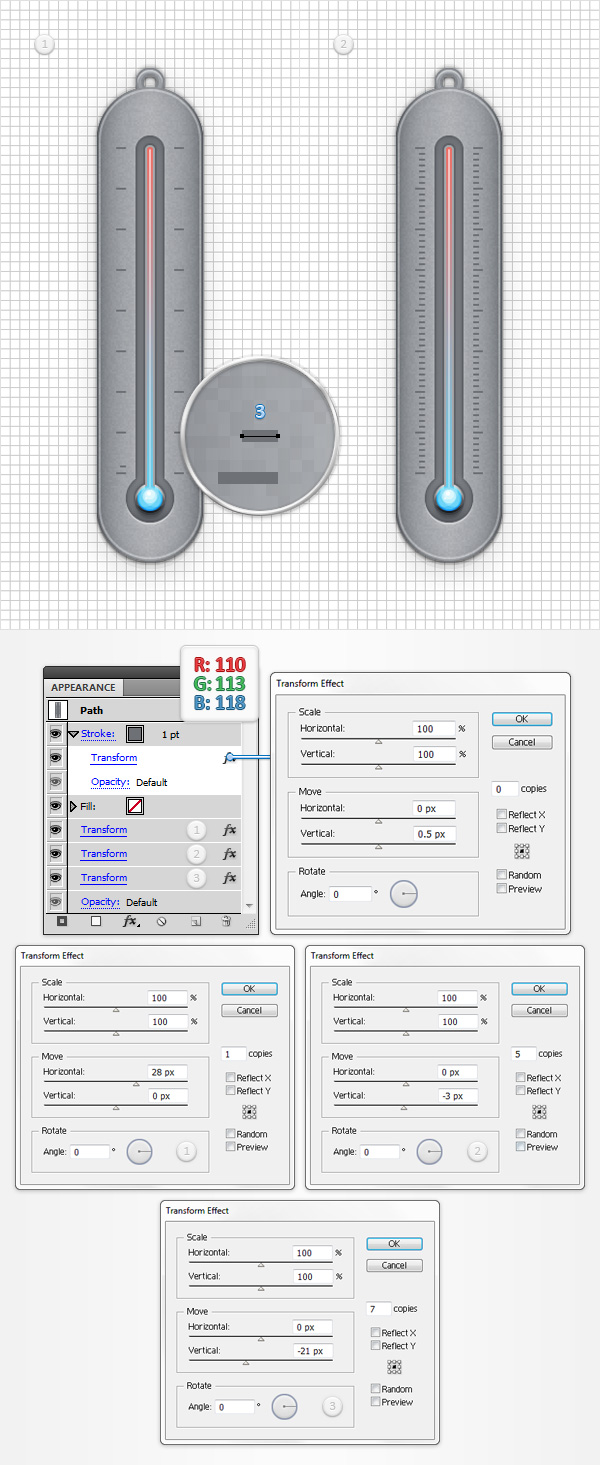
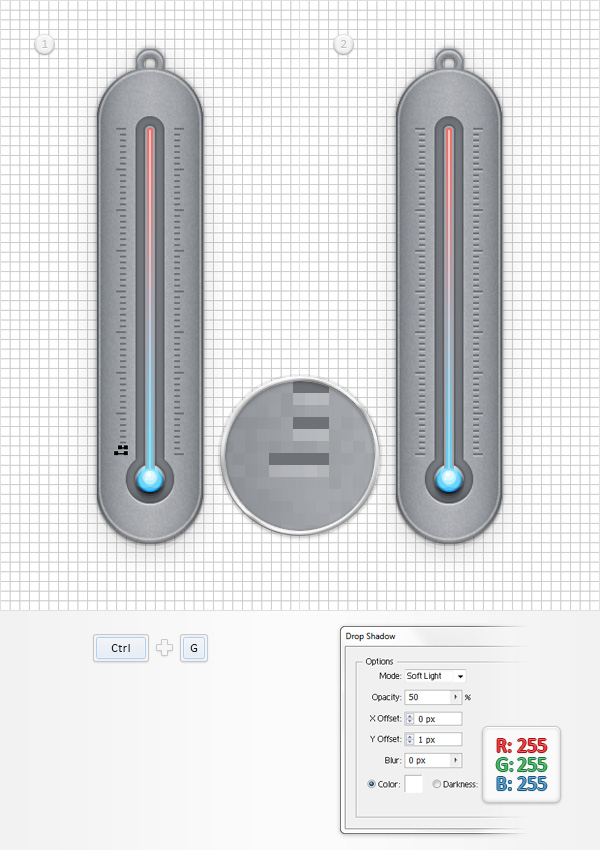
Switch to “gridline every 1px“, so go to Edit > Preferences > Guides & Grid and enter 1 in the Gridline every box. Using the Pen Tool (P), create a 3px, horizontal path and place it as shown in the first image. Add a 1pt stroke for this little path, set its color at R=110 G=113 B=118 and focus on theAppearance panel. Select the stroke and go to Effect > Distort & Transform > Transform. Enter the properties shown in the top window (in the following image) and click OK. Return to the Appearance panel, select the entire path and add the other three Transform effects shown in the following image.
Step 30
Finally, select both paths made in the last two steps and Group them (CTRL + G). Make sure that this new group is selected and go to Effect > Stylize > Drop Shadow. Enter the properties shown in the following image click OK and you’re done.
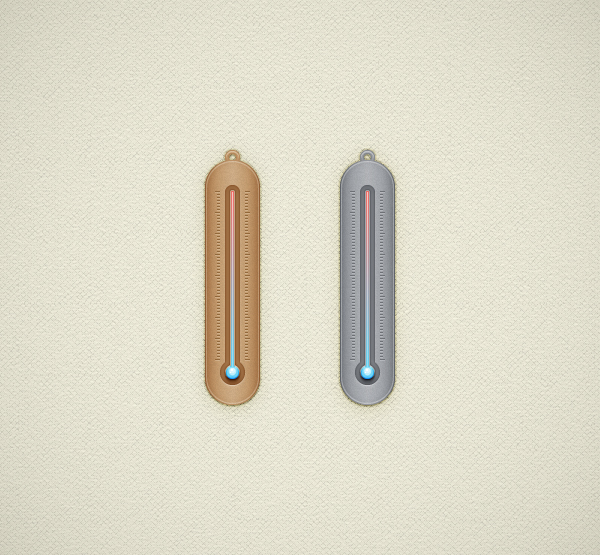
And We’re Done!
I hope you’ve enjoyed this tutorial and can apply these techniques in your future projects.
Nếu bạn có nhu cầu học khóa học Adobe illustrator (Ai) vui lòng NHẤP VÀO ĐÂY để xem chi tiết về khóa học hoặc NHẤP VÀO ĐÂY để gửi thắc mắc về khóa học của bạn cho chúng tôi.
Trung Tâm TIN HỌC KEY
ĐC : 203-205 Lê Trọng Tấn – Sơn Kỳ - Tân Phú – TPHCM
ĐT : (028) 22 152 521
